Ml k – Extron Electronics Fiber Optic Cleaver User Manual
Page 3
3
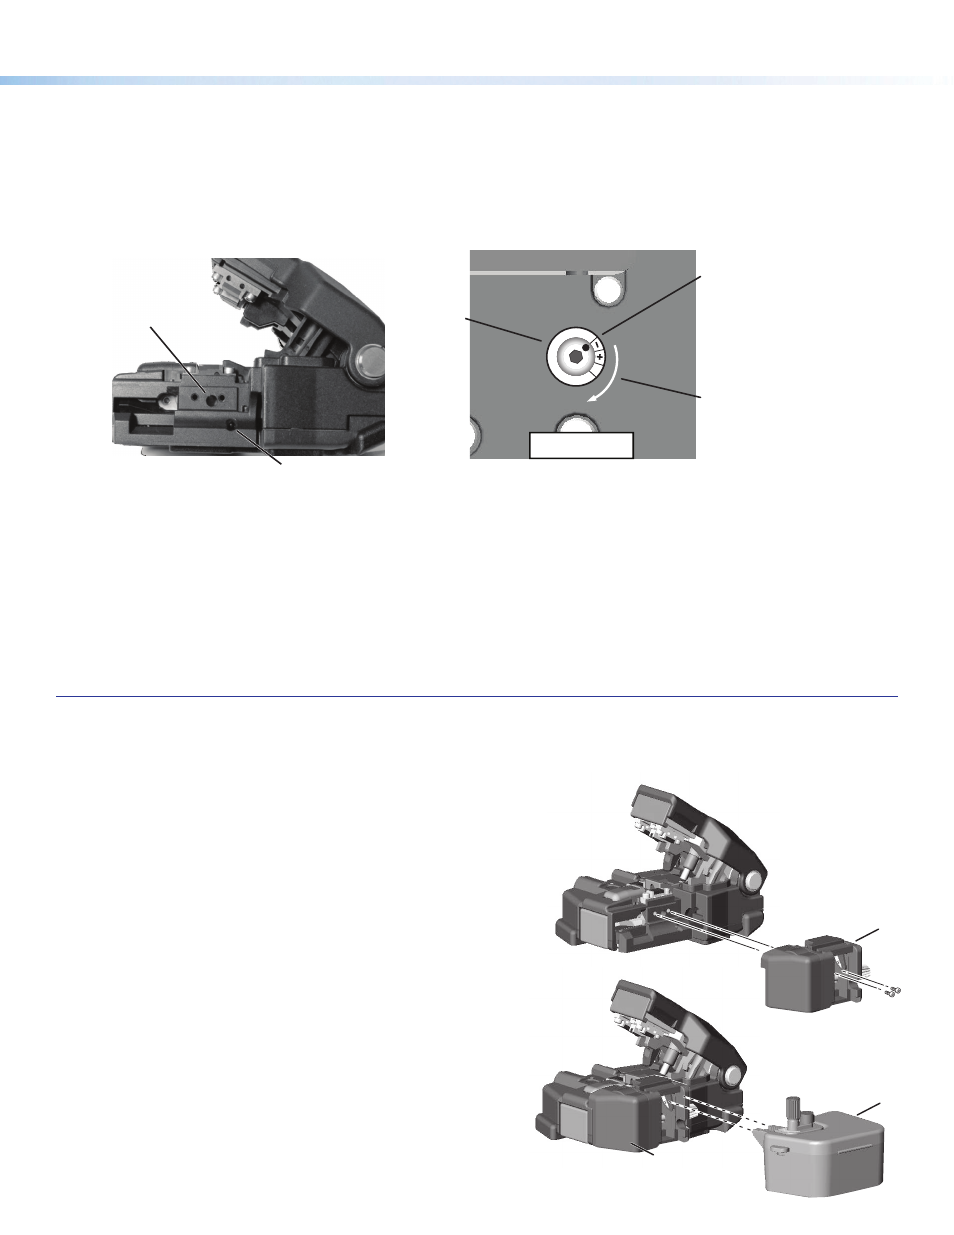
Blade Height Adjustment
When the circular blade has been rotated one complete revolution (16 positions), its height requires adjustment to
compensate for wear.
1.
Using the included hex wrench, remove the scrap container, (
n
), and the scrap collector mechanism, (
o
), see “Fiber
Scrap Collector Mechanism Installation and Removal” below.
2.
Using the hex wrench, loosen, but do not remove the blade lock screw, (
k
).
3.
Loosen, but do not remove the height adjuster lock screw, (
l
).
Bottom View
Direction
of Rotation
Adjuster shown
in initial position.
m
l
k
4.
On the bottom of the cleaver, with the hex wrench turn the adjuster, (
m
), clockwise so the reference dot aligns with the
next position mark. Never attempt to rotate the adjuster more than a single position mark.
5.
Tighten the height adjuster lock screw, (
l
).
6.
Move the blade so that position 1 is at the top, see “Blade Position Adjustment” on the previous page, then tighten the
blade lock screw, (
k
).
The 16 blade positions may now be used again. After another full rotation it may be raised again.
Blade Replacement
After the circular blade has been raised three times it must be replaced. Contact Extron for ordering details.
Fiber Scrap Collector Mechanism Installation and Removal
The fiber scrap collector mechanism, (
o
), must be installed before using the cleaver and removed for most maintenance
procedures.
Remove the side cover before installing the mechanism, see “Side
Cover Removal” on page 4.
To Install the Scrap Collector Mechanism:
1.
Insert the gear of the scrap collector mechanism, (
o
), into the
cleaver, then slide it until the screw holes align with the holes of
the cleaver.
2.
Install two M2x6 screws (included) as shown.
3.
Slide the scrap container,(
n
), in place.
4.
After a cleave operation, confirm the scrap collector rollers drive
the scrap fiber into the scrap container,(
n
).
To Remove the Scrap Collector:
1.
Remove the scrap container,(
n
), by pulling it away from the
cleaver.
2.
Remove the two screws, (uncovered when the scrap container
was removed), from the scrap collector mechanism, (
o
).
3.
Slide the scrap collector mechanism, (
o
), towards the front of
the cleaver until the gear clears the housing, then pull it away
from the cleaver.
Q
P
Q
Q
P
Q