Fc n, Ji f c n, Fiber optic cleaver • user guide (continued) – Extron Electronics Fiber Optic Cleaver User Manual
Page 2: Maintenance and adjustments
2
Fiber Optic Cleaver • User Guide (Continued)
Maintenance and Adjustments
The following section describes three maintenance operations; blade and pad cleaning, blade position, and blade height
adjustment, that must be performed regularly to ensure optimum operation of the cleaver.
Cleaning the Cleaver
For proper operation of the cleaver, the blade and clamp pads must be
cleaned frequently.
To clean the blade and pads:
1.
Remove the blade cover, (
f
), see “Blade Position Adjustment” below.
2.
Clean the visible portion of the circular blade, (
j
), and the
clamp pads, (
i
), with cotton swabs soaked with a few drops of the
included cleaner.
3.
Allow to air dry for several minutes, then replace the blade cover.
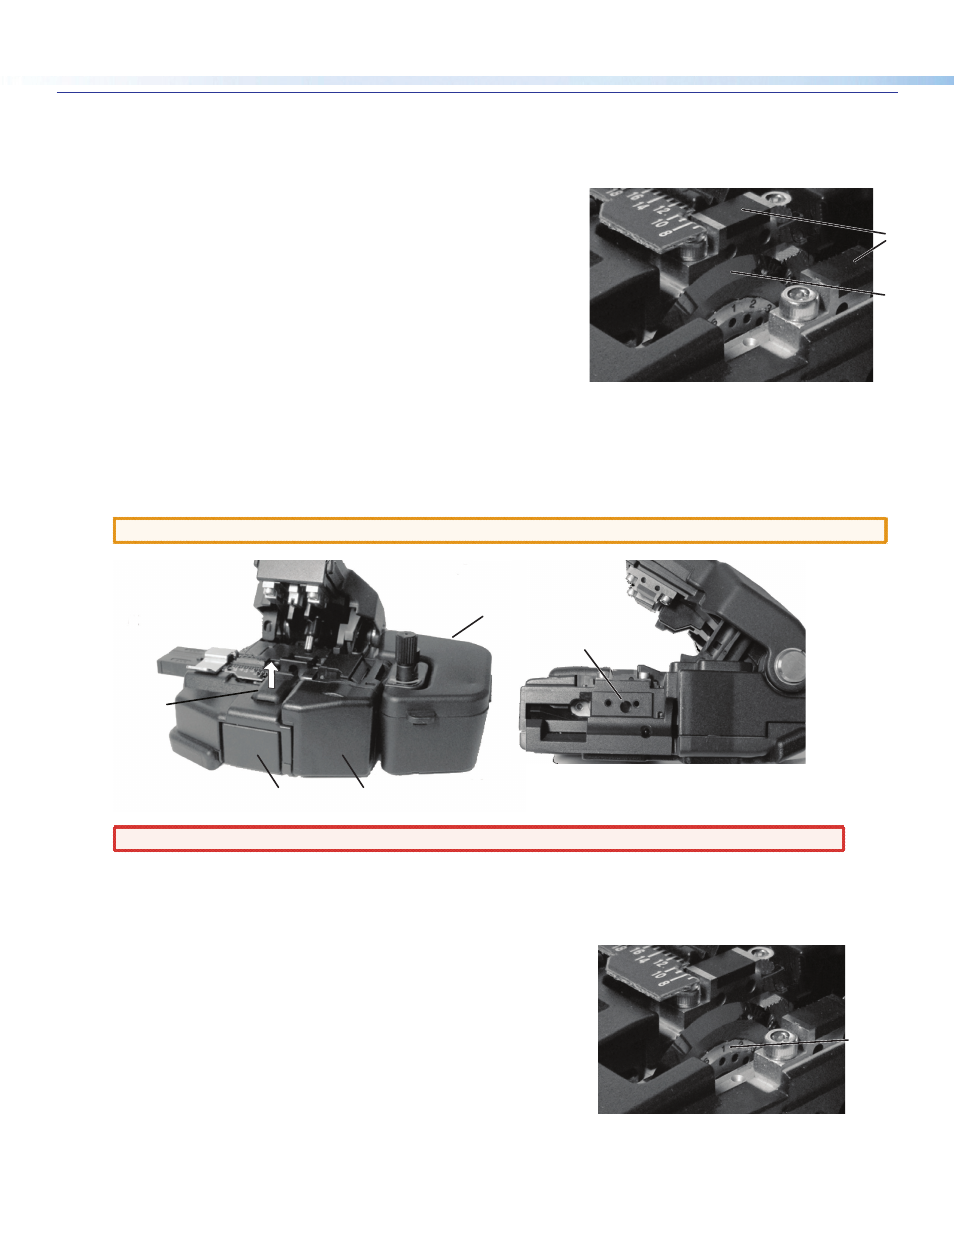
Blade Position Adjustment
The cleaver uses a circular blade with 16 cleaving positions. If the cleaver does not cut properly, or does not cut the fiber
cleanly on the first attempt, rotate the blade 1/16th of a turn to the next cleaving position to replace the worn portion of
blade with a sharp blade.
To rotate the blade:
1.
Remove the blade cover, (
f
), by prying it up from the housing with a small flat blade screwdriver.
CAUTION: The slide button, (
c
), must be in its outer position before the blade cover can be removed.
f
c
n
Blade
Position
Indicator
k
o
Warning:
Do not touch the blade. Personal injury could result.
2.
Remove the scrap container, (
n
), by pulling it away from the scrap collector mechanism.
3.
Using the included 1.5 mm hex wrench, remove the scrap collector
mechanism, (
o
), see “To Remove the Scrap Collector:” on the next page.
4.
Push the slide button, (
c
), inward until it locks.
5.
Using the included hex wrench, loosen, but do not remove the blade
lock screw, (
k
), located between the two scrap collector mechanism
screw holes.
6.
The circular blade has 16 hole stops to provide positive locating. Rotate
the blade one hole stop, or 1/16th of a turn, to the next higher position
number indication on the blade using a dental pick or other means to
hook a hole stop and rotate the blade.
7.
Tighten the blade lock screw, (
k
).
8.
Replace the scrap collector mechanism, (
o
), and fiber scrap container
box, (
n
).
9.
Release the slide button, then replace the blade cover, (
f
).
j
i
f
c
n
Blade
Position
Indicator
k
o