Extron Electronics CS 120P Setup Guide User Manual
Page 3
8.
Wire the CS 120P — Route the wires through the H-shaped opening in the CS 120P. Be sure to leave sufficient slack.
9.
Replace the terminal cover plate — Reinstall the cover plate onto the CS 120P and tighten the two screws that were
loosened in step 6.
10.
If the CS 120P is NOT being installed in a fiberglass ceiling tile, discard the fiberglass tile adapter and go to step 11.
If the CS 120P is being installed in a 1-inch (0.25 cm) thick fiberglass ceiling, install the fiberglass ceiling tile adapter.
Attach the fiberglass tile adapter to the outer side of the lip of the port hole on the CS 120P as follows:
a.
Cut four strips of adhesive tape (such as duct tape) to the appropriate size.
b.
Attach each tape strip starting from the outer side of the CS 120P metal baffle, up and over the port ring adapter, then
down to the inner surface of the CS 120P metal baffle, as shown below.
x 4 Tape
Fiberglass Tile Adapter
NOTE: The tape strips must lie flat against all surfaces, with no ridges or raised edges.
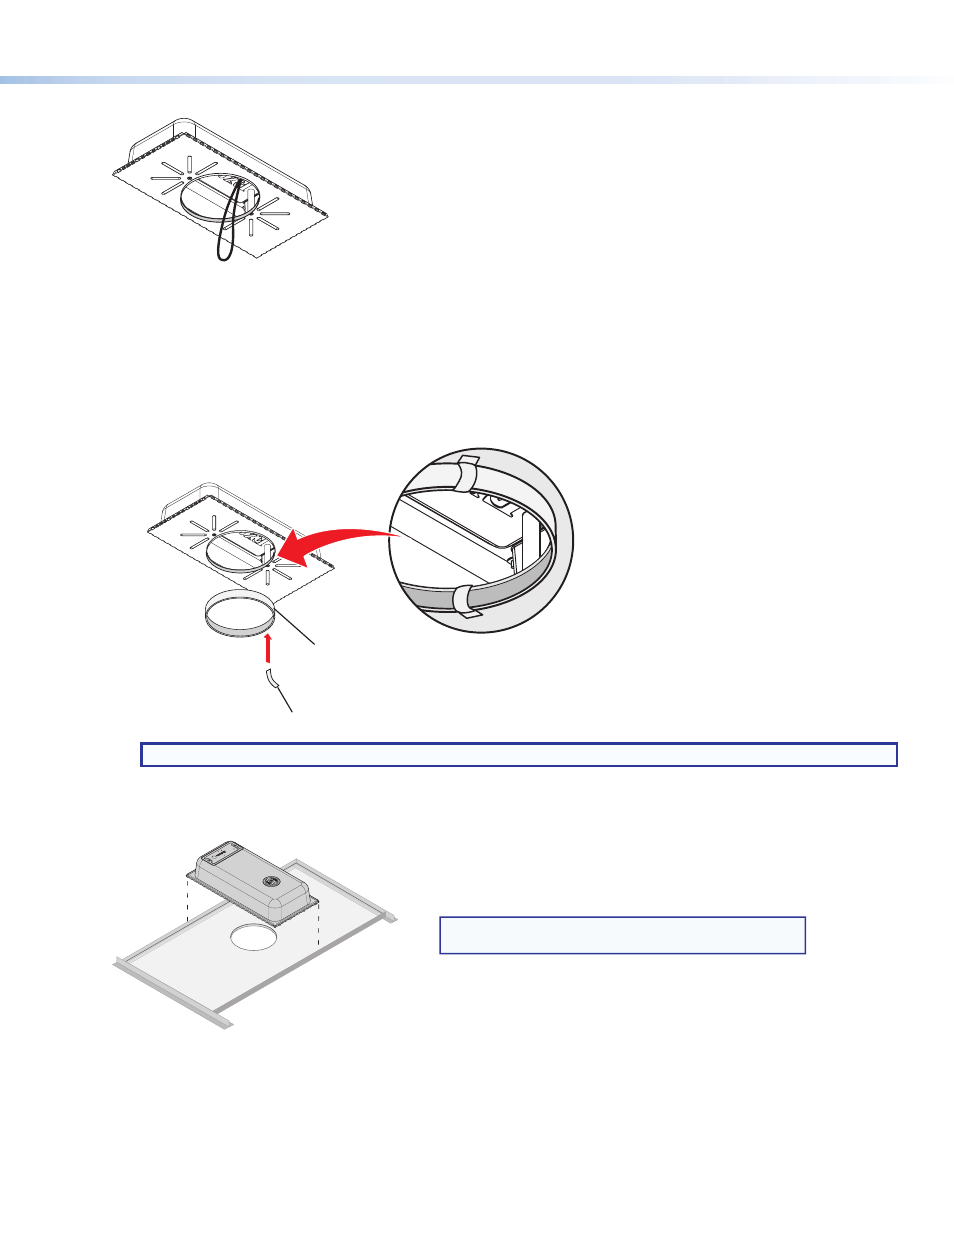
11.
Place the CS 120P into the ceiling grid — Place the CS 120P over the tile grid, so that the enclosure is safely supported
on the two short edges. Ensure that the hole in the tile is aligned with the hole in the CS 120P.
NOTE: 2' x 2' (600 mm x 600 mm) grid mounting is
the same as 2' x 4' (600 mm x 1200 mm) grid mounting.
2' x 4' (600 mm x 1200 mm) Ceiling Grid
3