Installation and operation, Installation overview, Mounting options – Extron Electronics DA RGB_YUV Series User Manual
Page 8: Wide ba nd dis tr ibu tio n a mp lif ier
DA RGB/YUV Distribution Amplifiers • Installation and Operation
DA RGB/YUV Distribution Amplifiers • Installation and Operation
Installation and Operation
2-3
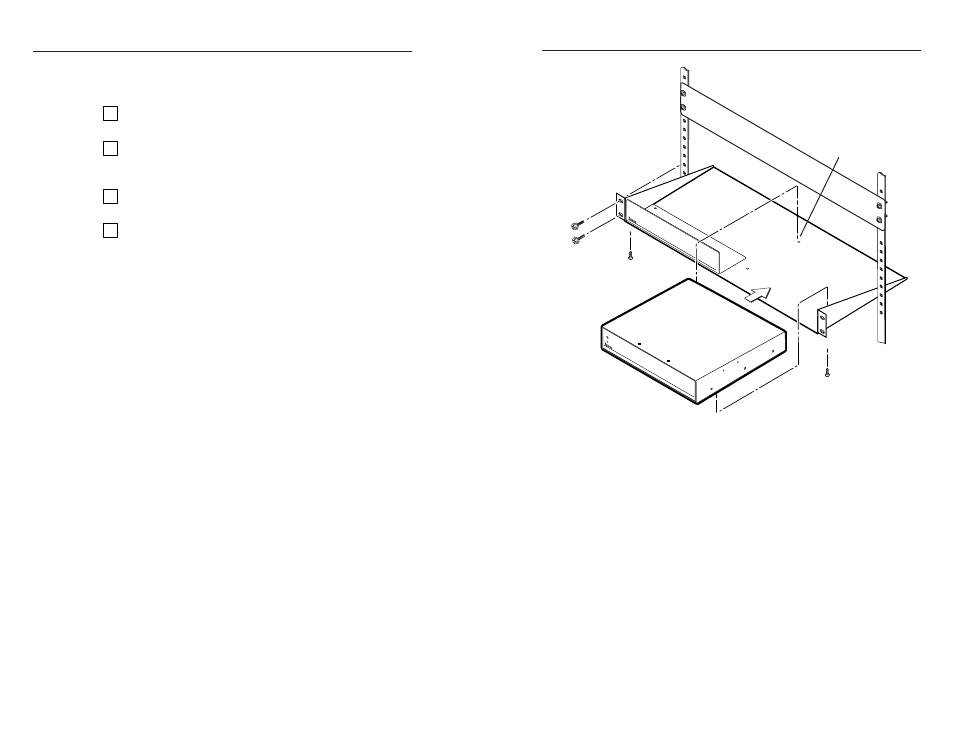
(2) 4-40 x 3/16" Screws
Use 2 mounting holes on
opposite corners.
False front panel
uses 2 front holes.
DA
R
GB
/YU
V S
ER
IES
W
IDE
BA
ND
DIS
TR
IBU
TIO
N A
MP
LIF
IER
Figure 2-1 — Rack mounting a DA2 RGBHV
Installation Overview
Install a DA RGB/YUV by performing the following steps:
1
Turn off the input and output devices, and unplug their
power cords.
2
If desired, mount the DA in a rack, under a furniture
surface, or through furniture. See Mounting Options,
below.
3
Connect the input and all desired outputs. See Rear Panel
Connections later in this chapter.
4
Plug in the DA and the input and output devices. Turn on
the input and output devices. See Operation and
Troubleshooting later in this chapter.
Mounting Options
Rack mounting the DA
Rack mount the DA as follows:
Rack mounting the DA2
1
.
If rubber feet were installed on the bottom of the DA,
remove them.
2
.
Place the DA on one half of an optional RSU 129 1U
(one unit high, 19" wide) rack shelf (part #60-190-01).
Align the front of the DA with the front of the shelf, and
align the threaded holes on the bottom of the DA with the
holes in the rack shelf (figure 2-1).
3
.
Secure the DA to the rack shelf with the two provided
4-40 x 3/16" machine screws. Insert the screws from the
underside of the shelf, and securely fasten them at
diagonally opposite corners.
4
.
Fasten the false front panel (provided with the rack shelf)
to the unoccupied side of the rack (figure 2-1), or install a
second half-rack-width device in that side by repeating
steps 1 through 3.
5
.
Secure the rack shelf to the rack using four 10-32 x 3/4"
bolts. Insert the bolts through #10 beveled washers, then
through the holes in the rack mounting flanges.
2-2