Armasight NAMPVS700133DB1 PVS7 GEN 3 Bravo Night vision goggles User Manual
Page 26
26
3.3.2 INSTALLATION OF THE qUICk DISCONNECT HELMET MOUNT
ASSEMBLY
1. Remove the helmet mount assembly from the carrying case. Make sure the helmet mount is com-
plete. Refer to Figure 3-9 for helmet mount components and features.
CAUTION:
To prevent possible equipment damage, remove both the goggles and the mount assembly
from the helmet when not required for immediate use. The clip/ strap assembly can remain in
place on the helmet.
2. If the mount assembly and clip/ strap assembly are connected, remove the mount assembly. To do
this, push the release lever at the top center of the mount and slide the two assemblies apart.
3. Adjust the clip/ strap assembly to fit the helmet size being used.
4. With the catch in the fully extended, place the strap over the top of the helmet, center and hook the
rear bracket onto the rear of the helmet. Center the front bracket hook on the front of the helmet
and hold it in place.
5. With the buckle lever open, tighten the slack in the clip/ strap assembly using the catch. Close the
buckle lever.
6. If the PASGT helmet has its cloth cover and camouflage strap installed, it will be necessary to slide the
camouflage strap up (at an approximately 30°-45° angle) at the front of the helmet (see Figure 3-9).
nape Strap faStener tabS
nape
StrapS
chIn Strap
Loop the nape strap fastener tabs around the corners
of the chin strap and snap closed. After closure, the
snaps will be on the outside, away from your chin.
FIGURE 3-8. NAPE STRAP INSTALLATION
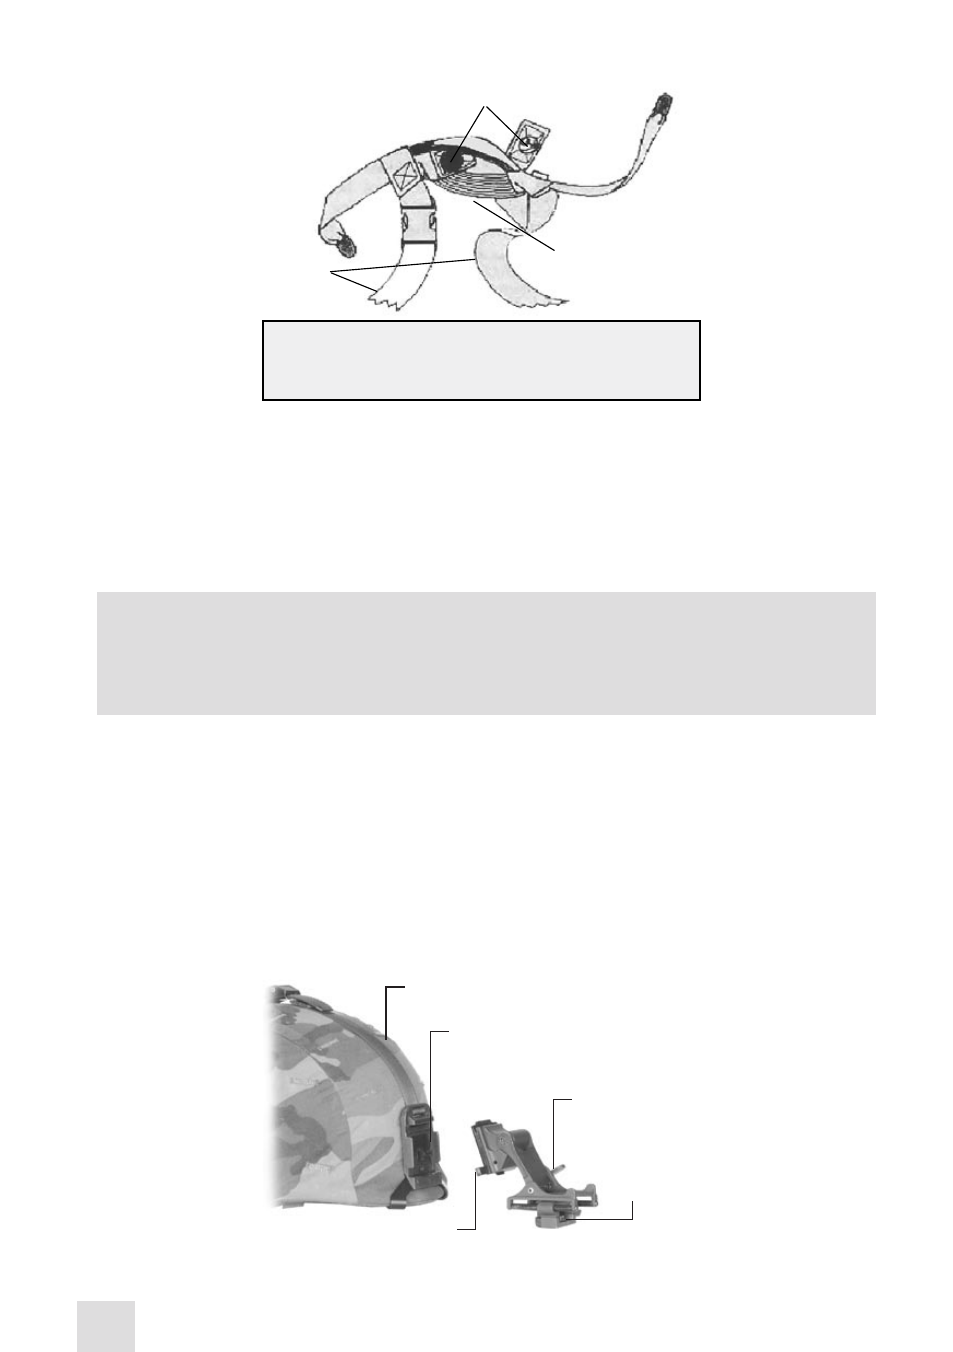
SocKet
tIlt adjuStment
mountIng
clIp
helmet
releaSe lever
FIGURE 3-9. qUICk DISCONNECT HELMET MOUNT FEATURES
- NAMPVS7001P3DA2 PVS7 GEN 3P TAN Night vision goggles NAMPVS7001P3DA1 PVS7 GEN 3P Night vision goggles NAMPVS700133DA2 PVS7 GEN 3+ Alpha TAN Night vision goggles NAMPVS700133DA1 PVS7 GEN 3+ Alpha Night vision goggles NAMPVS700133DB2 PVS7 GEN 3 Bravo TAN Night vision goggles NAMPVS700137DB2 PVS7 GEN 3 Bravo MG TAN Night vision goggles NAMPVS700123DS1 PVS7 GEN 2+ SD Night vision goggles NAMPVS700123DS2 PVS7 GEN 2+ SD TAN Night vision goggles NAMPVS700123DI1 PVS7 GEN 2+ ID Night vision goggles NAMPVS700127DI2 PVS7 GEN 2+ ID TAN Night vision goggles NAMPVS700123DH1 PVS7 GEN 2+ HD Night Vision Goggle NAMPVS700123DH2 PVS7 GEN 2+ HD TAN Night Vision Goggle