Armasight NAMPVS700133DB1 PVS7 GEN 3 Bravo Night vision goggles User Manual
Page 23
23
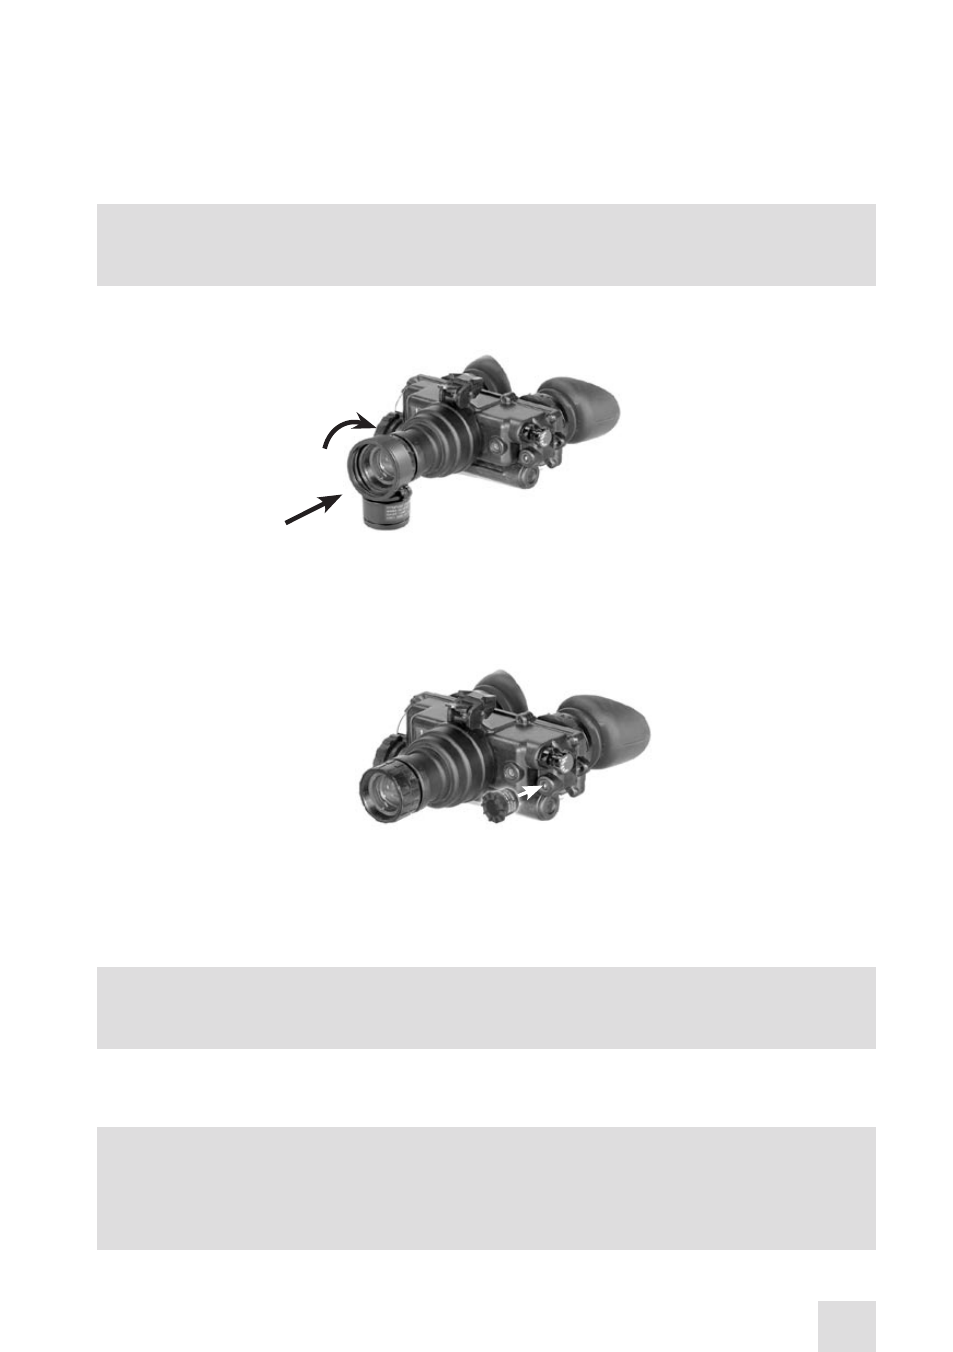
3. While looking through the goggles, rotate the objective lens focus completely counterclockwise.
4. Press the compass assembly onto the objective lens at an angle using your left hand. Slowly turn the
compass assembly counterclockwise until it is in the vertical position (with the compass illumination
button pointing down). See Figure 3-4.
5. Ensure that the compass fits tightly to the PVS-7.
NOTE:
The o-ring must be in place in the compass assembly in order for the compass to fit properly.
6. Refer to paragraph 3.3.3, D for operation of the compass.
G. Installation of the IR Spot/Flood Lens.
1. Press the IR spot/ flood lens over the IR source until it is tight against the goggles. Refer to Figure
3-5.
H. Installation and Adjustment of the Head Mount Assembly. Perform the following procedures for
putting the head mount on.
NOTE:
Do not put the head mount on while the PVS-7 is attached to it.
1. Prior to putting on the head mount, loosen the four chin straps so the ends of each strap are approxi-
mately two inches from the sliding bar buckles (See Figure 3-6)
2. Snap the front and rear snaps into place.
NOTE:
If the head mount is too loose, remove the attached thin brow pad and replace with either the
medium or large brow pad (both are stored in the carrying case). Refer to Chapter 3, paragraph
3-4 for removal and replacement of the brow pads.
FIGURE 3-4. INSTALLATION OF COMPASS
FIGURE 3-5. INSTALLATION OF THE IR SPOT/FLOOD LENS
- NAMPVS7001P3DA2 PVS7 GEN 3P TAN Night vision goggles NAMPVS7001P3DA1 PVS7 GEN 3P Night vision goggles NAMPVS700133DA2 PVS7 GEN 3+ Alpha TAN Night vision goggles NAMPVS700133DA1 PVS7 GEN 3+ Alpha Night vision goggles NAMPVS700133DB2 PVS7 GEN 3 Bravo TAN Night vision goggles NAMPVS700137DB2 PVS7 GEN 3 Bravo MG TAN Night vision goggles NAMPVS700123DS1 PVS7 GEN 2+ SD Night vision goggles NAMPVS700123DS2 PVS7 GEN 2+ SD TAN Night vision goggles NAMPVS700123DI1 PVS7 GEN 2+ ID Night vision goggles NAMPVS700127DI2 PVS7 GEN 2+ ID TAN Night vision goggles NAMPVS700123DH1 PVS7 GEN 2+ HD Night Vision Goggle NAMPVS700123DH2 PVS7 GEN 2+ HD TAN Night Vision Goggle