Armasight NAMPVS700133DB1 PVS7 GEN 3 Bravo Night vision goggles User Manual
Page 22
22
CAUTION:
If the demisting shields need to be cleaned, make sure the shields are dry and only use dry lens
paper. If the demist shields are wiped while wet or with wet lens paper, you will damage the
coating.
NOTE:
If inclement operating conditions are known to be a possibility prior to your mission (e.g. sig-
nificant temperature change and high humidity), install the demist shields before operation in
order to minimize diopter lens fog.
1. Carefully remove the eyecups.
2. Carefully press a demist shield onto each eyepiece. Be careful not to smudge the eyepieces or demist
shields.
3. Replace the eyecups (see paragraph 3.3.
E. Installation of the sacrificial Window. Perform the following procedure to install the sacrificial
window. Refer to Figure 3-3.
CAUTION:
If adverse operating conditions (dust or sand), are known to exist, attach the sacrificial window
to protect the objective lens from scratches or other damage.
1. If the compass assembly or lens cap is in place, remove it.
2. Carefully push the sacrificial window over the objective lens until it stops. Turn the sacrificial window
clockwise until it snaps into place.
F. Installation of the Compass Assembly.
NOTES:
a. Prepare the PVS-7 for operation (paragraph 3.3.1).
b. Ensure the neck cord is secured to the compass and clothing before installing.
1. If the sacrificial window or lens cap is in place, remove it.
2. Turn the PVS-7 on.
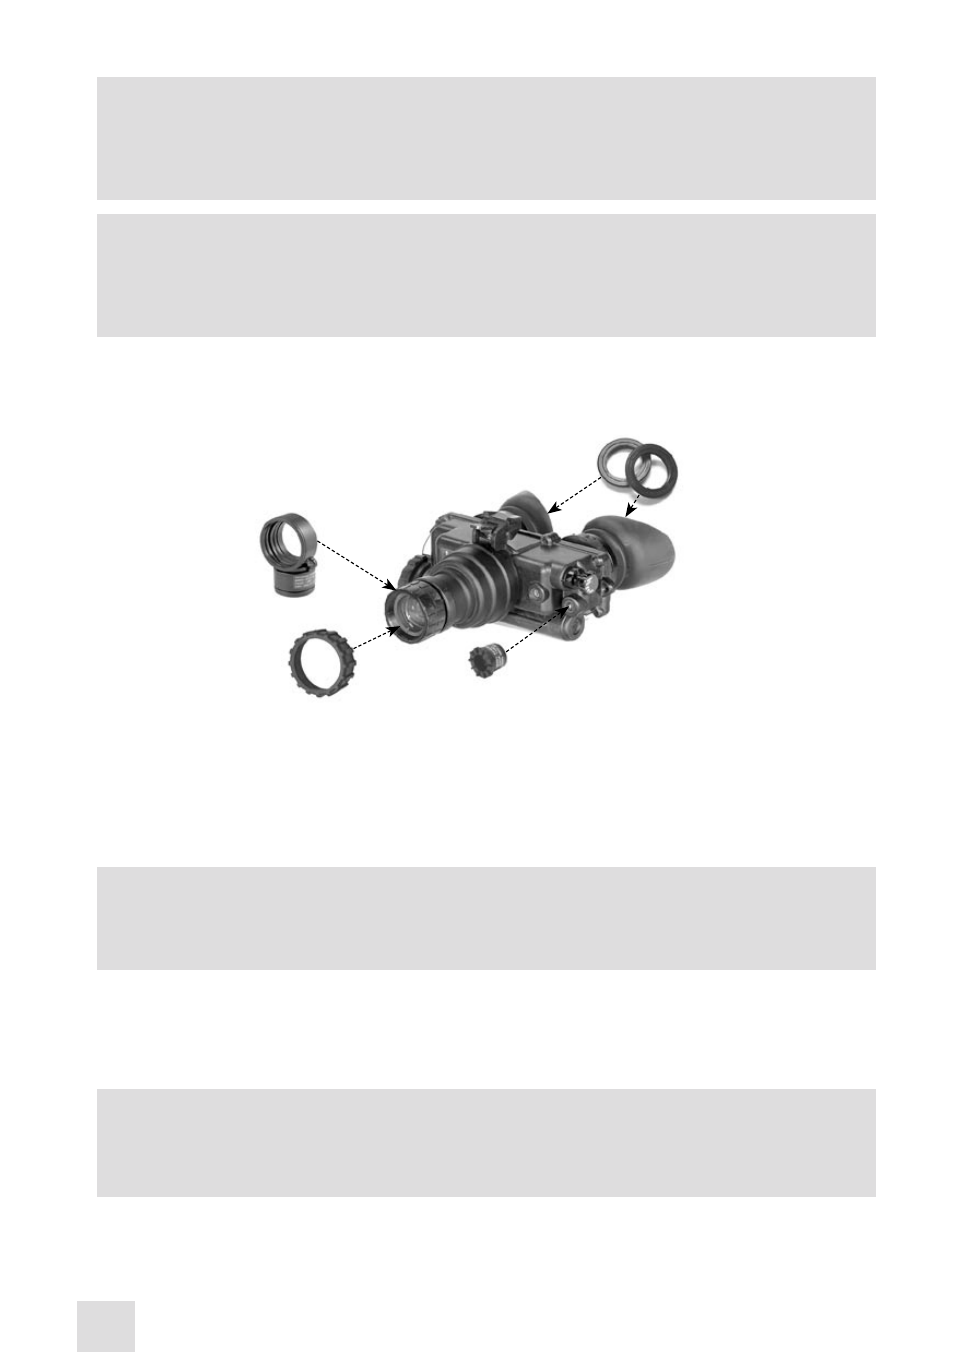
Ir Spot/flood lenS
compaSS
SacrIfIcIal
wIndow
demISt
ShIeldS
FIGURE 3-3. INSTALLATION OF DEMIST SHIELDS, SACRIFICIAL WINDOW
- NAMPVS7001P3DA2 PVS7 GEN 3P TAN Night vision goggles NAMPVS7001P3DA1 PVS7 GEN 3P Night vision goggles NAMPVS700133DA2 PVS7 GEN 3+ Alpha TAN Night vision goggles NAMPVS700133DA1 PVS7 GEN 3+ Alpha Night vision goggles NAMPVS700133DB2 PVS7 GEN 3 Bravo TAN Night vision goggles NAMPVS700137DB2 PVS7 GEN 3 Bravo MG TAN Night vision goggles NAMPVS700123DS1 PVS7 GEN 2+ SD Night vision goggles NAMPVS700123DS2 PVS7 GEN 2+ SD TAN Night vision goggles NAMPVS700123DI1 PVS7 GEN 2+ ID Night vision goggles NAMPVS700127DI2 PVS7 GEN 2+ ID TAN Night vision goggles NAMPVS700123DH1 PVS7 GEN 2+ HD Night Vision Goggle NAMPVS700123DH2 PVS7 GEN 2+ HD TAN Night Vision Goggle