Chapter 4, Creating a raid volume – Asus M4A79XTD EVO/USB3 User Manual
Page 102
4-14
Chapter 4: Software support
Chapter 4
The RAID BIOS setup screens shown in this section are for reference only and may not
exactly match the items on your screen.
The utility supports maximum four hard disk drives for RAID configuration.
The Main Menu allows you to select an operation to perform. The Main Menu options include:
• View Drive Assignments: shows the status of the hard disk drives.
• Define LD: creates a RAID 0, RAID 1, RAID 5 or RAID 10 configuration.
• Delete LD: deletes a selected RAID volume and partition.
• Controller Configuration: Shows the system resources configuration.
Press <1>, <2>, <3>, or <4> to enter the option you need; press
Creating a RAID volume
To create a RAID volume
1. In the Main Menu, press <2> to enter the Define LD function.
2.
Press
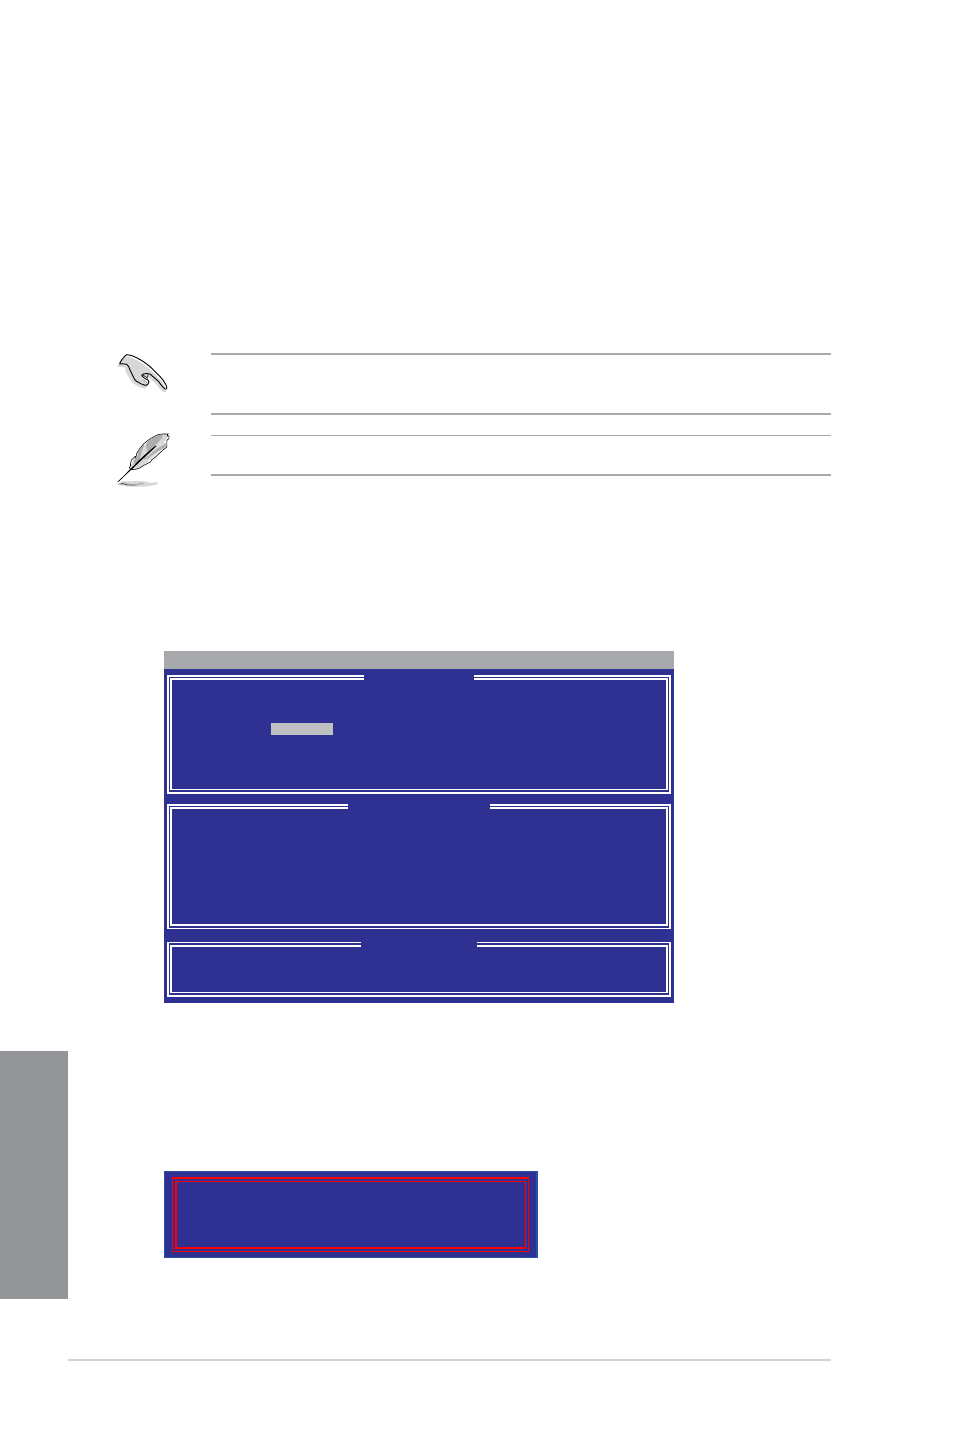
Option ROM Utility (c) 2008 Advanced Micro Devices, Inc.
[ Define LD Menu ]
LD No RAID Mode Total Drv
LD 1
RAID 0
0
Strip Block:
64 KB
Fast Init:
ON
Gigabyte Boundary:
ON
Cache Mode:
WriteThru
[ Drives Assignments ]
Channel:ID Drive Model Capabilities Capacity(GB) Assigment
1:Mas ST3160812AS SATA 3G 160.04 N
2:Mas ST3160812AS SATA 3G 160.04 N
3:Mas ST3160812AS SATA 3G 160.04 N
4:Mas ST3160812AS SATA 3G 160.04 N
[↑] Up [↓] Down [ESC] Exit [Space] Change [Ctrl-Y] Save [PgUp/Dn] Page Change
[ Keys Available ]
3.
Use the Up/Down arrow key to highlight the LD1 item and press
RAID mode you would like to create.
4.
Move to the Assignment item by using the down arrow key and press
Y to the drives you would like to include in the RAID volume.
5.
Press
Fast Initialization Option has been selected
It will erase the MBR data of the disks.