English installing an expansion card, Installing a dimm – Asus G1-P5G43 User Manual
Page 6
Installation manual
English
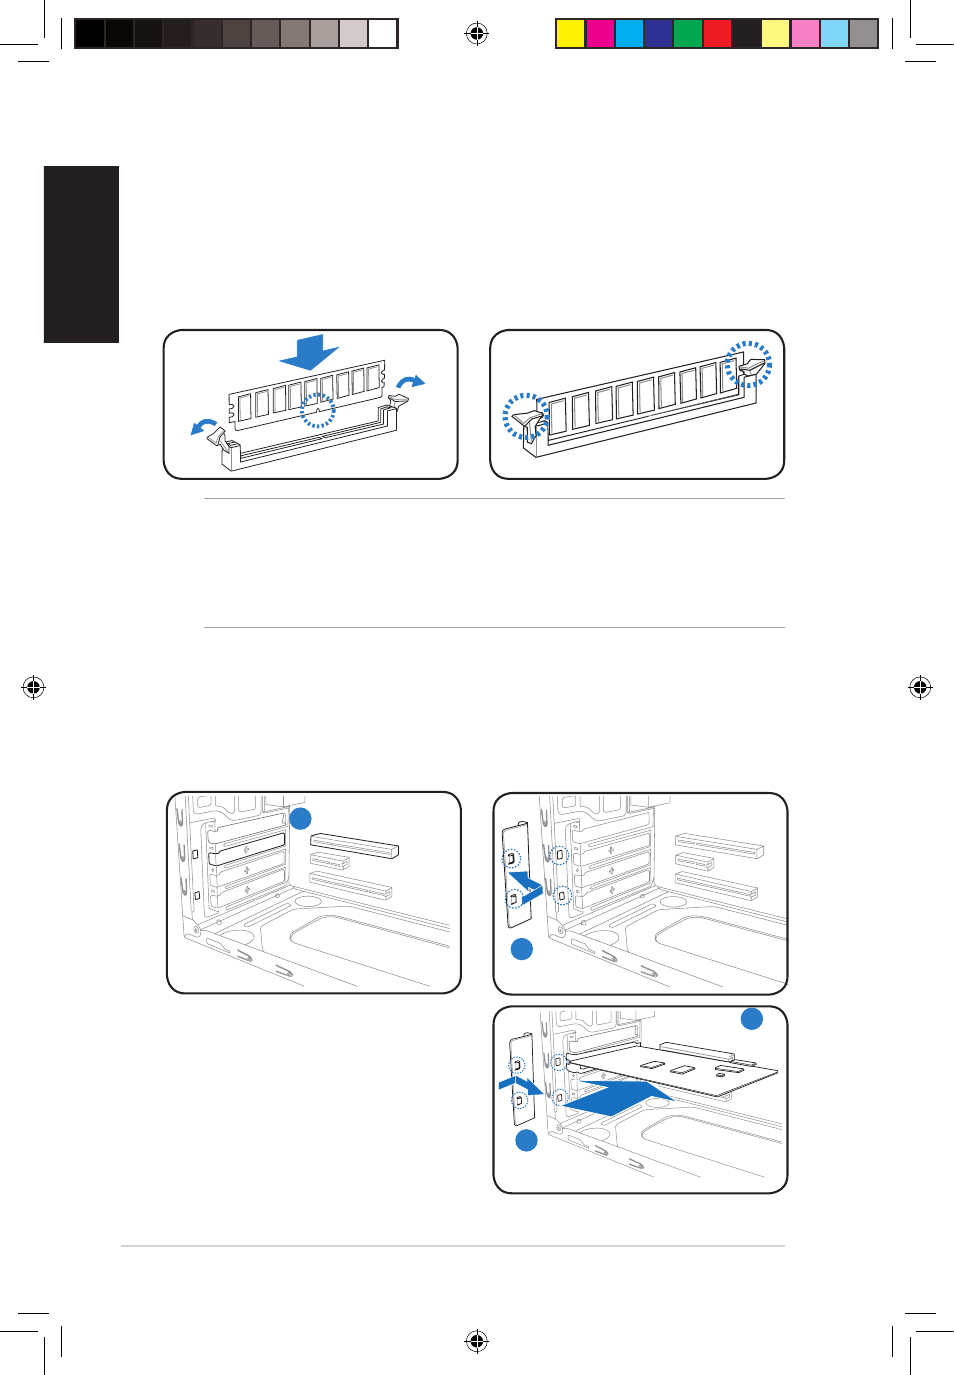
Installing an expansion card
2.
Remove the metal bracket lock.
1.
Remove the metal cover opposite the
slot that you intend to use.
3.
Insert the card connector to the slot,
then press the card firmly until it fits in
place.
4.
Replace the metal bracket lock.
Installing a DIMM
1.
Locate the DIMM sockets in the motherboard.
2.
Unlock a DIMM socket by pressing the retaining clips outward.
3.
Align a DIMM on the socket such that the notch on the DIMM matches the break on the
socket.
4.
Push the DIMM to the socket until the retaining clips snap inward.
CAUTION:
•
Unplug the power supply before adding or removing DIMMs. Failure to do so may
cause damage to the motherboard and/or components.
•
A DDR2/DDR3 DIMM is keyed with a notch so that it fits in only one direction.
Do not force a DIMM into a socket to avoid damaging the DIMM.
1
2
3
4
Book G1.indb 6
9/1/09 6:10:41 PM
- CG8565 (410 pages)
- CG8565 (246 pages)
- CS5111 (26 pages)
- CS5120 (1 page)
- ET1611PUK (38 pages)
- S2-P8H61E (80 pages)
- P2-PH1 (80 pages)
- P1-P5945G (80 pages)
- P2-P5945GCX (90 pages)
- CG8270 (536 pages)
- CG8270 (72 pages)
- CG8270 (76 pages)
- CG8270 (534 pages)
- CG8270 (362 pages)
- CG8270 (218 pages)
- P3-P5G31 (100 pages)
- P3-PH4 (80 pages)
- P2-M2A690G (80 pages)
- P2-M2A690G (8 pages)
- P4-P5N9300 (82 pages)
- P4-P5N9300 (1 page)
- P1-P5945GC (92 pages)
- P2-P5945GC (92 pages)
- P3-P5G33 (98 pages)
- T3-P5945GC (80 pages)
- T3-P5945GCX (80 pages)
- P2-M2A690G (94 pages)
- T3-PH1 (80 pages)
- T3-PH1 (82 pages)
- T5-P5G41E (76 pages)
- T5-P5G41E (82 pages)
- S1-AT5NM10E (68 pages)
- P6-P7H55E (67 pages)
- ES5000 (174 pages)
- T4-P5G43 (104 pages)
- T-P5G31 (92 pages)
- BT6130 (54 pages)
- BT6130 (2 pages)
- BT6130 (60 pages)
- CG8265 (350 pages)
- CG8265 (210 pages)
- CM1740 (70 pages)
- CM1740 (198 pages)
- CM1740 (330 pages)
- P6-M4A3000E (59 pages)