Asus P4GPL-X User Manual
Page 20
1 - 1 0
1 - 1 0
1 - 1 0
1 - 1 0
1 - 1 0
C h a p t e r 1 : P r o d u c t i n t r o d u c t i o n
C h a p t e r 1 : P r o d u c t i n t r o d u c t i o n
C h a p t e r 1 : P r o d u c t i n t r o d u c t i o n
C h a p t e r 1 : P r o d u c t i n t r o d u c t i o n
C h a p t e r 1 : P r o d u c t i n t r o d u c t i o n
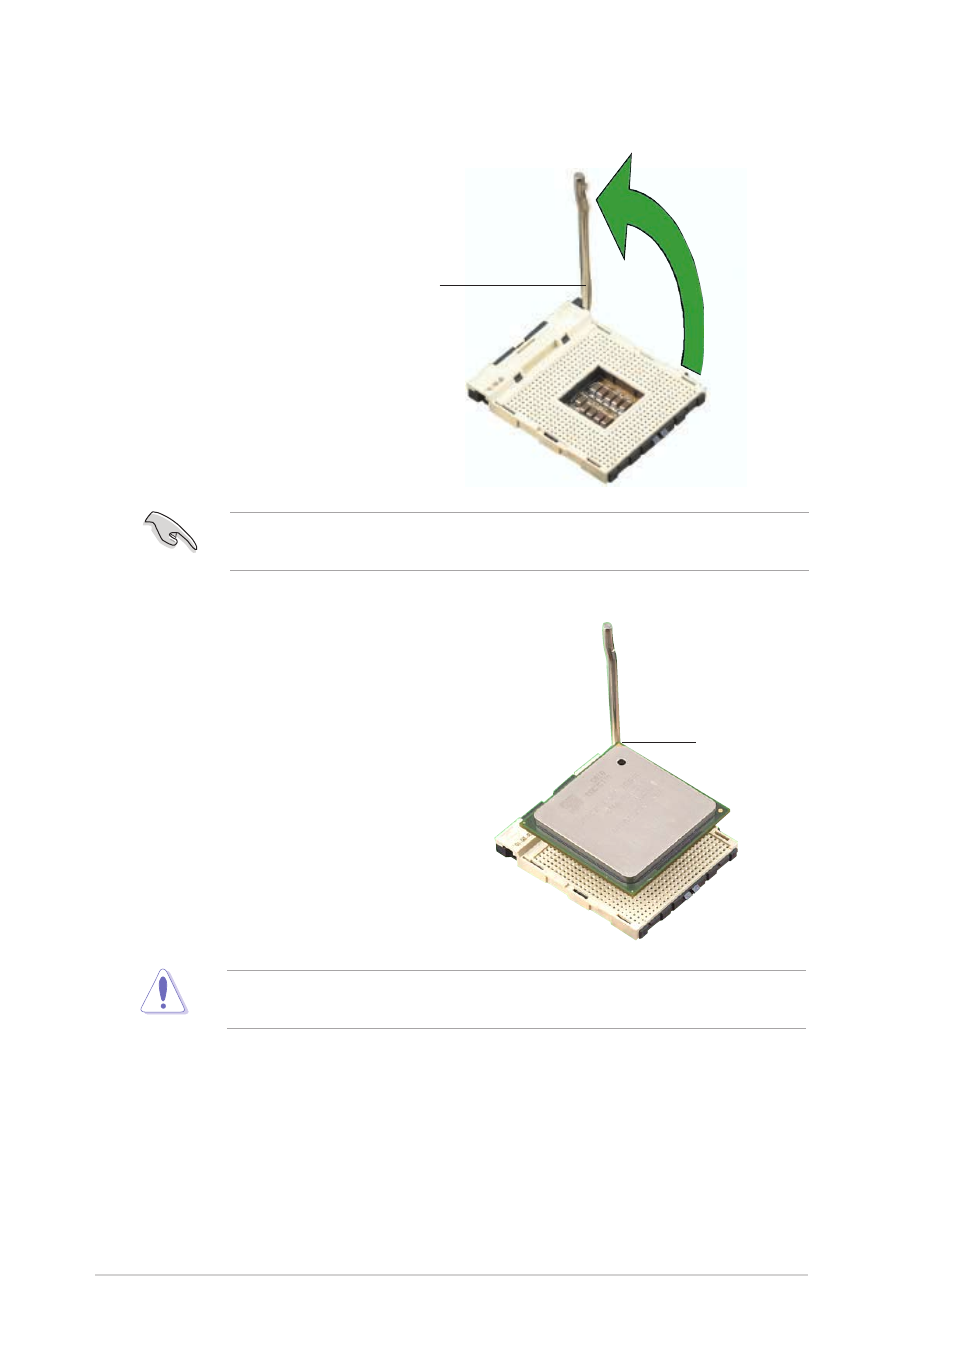
S o c k e t l e v e r
S o c k e t l e v e r
S o c k e t l e v e r
S o c k e t l e v e r
S o c k e t l e v e r
9 0 ° - 1 0 0 °
9 0 ° - 1 0 0 °
9 0 ° - 1 0 0 °
9 0 ° - 1 0 0 °
9 0 ° - 1 0 0 °
a n g l e
a n g l e
a n g l e
a n g l e
a n g l e
Make sure that the socket lever is lifted up to 90°-100° angle;
otherwise, the CPU does not fit in completely.
3.
Position the CPU above the
socket such that its marked
corner matches the base of the
socket lever.
4.
Carefully insert the CPU into the
socket until it fits in place.
The CPU fits only in one correct orientation. DO NOT force the CPU into
the socket to prevent bending the pins and damaging the CPU!
G o l d m a r k
G o l d m a r k
G o l d m a r k
G o l d m a r k
G o l d m a r k
2.
Unlock the socket by pressing
the lever sideways, then lift it up
to a 90°-100° angle.