3 installing a dimm, 16 chapter 1: product introduction – Asus P5QPL-VM User Manual
Page 26
1-16
Chapter 1: Product introduction
1.7.3
Installing a DIMM
A DDR2 DIMM is keyed with a notch so that it fits in only one direction. DO NOT force a
DIMM into a socket to avoid damaging the DIMM.
Unplug the power supply before adding or removing DIMMs or other system components.
Failure to do so may cause severe damage to both the motherboard and the components.
Unlocked retaining clip
1
DDR2 DIMM notch
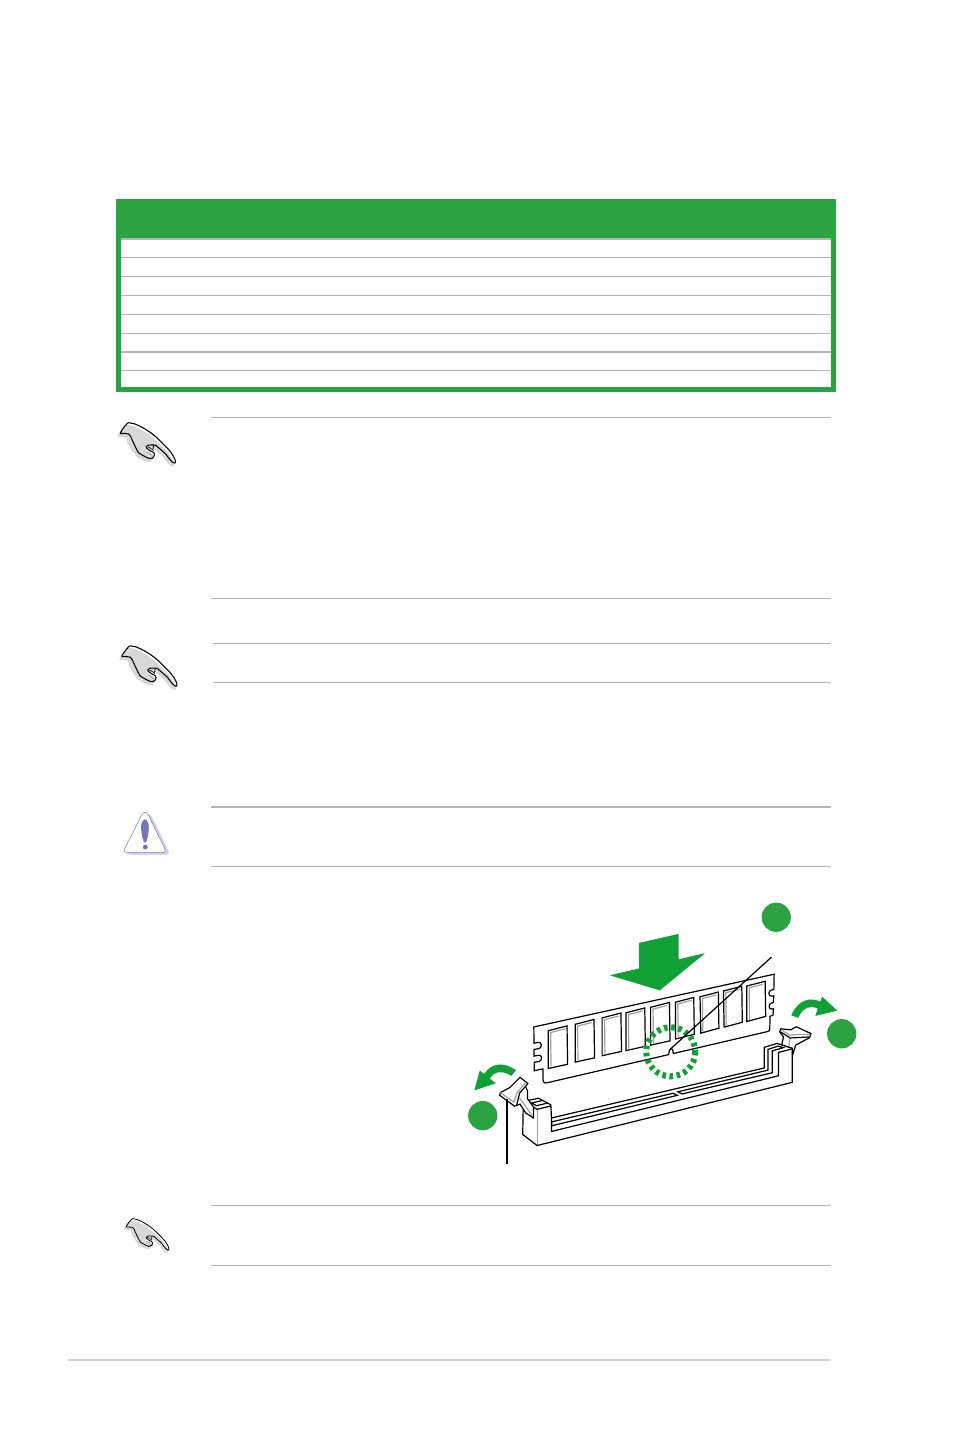
To install a DIMM:
1.
Press the retaining clips outward to
unlock a DDR2 DIMM socket.
2.
Align a DIMM on the socket such that
the notch on the DIMM matches the
break on the socket.
2
1
SS - Single-sided / DS - Double - sided
DIMM support:
•
A*: Supports one module inserted in any slot as Single-channel memory
configuration.
•
B*: Supports one pair of modules inserted into either the yellow slots or the
black slots as one pair of Dual-channel memory configuration.
•
C*: Supports four modules inserted into both the yellow and black slots as
two pairs of Dual-channel memory configuration.
Visit the ASUS website for the latest DDR2-1066/800/667 MHz QVL.
Size
Vendor
Part No.
CL
Chip Brand SS/
DS Chip No.
DIMM support
A* B*
C*
2G(kit of 2) G.SKILL
F2-8500CL5D-2GBPK
5-5-5-15 N/A
DS Heat-Sink Package
•
•
4G(kit of 2) G.SKILL
F2-8500CL5D-4GBPK
5-5-5-15 N/A
DS Heat-Sink Package
•
•
1G
G.SKILL
F2-8500CL5S-1GBPK
5-5-5-15 G.SKILL
DS Heat-Sink Package
•
•
512MB
Kingbox
EP512D21066PS
N/A
Micron
SS 6QD22D9GCT
•
•
4G(kit of 2) AENEON AXT860UD20-19E
N/A
AENEON
DS Heat-Sink Package
•
1G
AENEON AXT760UD00-19DC97X
5
AENEON
DS Heat-Sink Package
•
•
1G(kit of 2) Crucial
BL12864AA106A.8FE5
5-5-5-15 Crucial
SS Heat-Sink Package
•
1G(kit of 2) Crucial
BL12864AA106A.8FE5 (EPP) 5-5-5-15 Crucial
SS Heat-Sink Package
•
•
DDR2 1066 Qualified Vendors List