2 installing the cpu heatsink – Asus RS740-E7-RS24-EG User Manual
Page 33
2-9
ASUS RS740-E7-RS24-EG
1
2
2.2.2
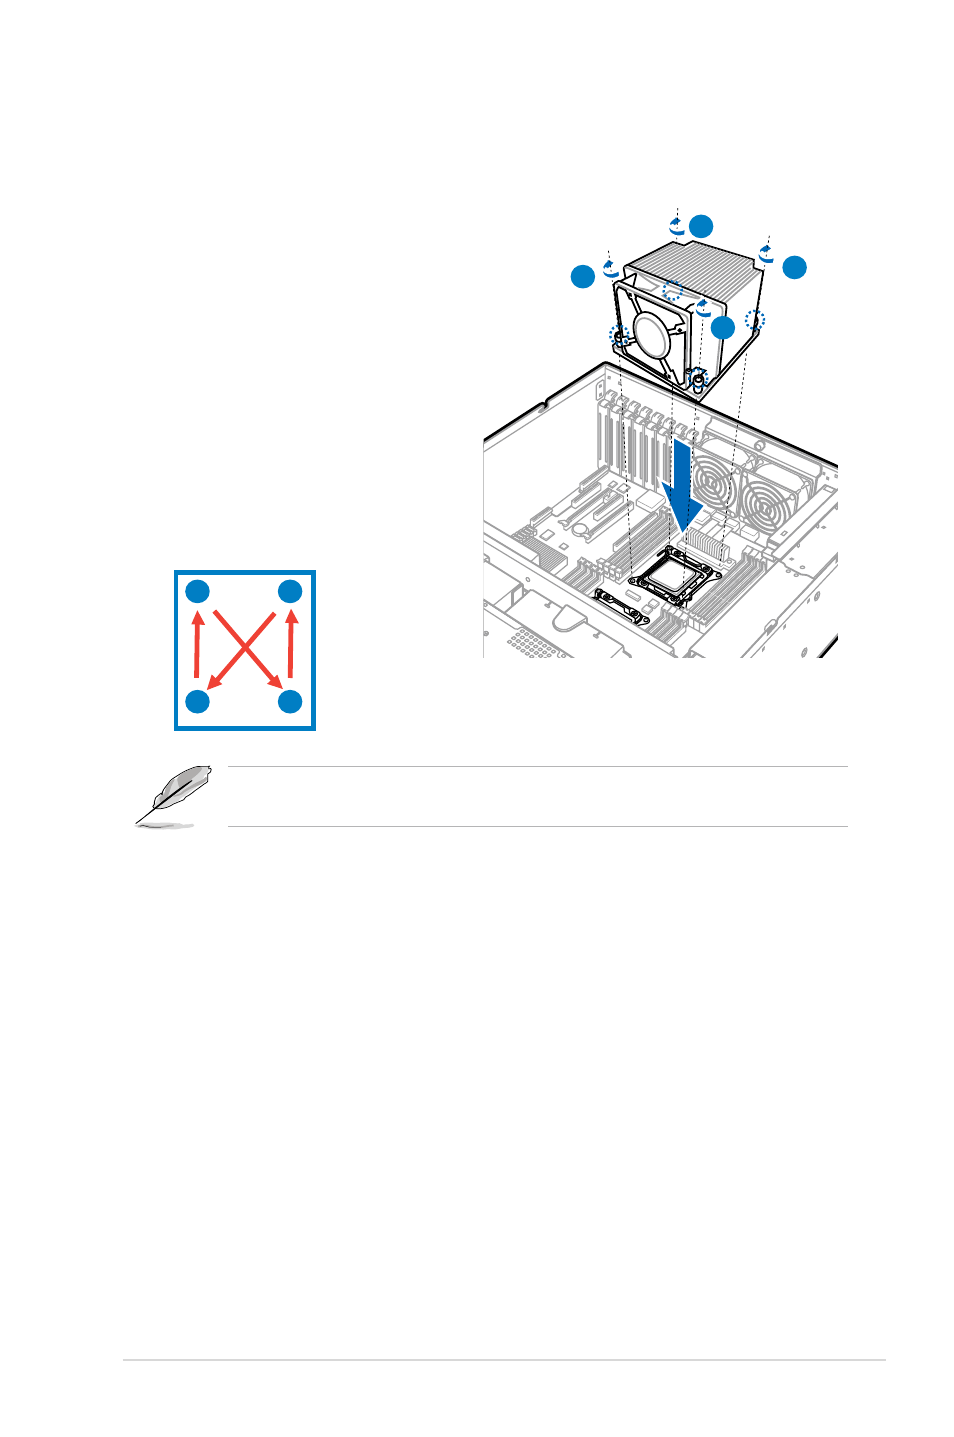
Installing the CPU heatsink
To install the CPU heatsink:
1.
Place the heatsink on top of the
installed CPU, ensuring that the
four screws match the holes on the
motherboard.
2.
Tighten each of the screws with a
Phillips screwdriver just enough
to attach the heatsink to the
motherboard.
3.
When attached, tighten the screws
one-by-one in a criss-cross sequence
and secure the CPU heatsink onto the
socket. Ensure an even distribution
of contact between the heatsink and
CPU.
A
C
D
B
Fasten the screws to just about the proper tightness to avoid damaging the motherboard,
CPU, or heatsink.
A
C
D
B
See also other documents in the category Asus Computer hardware:
- AP2500 (40 pages)
- AP1700-S5 (58 pages)
- RS700-E6/ERS4 (138 pages)
- AP1600R-E2(AA2) (150 pages)
- P7F-E (162 pages)
- RS161-E4/PA2 (126 pages)
- RS163-E4/RX4 (11 pages)
- M2N-LR (113 pages)
- P5BV/SAS (184 pages)
- K8N-DRE (142 pages)
- RS161-E5/PA2 (124 pages)
- LSI SAS3442X-R (68 pages)
- ESC4000/FDR G2 (200 pages)
- PIKE 2208 (16 pages)
- ESC4000 (162 pages)
- ESC4000 (22 pages)
- PSCH-SR/IDE (102 pages)
- P9D-M (156 pages)
- P5M2-E/4L (12 pages)
- ESC2000 G2 (226 pages)
- TS700-E6/RS8 (166 pages)
- RS160-E3/PS4 (140 pages)
- PU-DLS (134 pages)
- TR-DLSR (100 pages)
- P5BV-C/2L (161 pages)
- TS100-E5/PI4 (166 pages)
- ESC1000 Personal SuperComputer (184 pages)
- NRL-LS (120 pages)
- PCI-DA2200 (369 pages)
- P8C WS (140 pages)
- RS120-E4/PA4 (174 pages)
- P5MT-M (150 pages)
- TS Mini (114 pages)
- TS Mini (2 pages)
- TS Mini (112 pages)
- P5MT-MX/C (156 pages)
- AP140R-E1 (52 pages)
- AP140R-E1 (132 pages)
- ASMB6-iKVM (114 pages)
- DSBF-D16 (202 pages)
- DSBF-D16/SAS (200 pages)
- RS160-E5 (164 pages)
- Z8PE-D12X (170 pages)
- Z8PE-D12X (168 pages)