Billet Specialties Premium Tru Trac Serpentine System - Small Block Ford User Manual
Page 8
www.billetspecialties.com
www.billetspecialties.com
15
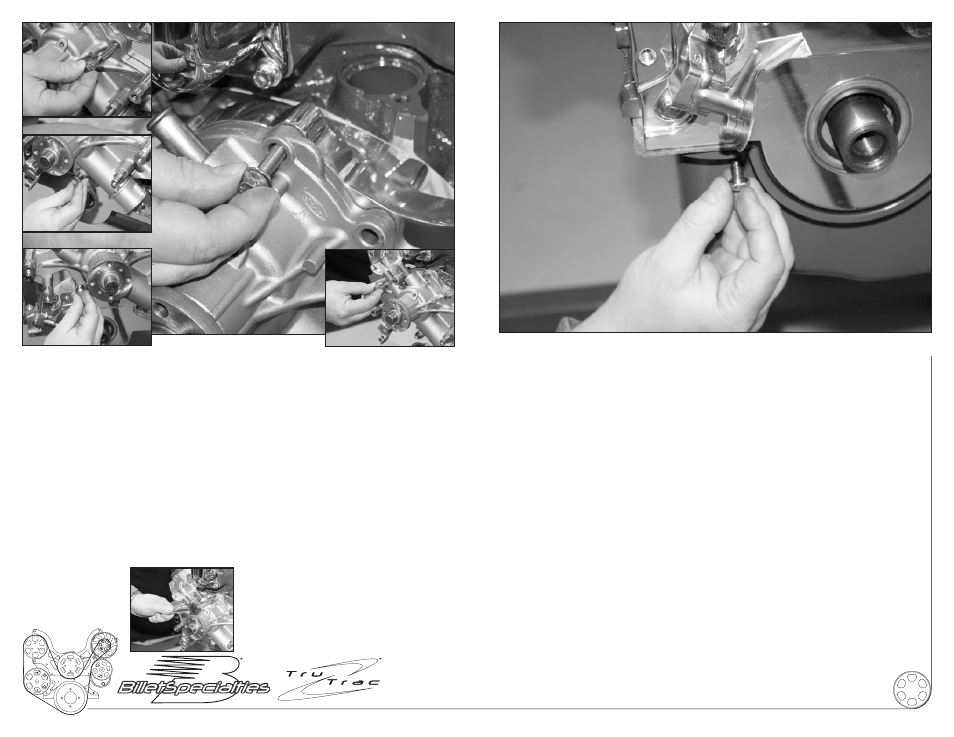
Figure 9: Complete Water Pump Installation
There are now five open holes remaining in the water pump, starting at the top
hole thread the 5/16”-18 x 1-1/4” ARP 12pt. bolt and 5/16” flat washer into hole
and finger tighten. Working in a clockwise direction, thread a 5/16”-18 x 3” ARP
12pt. bolt and 5/16” flat washer into the next hole and finger tighten. (A)
Continuing in a clockwise direction thread a 5/16”-18 x 2-1/4” ARP 12pt. bolt and
5/16” flat washer into the bottom right hole in the water pump and finger tighten.
(B)
Thread a 5/16”-18 x 1-1/4” ARP 12pt. bolt and 5/16” flat washer into the bottom
left hole in the water pump and finger tighten. (C)
Moving on to the remaining hole in the water pump at the top, thread a
5/16”-18 x 4-1/4” ARP 12pt. bolt and 5/16” flat washer into the hole and
finger tighten. (D)
Figure 10: Oil Pan Installation (If Removed)
Install oil pan and gasket at this time, thread two 5/16”-18 x 1/2" hex head cap
screw through the holes nearest the crankshaft and into the timing cover.
Thread the two remaining 1/4”-20 x 1/2" hex head cap screws through the
corner holes of the oil pan into the timing cover.
Tighten all bolts at this time.
Note: Some aftermarket oil pans may require different length hardware.
Figure 10: Oil Pan Installation (If NOT Removed)
Tighten oil pan to motor and timing cover firmly
Tighten all bolts on the timing cover
and then water pump at this time.
(A)
(B)
(C)
(D)