Billet Specialties Premium Tru Trac Serpentine System - FE Ford User Manual
Page 6
www.billetspecialties.com
11
www.billetspecialties.com
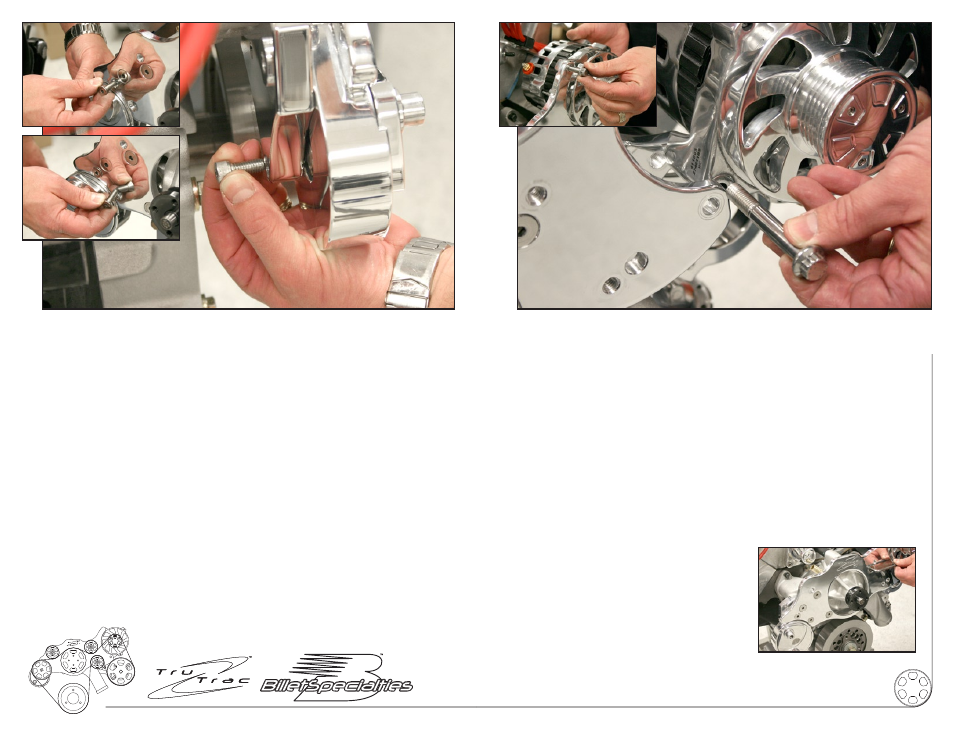
Figure 5: Install Tensioner
Apply anti seize to two 5/16-18 x 1” flat head cap screws and one 5/16-18 x 3/4”
socket head cap screw.
[A,B] Place tensioner between bridge bracket and tensioner bracket; thread the
two 1” long flat head cap screws through the bridge bracket and into the
tensioner and finger tighten.
[C] Finish installation by threading the 5/16-18 x 3/4” socket head cap screw
through the tensioner bracket and into the tensioner as shown and tighten firmly.
[A]
[B]
[C]
Figure 6: Install Alternator
Apply anti seize to one 10mm-1.5 x 70mm 12pt. ARP cap screw and one
8mm-1.25 x 25mm 12pt. ARP cap screw.
[A] Place alternator between the alternator bracket and bridge bracket aligning
the bottom bridge bracket hole with the lower alternator boss.
Thread the 10mm-1.5 x 70mm 12pt ARP cap screw through the bridge bracket,
alternator and into the alternator bracket.
[B] Finish alternator installation by threading the 8mm-1.25 x 25mm 12pt ARP cap
screw through the bridge bracket and into the top alternator boss.
TIGHTEN ALL FASTENERS AT THIS TIME including rear tensioner bolt. Leave lower
alternator bolt loose and check to see if a shim needs to be added at this time.
The alternator mounting boss may vary in thickness
due to the polishing process. 10mm shim washers are
provided to shim alternator to bridge bracket (washers
may or may not be needed).
[B]
[A]