Get started, Setup – Crown Audio I-Tech HD Series User Manual
Page 3
I-Tech HD Series
Power Amplifiers
I-Tech HD Series
Power Amplifiers
page 4
page 5
Operation Manual
Operation Manual
Welcome
This is the Crown
®
I-Tech HD Series offers amazing power, light weight and ease of use for touring sound
applications. Unlike other amplifiers, it includes onboard high-definition DSP, an LCD control screen, and a built-
in network connection.
Modern power amplifiers are sophisticated pieces of engineering capable of producing extremely high power
levels. They must be treated with respect and correctly installed if they are to provide the many years of reliable
service for which they were designed.
In addition, I-Tech Series amplifiers include a number of features which require some expla nation before they can
be used to their maxi mum advantage.
Please take the time to study this manual so that you can obtain the best possible service from your amplifier.
Get Started
Features
1.
Global Power Supply with PFC (Power Fac tor Correction) works anywhere in the world.
2.
High power density, up to 8000 watts in a 2U chassis.
3.
Highest output voltage in the industry (200V peak) provides clean transient peaks.
4.
3rd-generation patented Class I (BCA
®
) cir cuitry couples power
efficiently to the load and provides low AC current draw.
5.
Onboard high-definition DSP with 24-bit, 192 kHz Cirrus Logic SHARC A/D
and D/A converters. Advanced IIR filters and linear-phase FIR filters.
6.
Pushbutton presets simplify setup. Custom presets for various loudspeakers can be down loaded.
7.
AES/EBU digital audio input.
8.
EtherCon
®
Ethernet con nector for HiQnet™ control or CobraNet digital audio transport. This “Single
Plug” connection allows HiQnet protocol and CobraNet digital audio through the same CAT 5 cable.
9.
Analog and digital thru connectors.
10. LCD Control Screen is used to adjust the amplifier’s attenuation and muting, configure the amp, set
up and view error monitoring, and recall DSP presets to reconfigure the amp for various applications.
11. Comprehensive array of indicators provide accurate diagnostics: Power, Data, along with Ready,
Signal, Clip, Thermal and Fault for each channel.
12. AC mains indicator in power switch glows green when AC power is present.
13. Front-panel USB connector accepts a USB drive to transfer presets from the drive to the
amplifier DSP, and vice versa.
14. Light weight due to aluminum chassis, spe cial internal construction and switching power supply.
15. Thermal management controller and two dis crete thermal zones with variable-speed fans,
forced-air cooling.
16. Advanced protection circuitry guards against: shorted outputs, DC, mismatched loads,
general overheating, under/over volt age, high-frequency overloads and internal faults.
17. Three-Year, No-Fault, Fully Transferable Warranty completely protects your investment and guarantees its
specifications.
Unpack and Install Your Amplifier
When Please unpack and inspect your amplifier for any damage that may have occurred during transit. If damage
is found, notify the transpor tation company immediately. Only you can ini tiate a claim for shipping damage.
Crown will be happy to help as needed. Save the shipping carton as evidence of damage for the shipper’s
inspection.
We also recommend that you save all packing materials so you will have them if you ever need to transport the
unit. Never ship the unit without the factory pack.
YOU WILL NEED (not supplied):
1.
Input wiring cables
2.
Output wiring cables
3.
Ethernet cables
4.
Rack for mounting amplifier (or a stable surface for stacking)
WARNING: Before you start to set up your amplifier, make sure you read and observe
the Important Safety Instruc tions found at the beginning of this
manual.
CAUTION: Before you begin, make sure your amplifier is disconnected from the power
source, with the power switch in the “off” position and all level controls turned
completely down (counterclock wise).
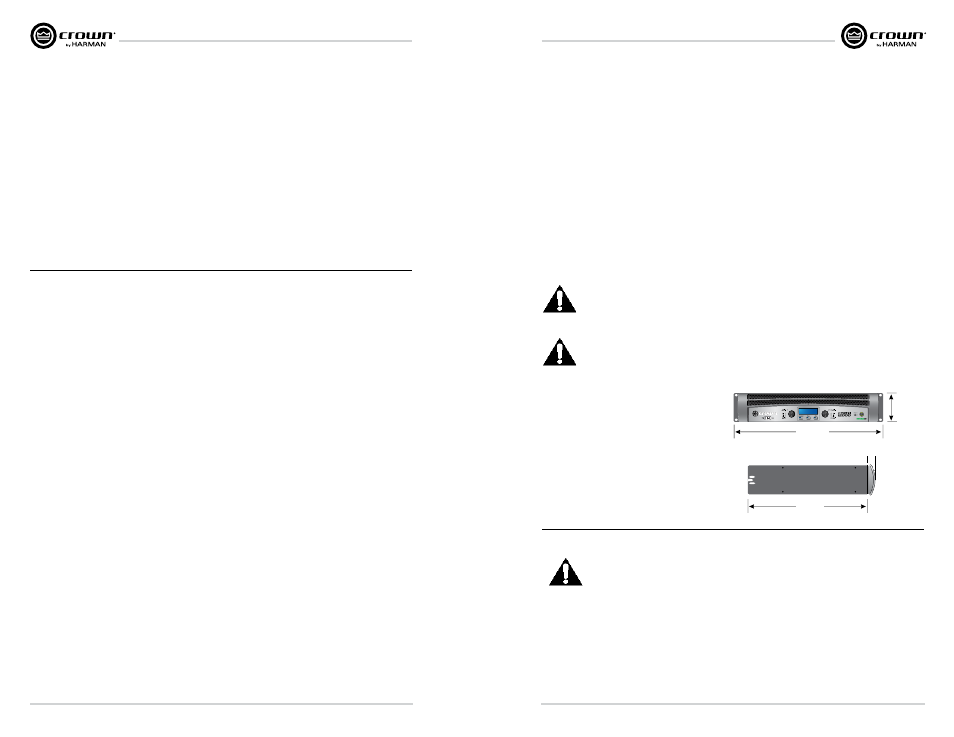
Use a standard 19-inch (48.3 cm) equipment rack
(EIA RS-310B).
You may also stack amps without using a
cabinet.
NOTE: When transporting, amplifiers should be
supported at both front and back.
Setup
1.5 In.
3.8 cm
3.5 In.
8.9 cm
16.2 In.
41.1 cm
48.3 cm
19 In.
Magnetic Field
CAUTION! Do not locate sensitive high-gain equipment such as preamplifiers or tape decks directly
above or below the unit. Because this amplifier has a high power density, it has a strong magnetic
field which can induce hum into unshielded devices that are located nearby. The field is strongest
on the right side and right bottom of the amplifier (facing the amplifier).
If an equipment rack is used, we recommend locating sensitive equipment at least 20 cm
(8 inches) away from the amplifier.
When using an equipment rack, mount units directly on top of each other. Close any open spaces in rack with
blank panels. DO NOT block front or rear air vents. The side walls of the rack should be a minimum of two inches
(5.1 cm) away from the amplifier sides, and the back of the rack should be a minimum of four inches (10.2 cm)
from the amplifier back panel.