3B Scientific Foucault Pendulum (230 V, 50__60 Hz) User Manual
Page 10
10
Fig. 10
Fig. 9
∑ Take readings of the approximate angle on the base
plate and use the vernier scale to read the exact an-
gle.
3.3 Further instructions
∑ In the case of an excited pendulum, the fluorescent
tube must be switched on, as it is a source of light for
the photovoltaic sensor.
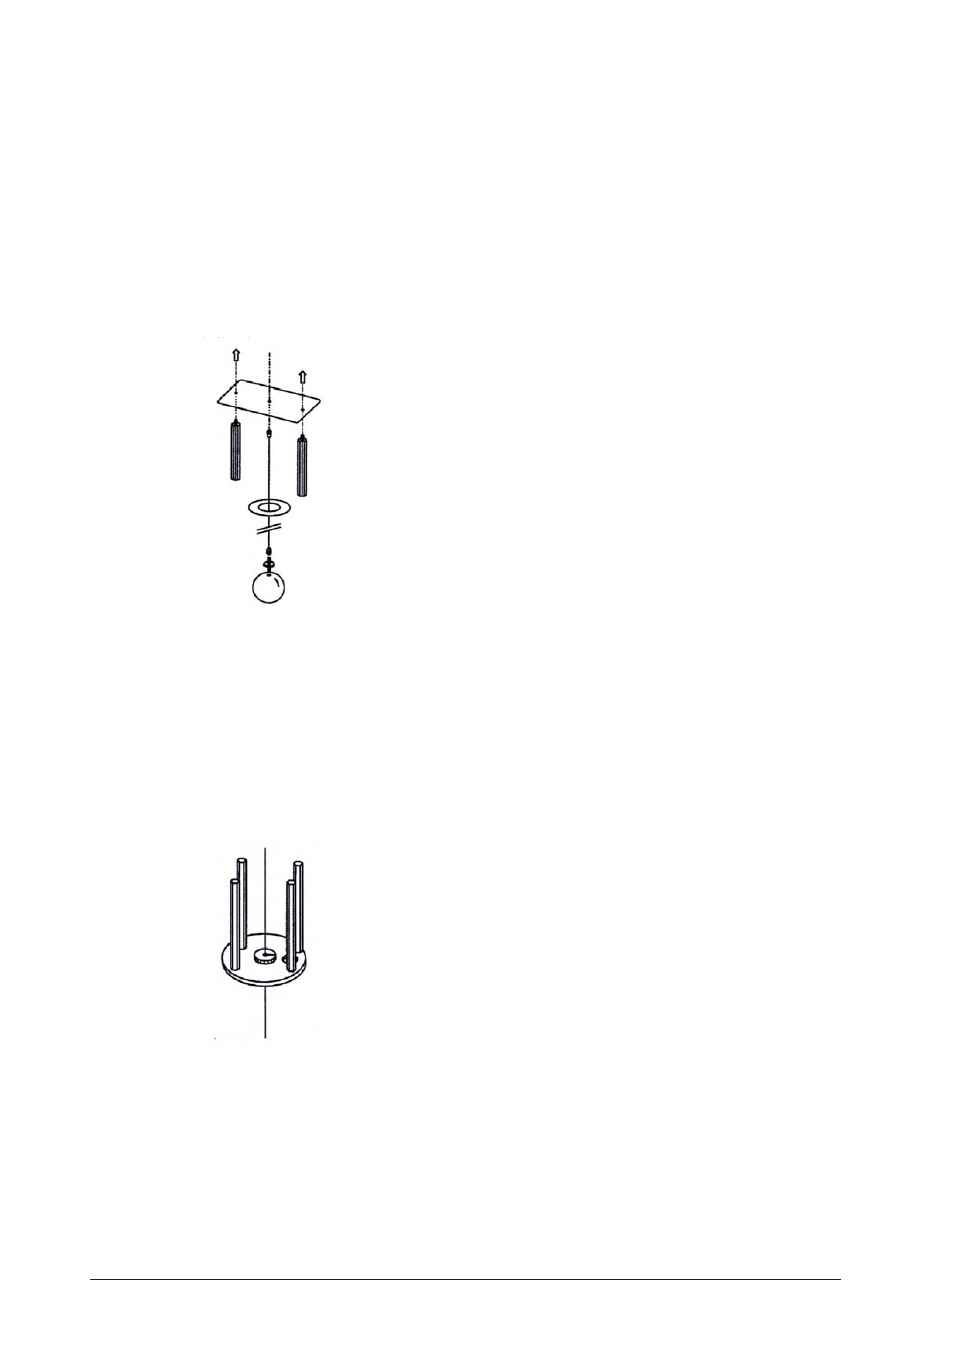
∑ The fastening screws for the string and the ring plate
must be checked to ensure that they are secure. Mea-
surements can be inaccurate, if the string fastening is
not tight (Fig. 9).
∑ The centring of the ring is factory-adjusted. If a new
setting is required, the following steps must be fol-
lowed (Fig. 10):
1.The pendulum must be aligned with the help of
the adjustment cylinder (see 3.1.3).
2. Insert the adjustment ring.
3. Loosen the screws on the underside of the Charron
ring without taking them out completely.
4.Fit the adjustment ring in the middle of the Char-
ron ring and move the Charron ring by knocking
on it lightly till you see that the string is suspended
exactly in the middle of the adjustment ring.
5. Tighten the screws without displacing the ring.
∑ When changing the suspension string care should be
taken to make sure the mounting bracket for the
string is not displaced, as this would mean repeating
the adjustments for the ring. As far as possible, only
the string's own fastening screw should be involved
in replacing the string.
∑ If the amplitude of the pendulum has not been ad-
justed accurately, then the plane of the pendulum
can precess either too quickly or too slowly. For pre-
cision measurements, the ideal amplitude is deter-
mined by observing the precession of the plane of
oscillation.
∑ Inaccuracies in the adjustment of the housing, cen-
tring of the ring and the amplitude of the pendulum,
or poor surface conditions can have an adverse effect
on the precession of the pendulum and can lead to
the precession becoming either too slow or too quick.
∑ If the pendulum stops swinging, the following are
possible causes:
1. The excitation has been switched off.
2. The fluorescent lamp has been switched off.
∑ Twists in the suspension string can induce measure-
ment errors. In order to remove twists in the string,
allow the string to hang freely for a few hours with
the pendulum bob suspended from it.
∑ If the projection lamp does not light, the following
are possible causes:
1. The projection lamp has not been switched on.
2. The bulb is loose. Remove the sleeve of the lamp
by turning gently and fasten the bulb.
3. The bulb is faulty. Remove the sleeve of the lamp
by turning gently and replace the bulb.
4. The sliding contacts are not making contact. Loos-
en the locking screw, gently press down the string
projection unit and fasten it under this pressure. In
case of further malfunctioning, loosen the locking
screw and remove the string projection unit. Check
the sliding contacts for any mechanical damage.
∑ If the string projection cannot be made to coincide
with the screen, remove the sleeve of the lamp by
turning gently and direct the light beam on to the
screen by applying radial pressure on the lamp sock-
et. For verification, suspend the bob in the adjust-
ment cylinder. If the string projection does not cover
the vertical line, then the factory settings must be
recalibrated. Loosen the two fastening screws of the
lamp socket and move the lamp socket horizontally
till the string projection covers the vertical line.
ELWE Didactic GmbH • Steinfelsstr. 5 • 08248 Klingenthal • Germany • www.elwedidactic.com
3B Scientific GmbH • Rudorffweg 8 • 21031 Hamburg • Germany • www.3bscientific.com
Technical amendments are possible