English – 3B Scientific Resusci Anne CPR Torso User Manual
Page 7
Long report
E
The long report format can be printed either during logging or
after logging of the CPR data.
This report consists of an analog part showing ventilation
and compression curves along with a time-line, and also the
different actions taken during the session, followed
by statistical data as described above.
Print-out during logging
When pressing the "long print" key during CPR performance,
an analog printout in real time of the CPR curves will be
printed if the log function has been activated.
When the logging is stopped, a statistical report of the CPR(-D)
performance data as described above, will be printed.
Print-out after logging
It is also possible to print a long format report (both analog
curves and statistical data) after a scenario is finished if the log
function has been active.
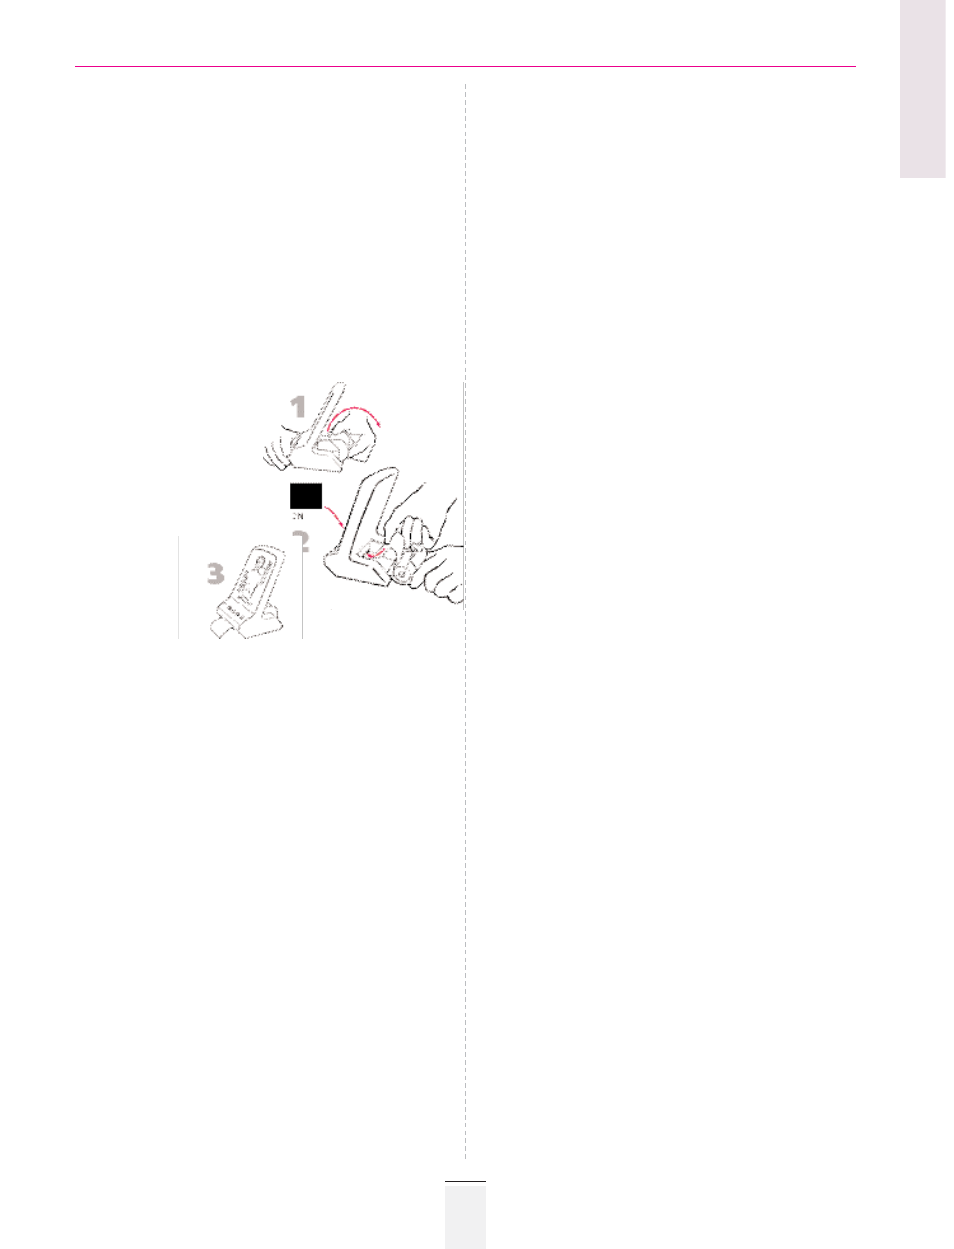
Installing new paper
Open the paper lid at the back
of the SkillReporter.
Place the paper roll as shown
on illustration.
Insert the paper end into
the paper inlet and the paper
will automatically feed
into the SkillReporter.
Close the paper lid.
Change of guidelines used for CPR feedback
The SkillReporter will be preprogrammed with the current
guidelines depending on country. At the moment we have two
guidelines available; AHA (American Heart Association) and
ERC (European Resuscitation Council).
If you need to change guidelines, this is possible to do by
simply pressing both the "LOG start/stop" button and the
"Metronome" button at the same time for 5 seconds. You will
then get a print-out showing the new active guidelines.
Inflation
The inflation volume is shown by a bar graph with different
LED colours indicating insufficient, sufficient and excessive
volumes. Between 0 and 0.8 l (AHA) or 0.4 l (ERC), the yellow
LED(s) will be activated indicating insufficient inflation volume.
When lung inflation volume reaches 0.8 l to 1.2 l (AHA) or
0.4 l to 0.6 l (ERC), the green LED(s) will be activated indicating
sufficient inflation volume. If lung inflation volume exceeds
1.2 l (AHA) or 0.6 l (ERC), the red LED(s) will be activated
indicating excessive inflation volume. A red warning light
indicates a too fast inflation (stomach insufflation).
Stomach insufflation will be indicated by "!" next to the
ventilation curve in the printout.
Chest compression
The compression depth is shown by a bar graph with different
LED colours indicating insufficient, sufficient and excessive
compressions. When the breastbone area of the chest is
depressed between 0 and about 4 cm (1 1/2"), the yellow
LED(s) will be activated to indicate insufficient compression
depth. Between 4 cm (1 1/2") and 5cm (2"), the green LED(s)
will be activated to show sufficient compression depth.
If compression exceeds 5 cm (2" ) the red LED(s) will be
activated indicating excessive compression depth.
Wrong hand position
The yellow LEDs will be activated if chest is depressed outside
the correct area either on one of the sides or at the upper part
of thorax. The red LED will be activated if the chest is
depressed with hands placed outside the correct area at the
lower center part of thorax. This will in addition to visual feed-
back also be recorded on the printout report as "!" next to
the compression curve.
Responsiveness check
The manikin has a shake sensor installed that will be activated
by gently shaking the manikin. This will result in a "r" in the
printout report. This will only be possible if responsiveness
check is done before any other CPR is performed.
Open airway
The manikin has a neck sensor installed that will be activated
by head tilt/ chin lift to indicate open airway. This will result in
an "a" in the printout report.
Pulse check
The manikin has sensors installed that will be activated by caro-
tid pulse check for 5 seconds on either side of the throat. This
will result in a "c" in the printout report.
Power Supply
The eight 1.5 V alkaline batteries, size D, are located inside the
manikin chest and will provide approximately 125 hours of use
in the classroom. This will vary depending on use patterns and
brand of batteries. These batteries are the "power supply" for
both the manikin and the SkillReporter.
Battery low indication
"On" LED on SkillReporter will start to flash when only 25 %
of battery capacity is left. At this level the print-out function
may stop.
When "On" LEDs on both manikin and SkillReporter start
flashing, you should replace batteries to avoid that
logging/feedback stops.
Connection Cable
This is permanently connected to the SkillReporter and has an
8 pin male connector that is to be connected to the manikin.
The cable is 1.8 meters (72 inches) in length to allow for fle-
xible use while connected.
Cautions
Make sure that the SkillReporter/manikin has been turned off:
- when airway is changed, or
- when internal service is carried out.
Make sure the chest skin is properly fastened before turning
on the SkillReporter/manikin.
ENGLISH
9
Resusci Anne Modular System