English – 3B Scientific Resusci Anne CPR Torso User Manual
Page 11
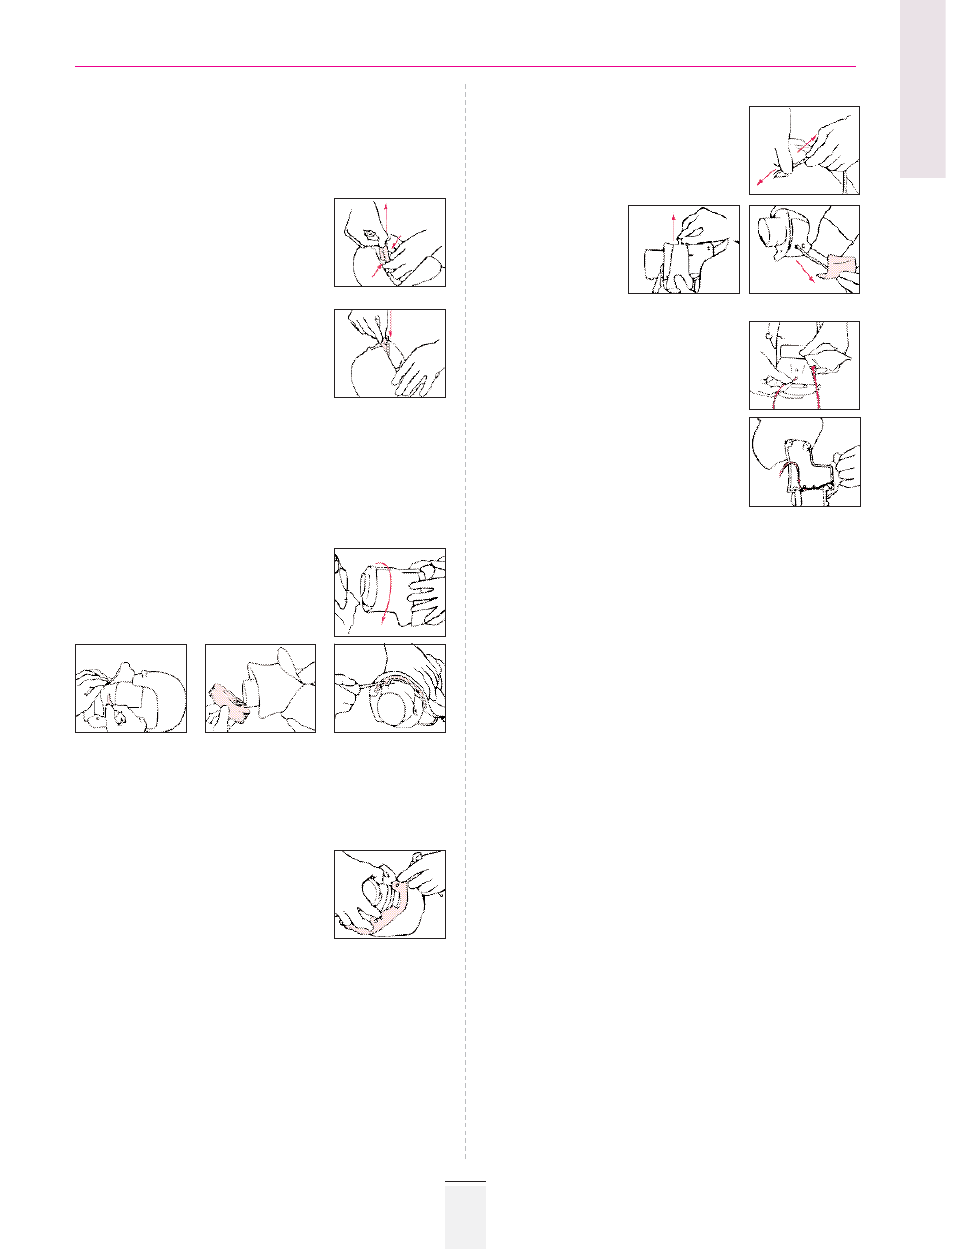
Miscellaneous replacements
Changing holder for airway connector
To remove:
1. Lift off face, remove jaw and detach airway connector
(See "To remove airway" steps 1-3, page 11.)
2. With one hand pull the holder upwards
until it is retained by the two knobs on
the rim of the holder. Use two fingers
of the other hand to pinch the holder
so that it can be pulled loose.
To install:
1. Ensure that a new holder is correctly
inserted. An audible click indicates that
the holder is properly situated. The two
knobs prevent unintended loosening
of the holder.
2. Mount airway connector, jaw and face
(See "To install airway" steps 4-6, page 11).
Changing neck skin
Replace neck skin when damaged or discoloured by long term
contact with student's hands without regular cleaning.
To remove:
1. Lift off face, remove jaw and detach
airway connector
(See "To remove airway"
steps 1-3, page 11).
2. Disconnect head from shoulders by
rotating head 180° (face turned back-
wards) and pull it away from torso.
3. a) Unbutton elastic bands at the back of the neck.
b) Remove foam ring from the base of the neck.
c) Undo the two screws in the curved securing piece.
4. Remove the old neck skin.
To install:
1. Apply the lower portion of the neck
skin over the rim of the inner part of
the curved securing piece, so that
the two holes in the skin are placed
over the screw holders.
For the following procedure see ill.
under "To remove", steps 2 and 3 above:
2. Apply the outer part of curved securing piece over
the lower rim of the neck skin. Align holes and fasten skin
between outer and inner securing piece with two screws.
3. Fasten the elastic bands in the back of the neck.
4. Put on the foam ring.
5. Mount the head on the manikin's torso.
6. Mount airway connector and jaw, fold neck skin over chin,
and mount face
(See "To install airway", steps 4-6 page 11).
Changing pulse simulator neck collar
To remove:
1. Remove neck skin.
(See “Changing neck skin”).
2. Then disengage nipple on tubing
for pulse simulator.
3. Remove the white
retention plug
and lift off
the pulse collar
with tube.
To install:
1. Apply new pulse collar over neck.
Push tubing through the lower hole
of the cushion pad and neck.
2. Thread tubing from inside through
the upper circular hole (a) in the back
of the neck.
3. Thread tubing inside the neck
under the two retainers (b).
4. Insert the white retention plug through
holes in both ends of collar, and into
the lower hole in the back of the neck,
and connect tubing from neck collar
to nipple on tubing from pulse simulator, as illustrated
under "To remove", steps 2 and 3 “Changing neck skin”.
5. Mount neck skin, foam ring, head, airway and face.
See “Changing neck skin”.
Changing compression pulse collar (if applicable)
The compression pulse collar is placed under the pulse
simulator collar.
To remove:
1. Unbutton chest skin and detach compression pulse tubing
from the nipple.
2. Lift off the compression pulse collar as described above.
To install:
1. Apply a new compression pulse collar around the neck.
Push tubing through the upper hole of the cushion pad.
2. Thread tubing through the oval canal in the neck base.
Make sure the tubing is held in place by the retainers
inside the neck.
3. Attach compression pulse tubing to the nipple.
4. Fasten in neck with plug together with pulse simulator
collar as described above.
Changing batteries in manikin
(SkillReporter manikin only)
When replacing worn out batteries in your SkillReporter
manikin, replace them with eight 1.5 V alkaline batteries,
size D.
To replace batteries:
1. Remove chest skin.
2. Open the battery cover.
3. Remove and discard old batteries.
4. Replace new batteries as indicated on battery cover.
5. Align battery cover with grooves in battery compartment.
6. Replace chest skin.
ENGLISH
13
Resusci Anne Modular System
3a
3b
3c
a
b