Figure 2 – Newport Brass 9401 User Manual
Page 2
1. Before installing the faucet, flush the hot and cold lines to eliminate dirt
accumulated in the pipes.
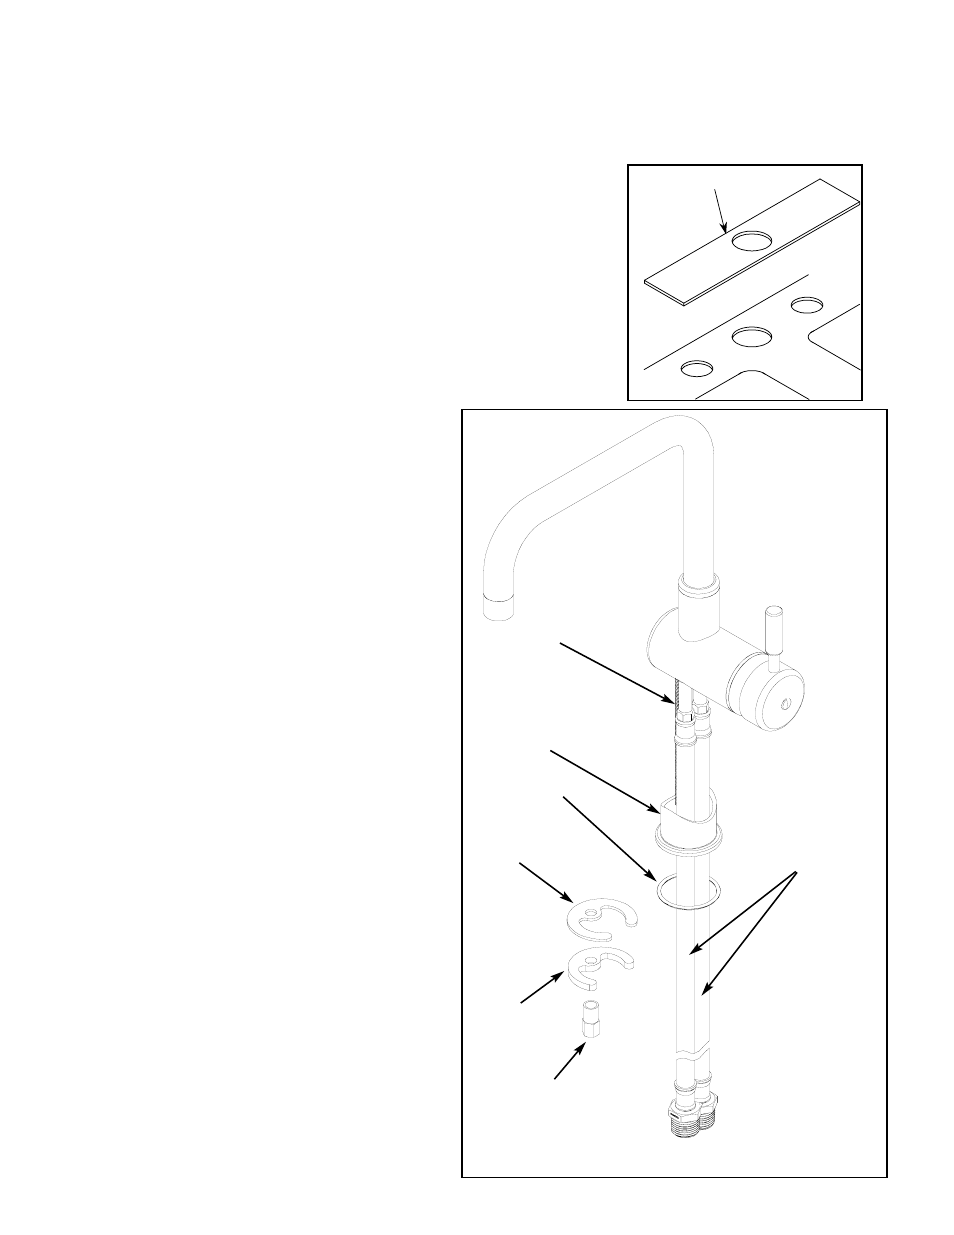
2. The through hole in the sink or countertop should be between 1-1/4"
to 1-1/2". If the sink has three holes, use a cover plate to cover extra
holes (PN: 102 is not supplied with the faucet and must be ordered
separately). See Fig. 1
3. To install the faucet, verify that the base o-ring
(91031) is seated into the base collar, guide the
flex hoses and mounting stud through the sink-
hole.
Place gasket (91063), mount cresent
(10514), and loosely tighten mounting nut
(10516) onto the threaded mounting stud. See
Fig. 2
4. Position the spout and handle toward the front of
the sink. Make sure that the handle swings freely
and equally in both hot and cold directions.
Tighten mounting nut to secure the faucet firmly
in place.
5. Connect supply line (not included) to the faucet's
½" NPT flex hose inlets.
6. After installation is complete flush faucet by
removing aerator from spout and flush until
water is clear. Reinstall aerator to the spout.
NWP-9401
Figure 2
Base collar
Gasket
91063
Base O-ring
91031
Recommended Installation by a Professional Plumbing Contractor
Note: The use of petroleum base plumbers putty on our products will nullify the warranty. We recommend the use of clear sili
cone sealing materials.
If mounting faucet to stainless steel rim, an under-mount support, (e.g. wood, appropriate size x 1/2” thick), should be utilized.
Mount cresent
10514
Mounting nut
10516
Threadead
rod
Flex hose
No. 102
Cover Plate