Rough in valve installation – Newport Brass 2566 Skylar User Manual
Page 2
Rough in Valve Installation
We recommended Installation of this product by a Professional Plumbing
Contractor
Note: Use Teflon tape or equivalent to seal all threaded joints.
Warning: To prevent severe damage to valve body, any solder/braze process must
be performed a min. of 4" from ports. It is strongly recommended that an access panel is
built into the roman bath surround. Access panels allow for ease of trim installation and
future possible repairs.
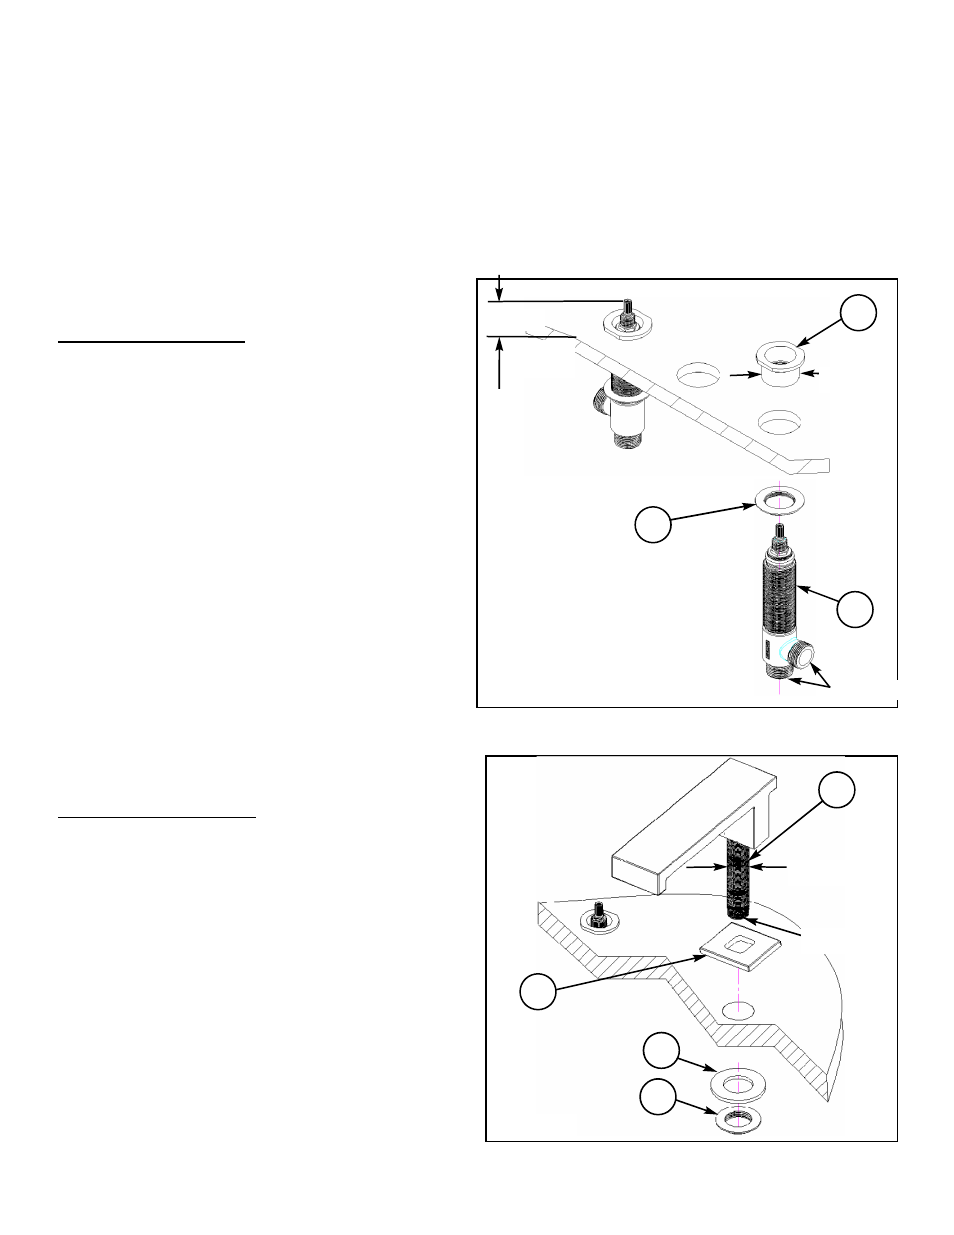
Valve Installation
1. Place flange NUT (1)
onto VALVE (2).
2. Insert VALVE (2), (blue/cold and red/hot),
through the hole in the mounting surface.
3. Thread inverted mounting NUT (3) onto
VALVE (2). Adjust VALVE (2) stem height to
1-3/16" above the top of mounting surface.
See Figure 1.
Spout Installation
1. Slide spout NIPPLE (4) through deck PLATE
(5) and center hole of mounting surface.
Make sure spout is flush with deck PLATE
(5).
2. Secure into place with WASHER (6) and
MOUNTING NUT (7). See Figure 2.
Figure 1
Finished
Deck
3/4” NPT
1-3/8”
Figure 2
Ø1-1/16”
2
4
5
7
3/4” NPT
1
3
Ø1-7/16”
6
NWP-1-656
EN-2108
REV -