Maintenance, Headlight aiming adjustment, Adjustment after headlight assembly replacement – KIA Magentis 2006 User Manual
Page 218
MAINTENANCE
7-42
HEADLIGHT AIMING
ADJUSTMENT
Before performing aiming adjustment,
make sure of the following.
1. Keep all tires inflated to the correct
pressure.
2. Place the vehicle on level ground and
press the front bumper & rear
bumper down several times.
3. See that the vehicle is unloaded
(except for full levels of coolant,
engine oil and fuel, and spare tire, jack,
and tools). Have the driver sit in the
driver’s seat or use equivalent weight.
4. Clean the headlight lenses and turn
on the headlight (Low beam).
5. Open the hood.
6. Draw a vertical line (through the
center of each headlight) and the
horizontal line (through the center of
each headlight) on the aiming screen.
1) Horizontal line dimension from
ground: 628 mm (24.72 in)
2) Distance between each vertical
line : 1,306 mm (49.17 in)
And then, draw a parallel line at 30
mm (1.18 in) place under the
horizontal line.
7. Adjust each cut-off line of the low
beam to the parallel line with a
Phillips screwdriver.
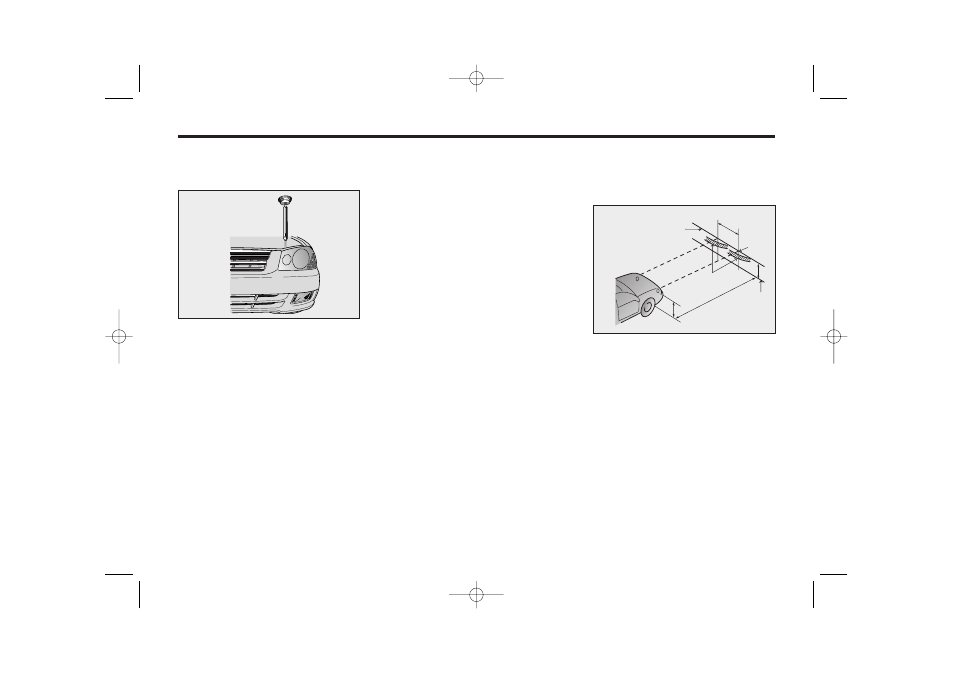
ADJUSTMENT AFTER
HEADLIGHT ASSEMBLY
REPLACEMENT
If the vehicle has had front body repair
and the headlight assembly has been
replaced, the headlight aiming should be
checked using the aiming screen as
shown in the illustration. Turn on the
headlight switch. (Low Beam Position)
1. Adjust headlights so that main axis of
light is parallel to center line of the
body and is aligned with point “P”
shown in the illustration.
MMSA7032
Vertical
aiming
H
H
W
P
MMSA7033
Horizontal line
21 mm (0.82 in)
Cut-off line
Ground line
Vertical line
MS-CNA-Eng 7.QXD 7/25/2005 5:09 PM Page 42