Step 8: install decal o ver splice joints – Pace-Edwards Utility Rig Rack User Manual
Page 11
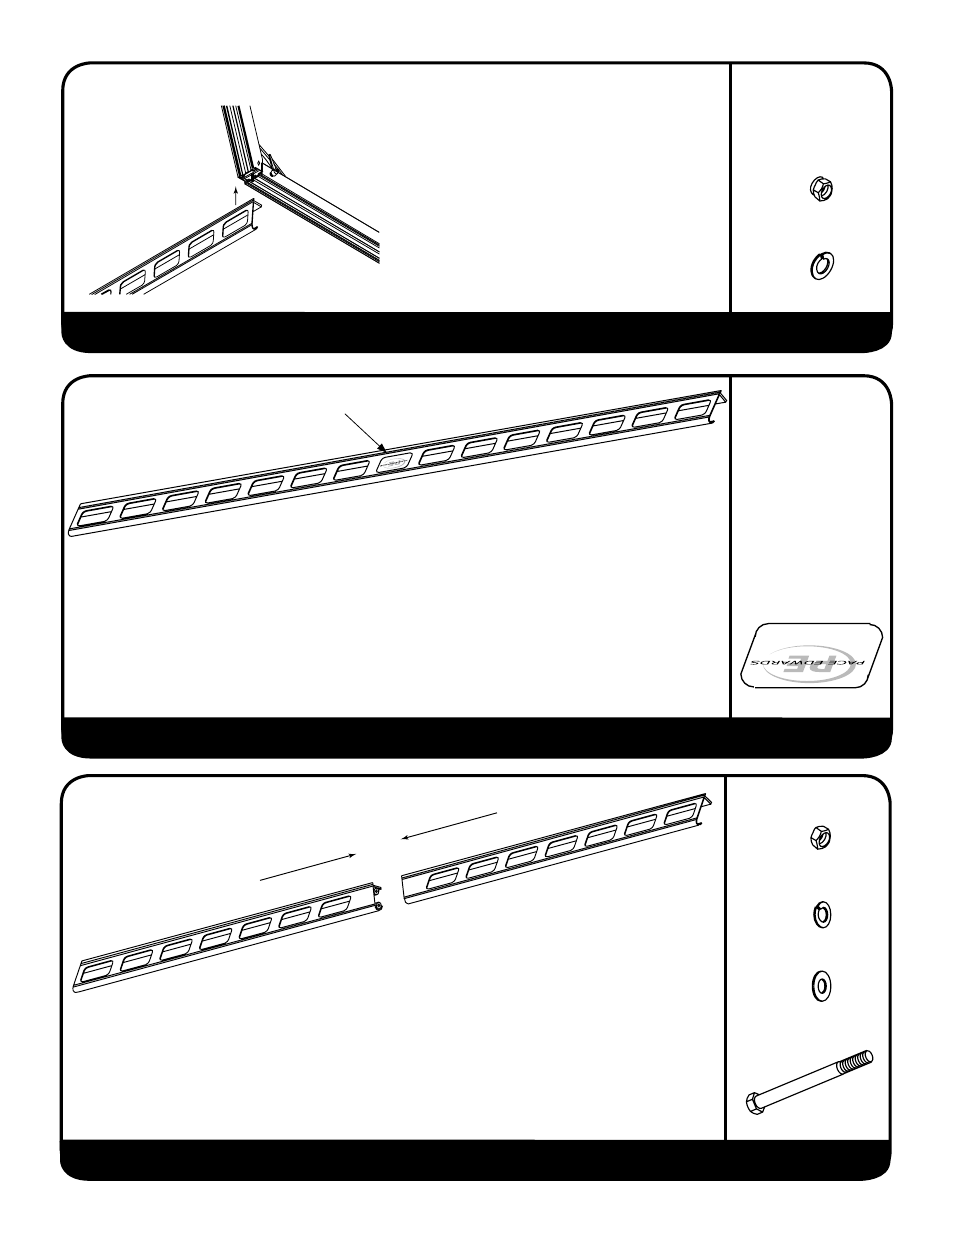
STEP 7: ASSEMBLE EXTENSION BEAM HALVES
STEP 9: INSTALL EXTENSION BEAMS ON TR
USSES
HARDWARE USED:
HARDWARE USED:
5/16” STAINLESS
NUTS (x 8)
STEP 8: INSTALL DECAL O
VER SPLICE JOINTS
You will need a smooth clean surface where you can bolt together the halves of the Extension
Beams (ie. cardboard, paper, plastic).
Locate a matching pair of Extension Beams (all holes leaning the same way) and place them
end to end so that the welded-in splice blocks touch each other and the holes in the splice
blocks align. Slide a 3/8” fl
at washer on the 4” bolt and insert the bolt through the splice blocks,
then install a fl
at washer, then lock washer
, then nut, in that order. Repeat the procedure for
the other hole, align Extension Beam halves so that the outside surfaces meet smoothly, and
then tighten nuts. Repeat the procedure for the remaining Extension Beam.
CONTRACTOR RIG RACK
6
(800)
338-3697
3/8” STAINLESS LOCK
WASHERS (x8)
3/8” STAINLESS NUT
(x4)
4-3/8” STAINLESS
BOLTS (x 4)
PA
RALLELOGRAM
DECALS (x2)
3/8” STAINLESS FLA
T
WASHERS (x4)
HARDWARE USED:
Important! There are left and right decals! Decal leans forward just like Extension Beam
holes do!
Position the decal accurately so that it repeats the punched hole pattern. Although the decal
can be installed dry, the “wet method” makes the job much easier
. Just add 10 or 12 drops
of dish washing liquid to a glass of water, pull of
f the decal backing, wet the decal and the
Extension Beam and apply the decal centered between holes over the splice joint. This
wet method allows you to slide the decal around to position it correctly. When correctly
positioned, force out excess water with fi
ngers or a sponge. The decal will ultimately adhere
with just as much “grip” as the dry method would but without the risk of misalignment,
bubbles, creases etc.
DECAL
Mount one Extension Beam on the T
russes
(notched end goes in front), aligning the end
of the beam with the rear surface of the rear
Truss.
Install lock washers and nuts and tighten
these two Extension Beam mounting bolts.
Set the other Extension Beam on the opposite
side and loosely install a lock washer and nut
on the rear T
russ only, as you will need to lift
the forward end slightly off the front truss to
assemble the crossmember.
5/16” STAINLESS LOCK
WASHERS (x 8)