B&B Electronics GW-7553 - Quick Start Guide User Manual
Page 2
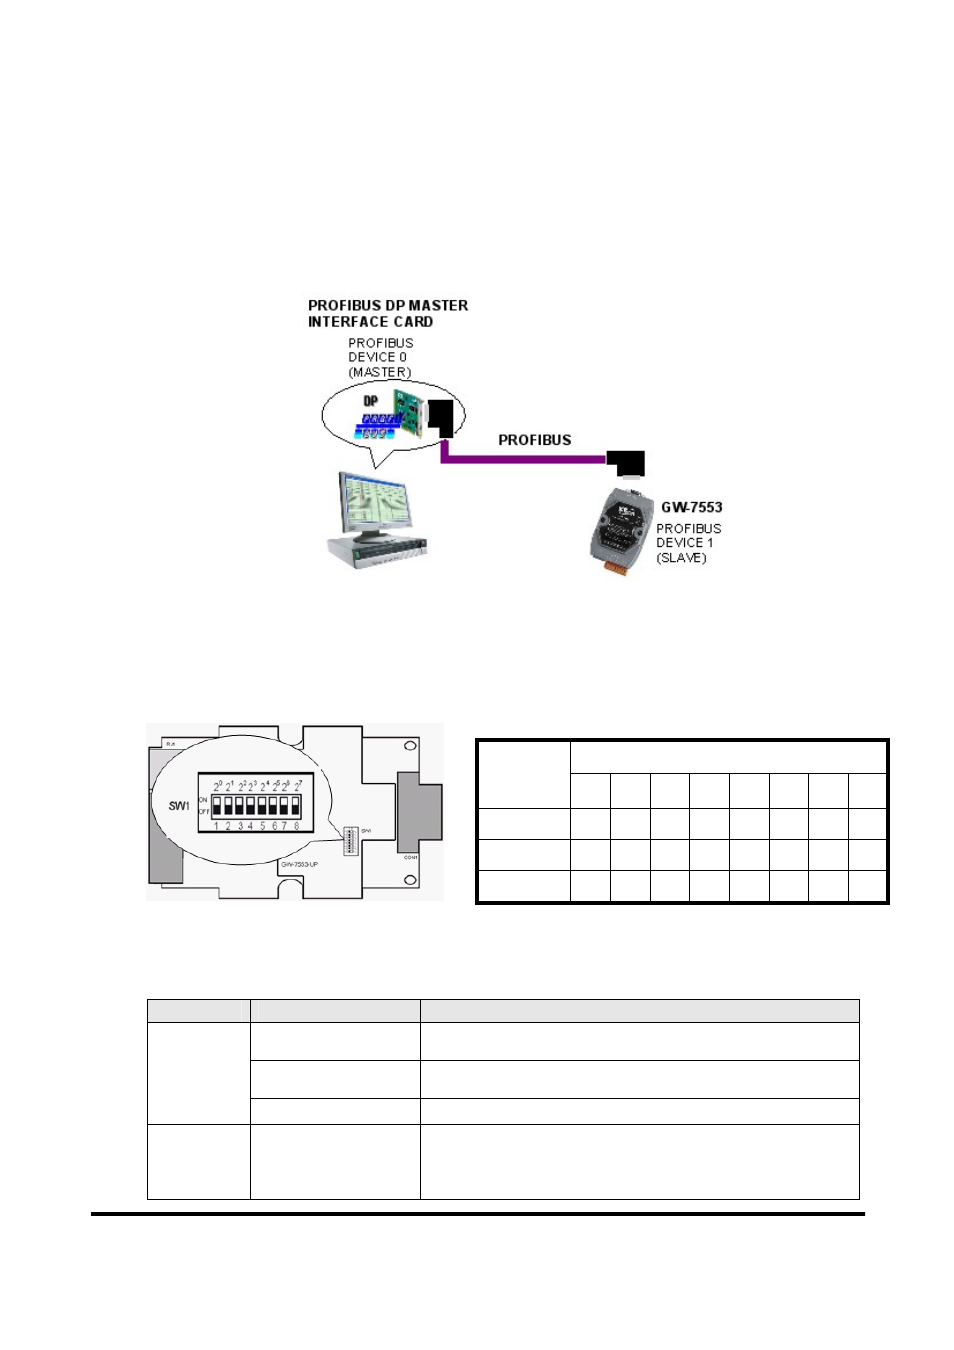
PROFIBUS connection
Here we recommend users to use the standard PROFIBUS cable and
connector (DB9 male). It is only needed to use D-type connector via
PROFIBUS cable to connect PROFIBUS Master station and GW-7553
module. PROFIBUS Master station and GW-7553 module belong to terminal
equipments in this example, thus we need to enable the terminator resistor in
the D-type connector.
Address setting
The GW-7553 is a slave device of PROFIBUS DP protocol. The station address
of GW-7553 can be set by DIP switch. The DIP switch can be seen by open the
cover, as shown in the below. The range of DIP switch is 0~126, here we set
GW-7553 module’s DIP switch to 1.
LED status indicator
LED
Status
Description
flash
When the GW-7553 is a Modbus Slave device and receiving
query message form Modbus Master device, PWR led will flash.
on
Power supply is ok.
The firmware has loaded.
PWR
off
Power supply has failed.
ERR
flash
When the GW-7553 connects with the utility tool, it will flash
fast (flash once about 55ms).
When the GW-7553 has diagnostic message, it will flash slowly
(flash once about 220ms).
DIP switch (SW1)
Station
address
1 2 3 4 5 6 7 8
1
1 0 0 0 0 0 0 0
10
0 1 0 1 0 0 0 0
31
1 1 1 1 1 0 0 0
Note: 1=>ON, 0=>OFF
GW-7553 PROFIBUS/Modbus TCP Gateway Quick Start (Version 1.00, DEC/2008) PAGE:2