Daystar KF09101BK User Manual
Page 3
5
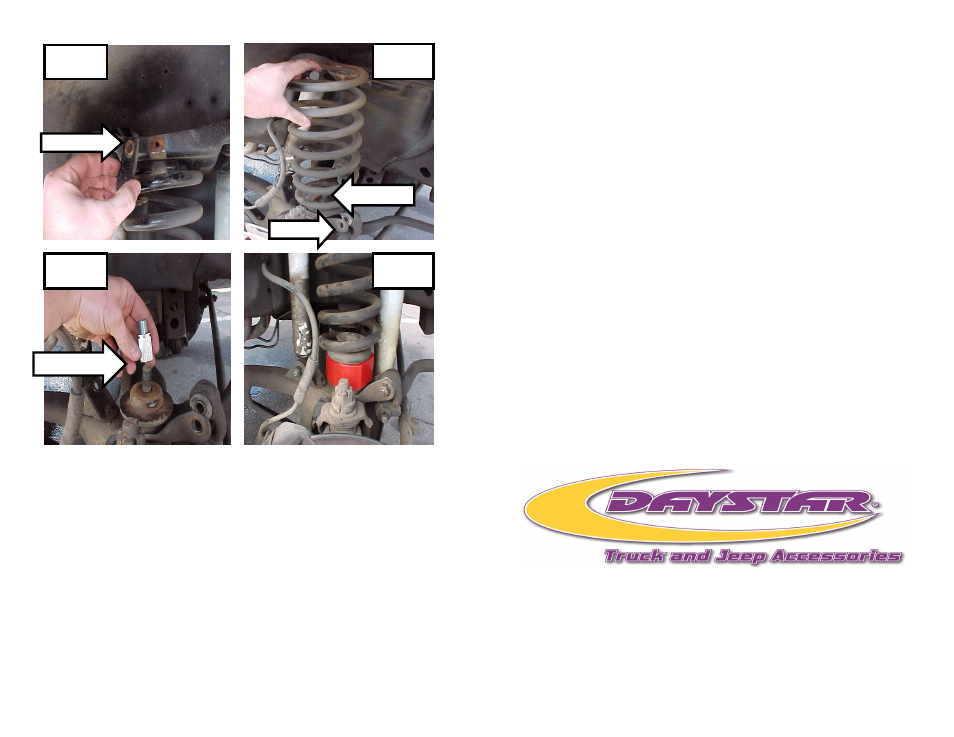
8 Install the coil spring spacer onto the lower coil spring mount.
NOTICE: You may have to use a coil spring compressor to re
install spring
9 . Install coil spring into the upper frame pocket and the lower on to
the spacer and bolt lower mount.
CAUTION: coil spring being compressed will be under extreme
pressure. Take caution installing.
10.After install spring reinstall the upper clamp and the lower coil
spring bolt and nut with washer. See figure 1 and 4
11. Reconnect the sway bar end link attaching points and the shock
nuts.
Fig 1
Fig 2
Fig 3
Fig 4
Top Clamp
Stud extender
Nut /washer
Sway bar
6
Daystar® Lifetime GoEverywhere Limited Warranty
Your Daystar® Comfort Ride or Budget Boost leveling kit is covered by the
following Go Everywhere Lifetime Limited Warranty provided exclusively
by Daystar Products International, Inc., 841 South 71st Ave., Phoenix, AZ
85043 (“Daystar”).
12.Then then double check the installation.
13. Reinstall driver and passenger tires and wheels.
14. Remove jack stands and lower the truck back on the ground. Re-
move all jacks and jack stands from under vehicle.
15. Torque the lug nuts to 85ft.lbs. using an X pattern.
Caution: Have an alignment professional check and adjust the
alignment to factory specifications.
16. With the vehicle on the ground cycle the steering wheel side to
side and inspect suspension components, brake lines and tires to
ensure there are not any clearance issues. Jounce the suspension to
assure front suspension operates freely, brake lines retain proper
slack at full extension and that they remain clear of springs or oth-
er obstructions.
17. Install “Warning to Driver” decal on the vehicle’s sun visor or
dash. The decal must be placed in a conspicuous location. Anyone
that operates the vehicle must be made aware of the changes
made.
18. After 25 miles of driving re-torque the lug nuts to 85 ft.lbs..
19. After 500 miles of driving re-torque all of the hardware associated
with the leveling spacer installation to factory specifications. Re-