Rough Country PERF679 User Manual
Page 2
FRONT INSTALLATION INSTRUCTIONS
1. Chock the rear wheels and jack up the front of the vehicle and support the vehicle with jack stands so that the front
wheels are off the ground.
2. Using a 19mm deep well socket remove the front tires/wheels,
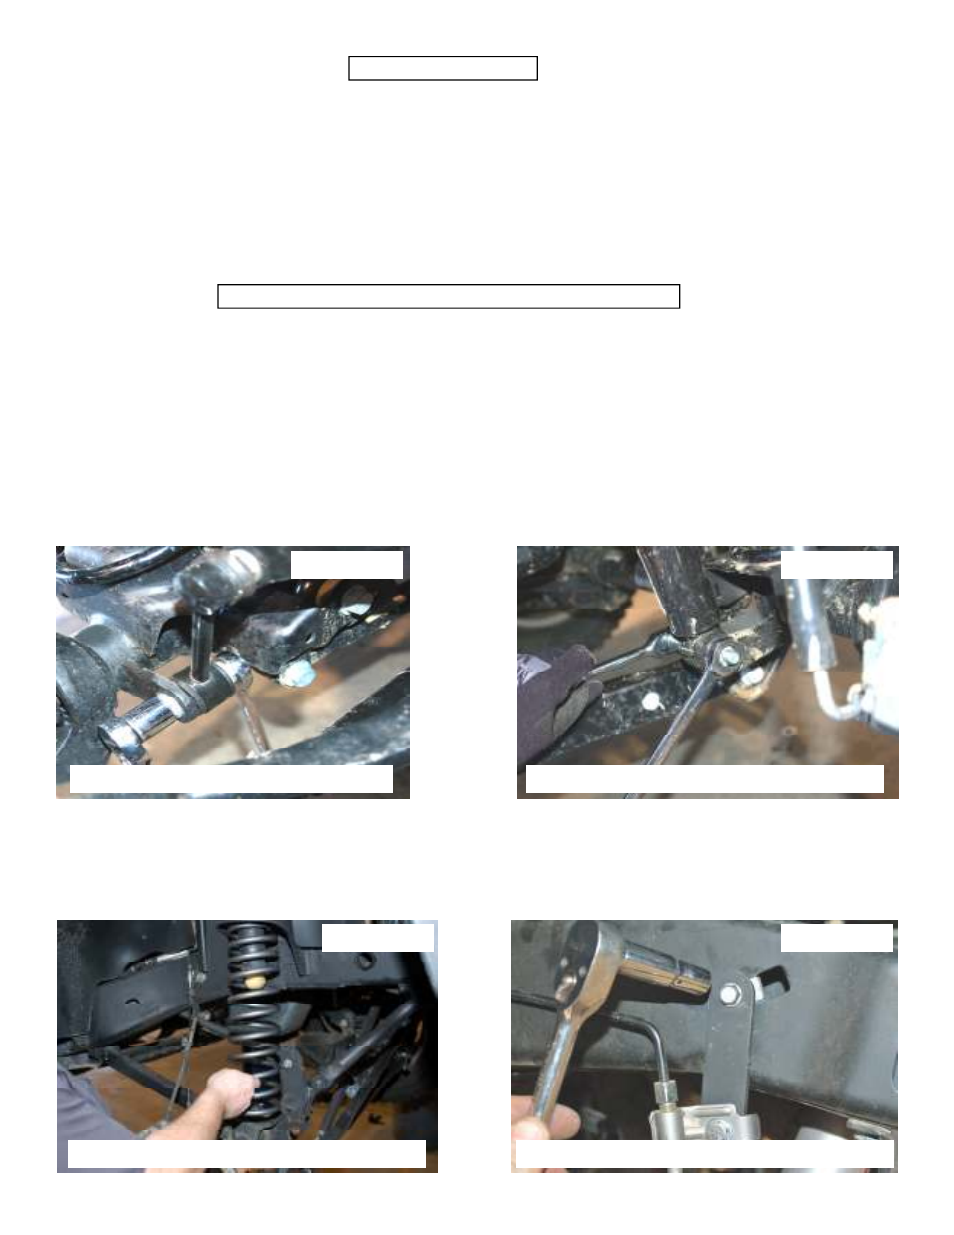
3. Using a 18mm socket and wrench remove the bottom sway bar bolts. Retain hardware for later use. See Photo 1
4. Using a 18mm socket and wrench remove the lower shock bolt. See Photo 2. Retain the lower hardware for reuse.
5. Using a 10MM socket, remove the brake line bracket from the stock location.
6. Push down on the axle to allow room for the coils to be removed. Remove coil springs, and factory spring isolator.
7. Install the coil spring over the factory bump stop with the factory isolator as shown See Photo 3.
8. Be sure to rotate the spring until the pigtail hits the stop.
9. Install the brake line extension bracket with the stock hardware to the frame. Install the stock line to the bracket with
the supplied 1/4” x 1’ bolt, washers and nut. See Photo 4.
Photo 1
Photo 2
10mm Wrench-
16mm Wrench
16mm Socket-
18mm Wrench-
18mm Socket-
19mm Deep Well Socket-
Jack
Jack Stands
1/2” Socket/ Wrench
7/16” Socket / Wrench
Size Grade 5
Grade 8
5/16” 15 ft/lbs
20 ft/lbs
7/16” 45 ft/lbs
60 ft/lbs
1/2” 65 ft/lbs
90 ft/lbs
9/16” 95 ft/lbs
130 ft/lbs
Class 8.8 Class 10.9
10MM
32ft/lbs
45ft/lbs
12MM
55ft/lbs
75ft/lbs
Torque Specs:
Photo 4
Photo 3
Tools Needed:
19mm Deep Well Socket-
Jack
Jack Stands
1/2” Socket/ Wrench
7/16” Socket / Wrench
Remove the sway bar link from the axle
Remove the shock from the axle
Install the new coil spring
Install the brake line bracket on frame and line