Rough Country 87495.20 User Manual
Page 2
CAUTION: Any and all warranties including but not limited to any express warranties,
implied warranty of merchantability, or implied warranty of fitness for a particular pur-
pose shall not apply to any product altered in any way outside the premises of the manu-
facturer or to any product which is not installed in accordance with the written instruc-
tions provided by the manufacturer for installation of the product.
5. Tighten all brackets / hardware.
6. Install the stabilizer cylinders using the supplied ½”
hardware as shown in Finished Assembly picture be-
low.
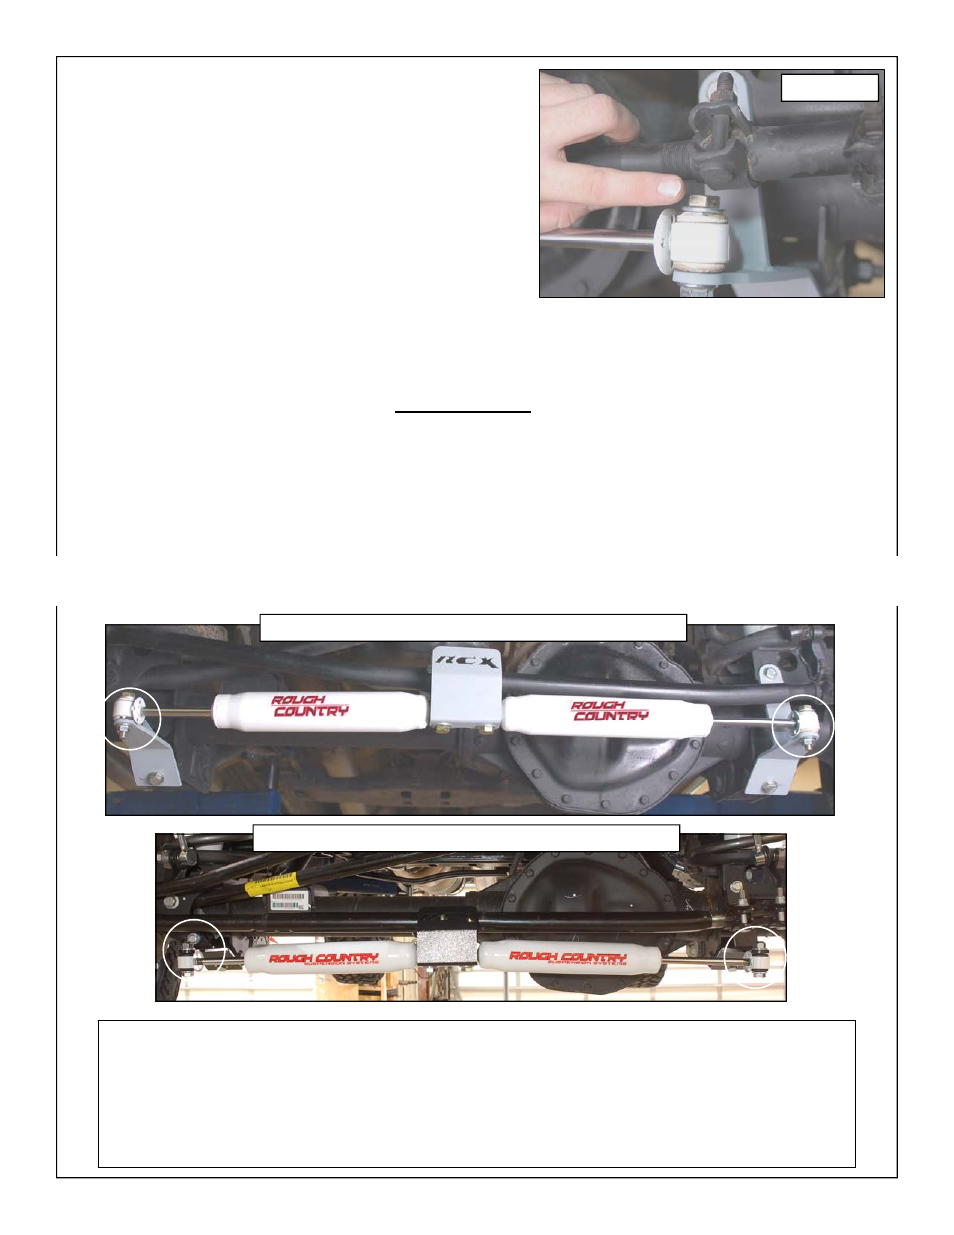
7. IMPORTANT NOTE: You must adjust the collar on
the driver side to allow for clearance of the stabilizer
cylinder. Loosen one clamp at a time on the collar
and turn up out of the way. When the vehicle is
aligned is very important that this step is followed
each and every time. See Photo 7.
8. Turn wheels fully to the right and left making sure that
no interference occurs and that wheel stops are con-
tacted. Re-check all nuts for proper tightness before releasing installation.
9. Periodically inspect for tightness
.
BOX CONTENT
2-STABILIZER CYLINDERS
1-DRIVER SIDE BRACKET
1-PASSENGER SIDE BRACKET
1-CENTER BRACKET
1-POLY BAG
FINISHED ASSEMBLY SHOWN ON 2010 MODEL
PHOTO 7
FINISHED ASSEMBLY SHOWN ON 2012 MODEL
On some later 2011-2012 models the steering stabilizer cylinders may need to be mounted on the bottom of the
driver and passenger end bracketsm to ensure clearance between the tie rod end and the cylinders.