Rough Country 1126 User Manual
Page 2
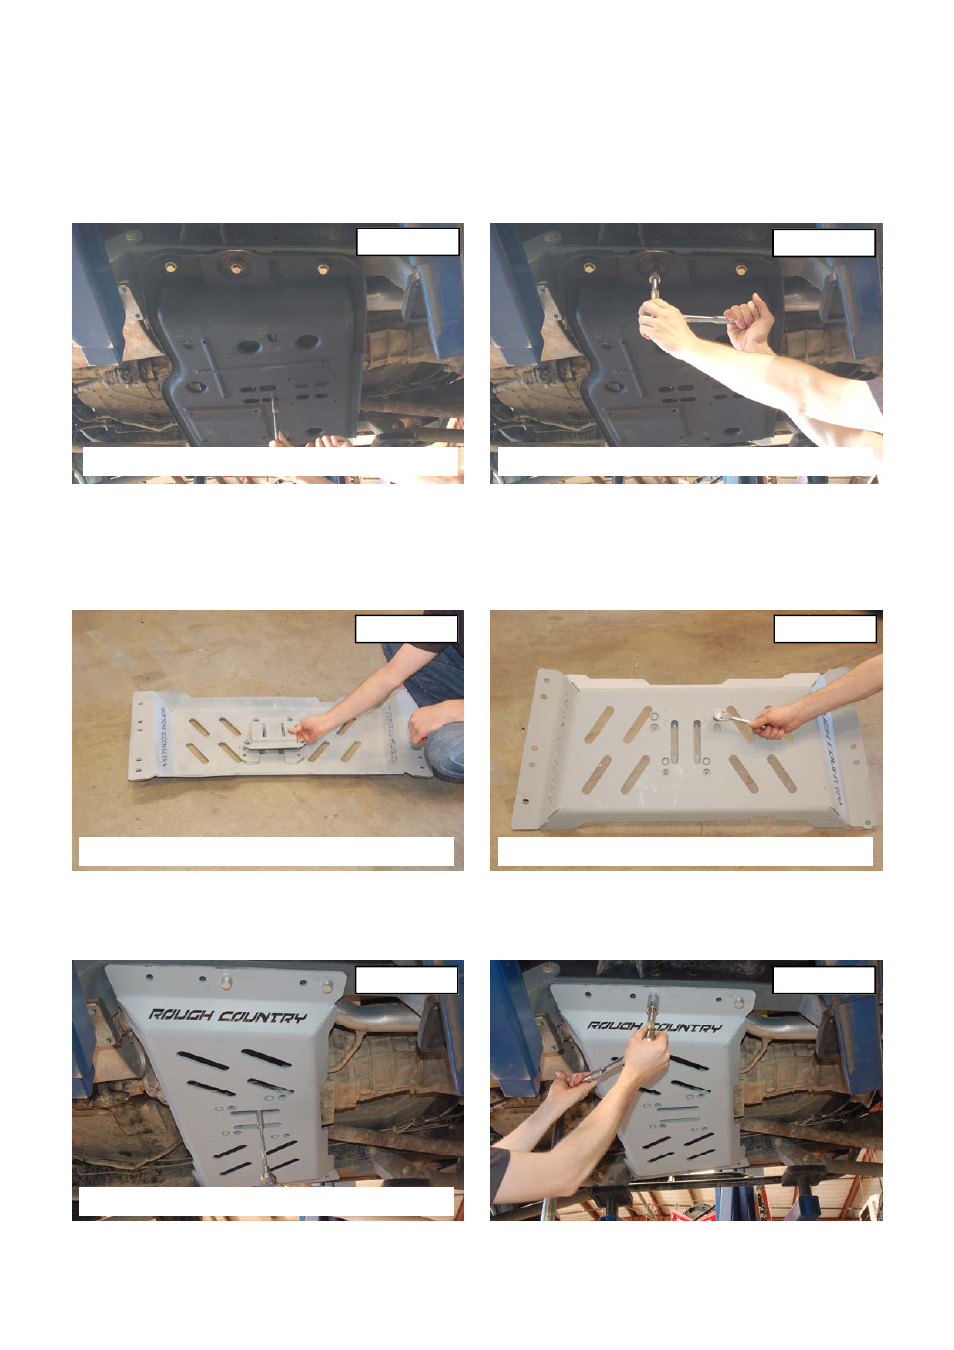
1. After the motor mount kit and 1 1/4” Body lift is installed, proceed to high clearance skid plate installation.
2. Remove the transmission hardware that secures the transmission to the stock skid plate. See Photo 1. Retain the
stock hardware.
3. Make sure to support the transmission and transfer case with a floor jack or jack stand.
4. Remove the skid plate from the frame rail as shown in Photo 2 using a 3/4” wrench for 97-02 and 18mm for 03-
06. Retain the factory hardware for the 03-06 models as it will be reused. New bolts are supplied for the 97-02
models.
5. Lower the transfer case skid plate down and remove from the vehicle.
6. The skid plate has two sets of holes for the transmission mounting bracket. See Photo 4.To identify which set of
holes to use, the skid plate and bracket will need to be trial fit on the vehicle.
7. Align the hole on the frame rail and the holes on the transmission mounting plate. After noting which set of holes
to use, remove the skid plate and mounting plate and secure the transmission mounting plate to the skid plate
with the supplied 3/8” x 1” bolts. Tighten using a 9/16” socket / wrench. See Photo 3.
8. Reinstall the skid plate and mounting bracket back on the frame rail and secure the transmission to the plate us-
ing the factory hardware. See Photo 5.
9. Install the plate on the frame rail with the supplied 1/2” x 1 1/2” bolts / washers for the 97-02 Models. On 03-06
models the factory hardware will be reused. See Photo 6.
POST INSTALLATION
• All components must be retightened after 500 miles, and every three thousand miles after installation.
INSTALLATION INSTRUCTIONS
PHOTO 1
PHOTO 2
PHOTO 3
PHOTO 4
PHOTO 5
PHOTO 6
REMOVE THE TRANSMISSION NUTS
REMOVE THE FRAME RAIL BOLTS
MOUNT TRANSMISSION PLATE TO SKID
TIGHTEN HARDWARE
REINSTALL TRANSMISSION HARDWARE