Rough Country 7501 User Manual
Page 4
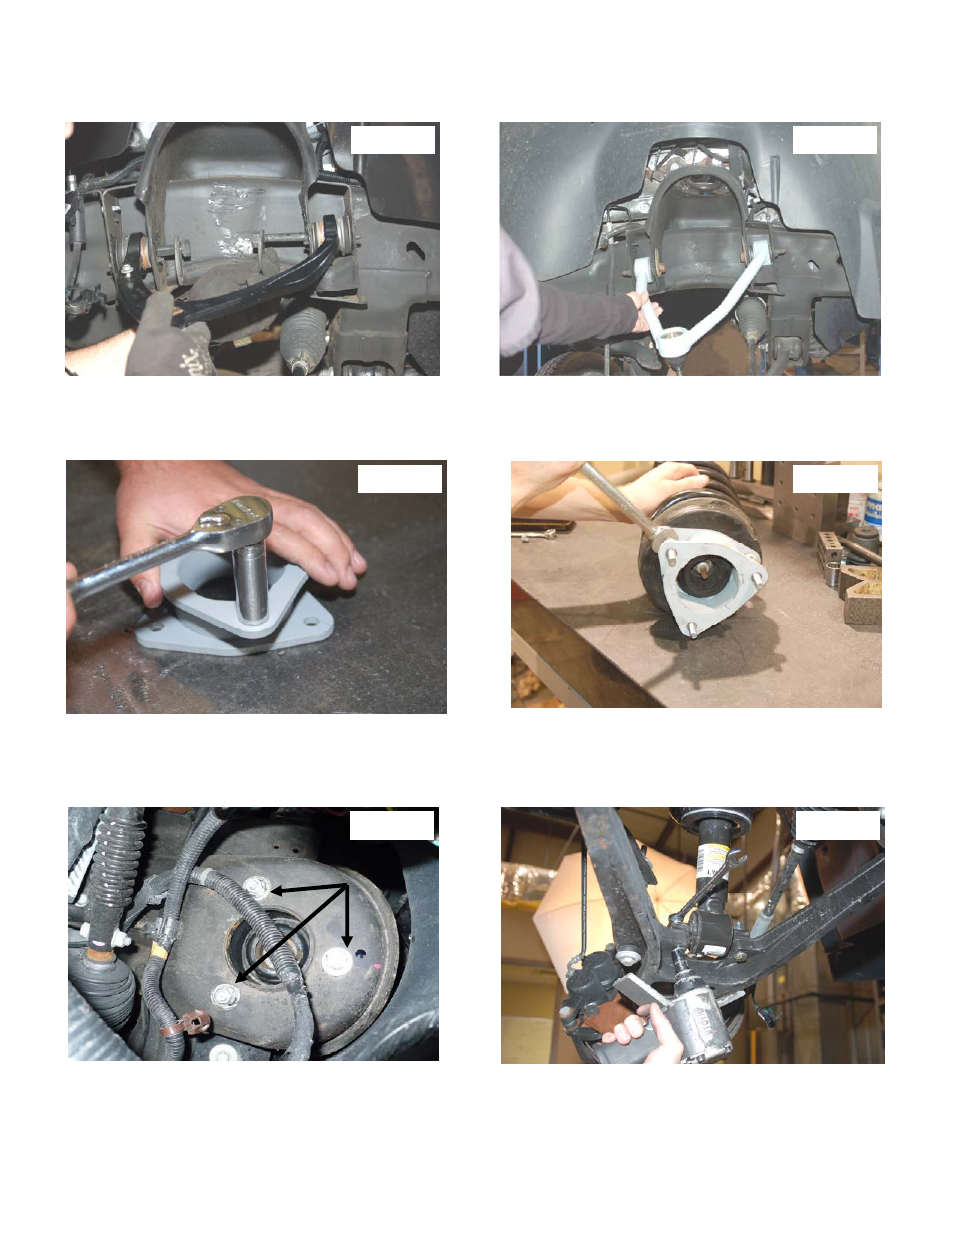
10. Mark location of alignment cams on upper control arms to allow installation of new arm to same position. Using a
21mm wrench and 21mm socket, remove the upper control arms from the vehicle.
See Photo 7. Retain the hardware.
11. Install the new control arm in the factory mount as shown in
Photo 12 with the factory hardware and tighten using mark
made as a reference in Step 10 and using a 21mm wrench & socket.
12. Locate the supplied strut spacer and install the supplied 10mm stud extensions. Using a 17mm socket snug the stud in
the new spacer as shown in
Photo 9.
13. Install the strut spacer on the factory strut with factory hardware and using a 18mm wrench.
See Photo 10.
14. Install the strut assembly in the factory mount with the supplied 10mm nuts/washers & lock-washers on the upper
mount. Tighten using a 17mm wrench.
Flat washer must be installed on stud as shown in Photo 11.
15. Install the strut in the lower control arm using the supplied 3/8
” 2 1/4” bolts /washers & nuts using a 9/16” wrench.
See
Photo 12. It may be necessary to jack up the lower control arm with a floor jack to align lower strut holes.
Photo 8
Photo 7
Photo 11
Photo 12
Photo 9
Photo 10