Rough Country 1047 User Manual
Page 2
Thank you for purchasing a Rough Country Suspension Component.
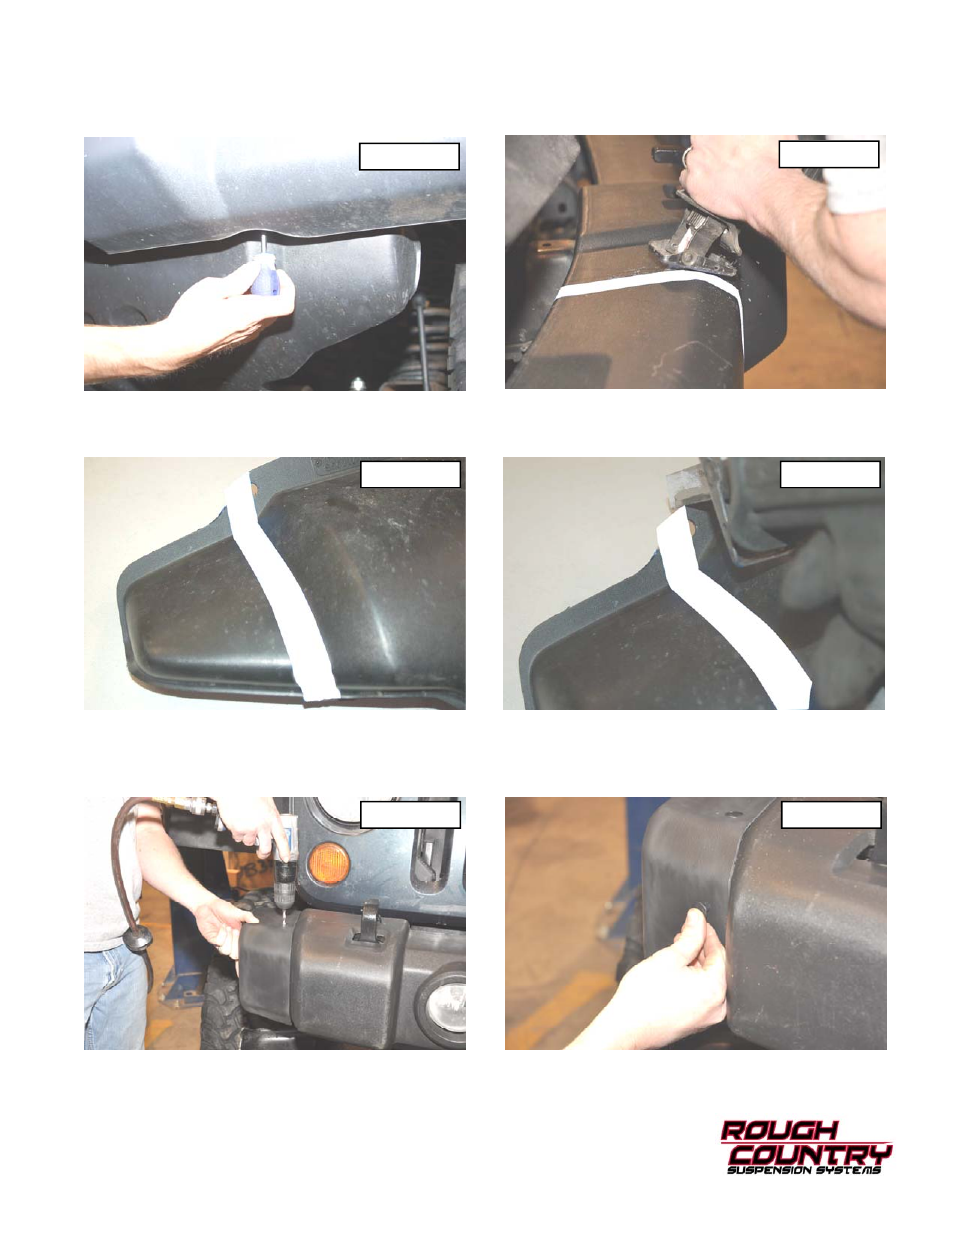
3. Remove the Phillips screws (2) securing the lower cover to the bumper as shown in Photo 3 to allow the bumper
and lower cover to be trimmed.
4. Cut the bumper using a reciprocating saw, making sure to remove the steel bumper behind the plastic bumper. See
Photo 4.
5. Mark the lower cover as shown in Photo 5.
6. Cut using a reciprocating saw as shown in Photo 6. (Cover shown removed from vehicle for picture purposes
but does NOT have to be removed, trimming can be accomplished while installed on the vehicle).
7. Place the caps on the bumper making sure the caps are aligned with the bumper. Note: There is a passenger and
drivers side cap.
8. Using a 1/4” drill bit, drill the 5 holes per cap using the bumper cap as a guide. See Photo 7.
9. Lastly install the driver and passenger side caps as shown in Photo 8 using the supplied black pins.
PHOTO 7
PHOTO 8
PHOTO 5
PHOTO 6
PHOTO 3
PHOTO 4