Rough Country 1058 User Manual
Page 2
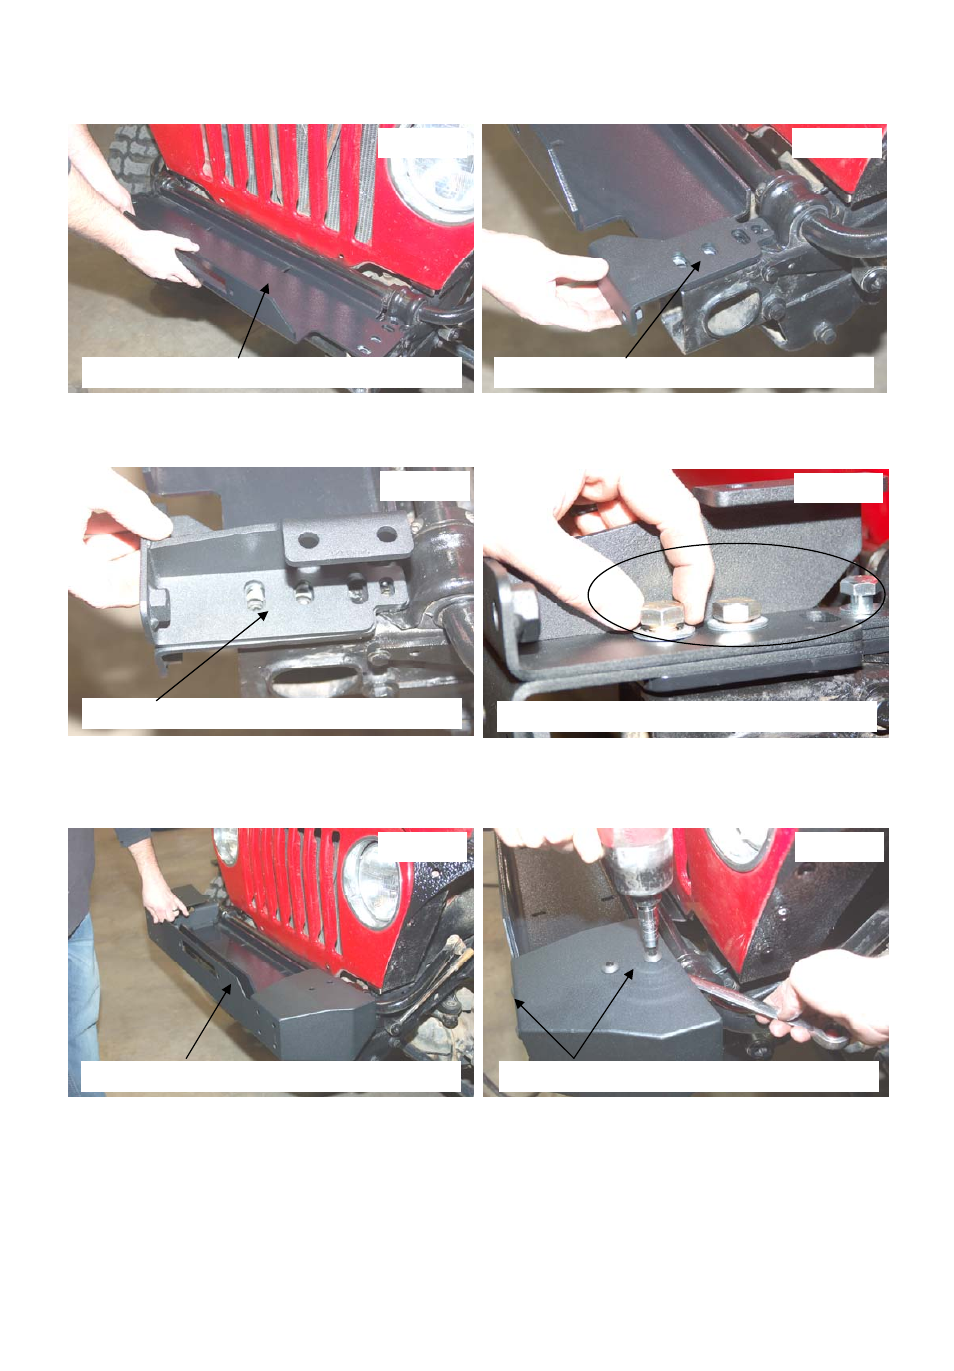
7. Place winch mounting plate in position and align the mounting holes on the plate with the holes on the
frame. See PHOTO 3.
8. Install the supplied bumper brackets as shown on the winch plate. See PHOTO 4.
9. Place the upper bracket on the lower bracket. See Photo 5.
10. Install the bracket using the supplied 10mm x 40mm bolts / washers (TJ only) in the rear holes and the 1/2”
x 1 1/2” bolts / washers as shown in Photo 6. Do not fully tighten at this time.
11. Place the bumper on the bumper brackets and align the hole in the bumper with the brackets. See Photo 7.
12. Install the supplied 1/2” X 1 1/2” button head bolts in the top with supplied lock nuts and in the front holes in
the bumper. If D-ring mounts, stingers or light bars were purchased with this kit, install at this time with the
supplied 1/2” x 1 1/2” button-head bolts using a 8mm allen bit. Tighten the bumper hardware. See Photo 8.
13. Tighten the frame to bracket hardware using a 3/4” & 17mm wrench.
14. Install the winch per the instructions included with the winch. The supplied 3/8” x 1 1/4” Bolts & lock nuts will
be used to secure the roller fairlead/ hawse lead to the winch bumper / plate.
PHOTO 3
PHOTO 4
PHOTO 5
PHOTO 6
PHOTO 7
PHOTO 8
PLACE THE WINCH PLATE ON FRAME
PLACE THE FRAME BRACKET ON PLATE
PLACE THE UPPER BRACKET ON LOWER
INSTALL HARDWARE
PLACE BUMPER ON BRACKETS AND ALIGN
INSTALL 1/2” BUTTON HEAD BOLTS