Rough Country 349.23 User Manual
Page 5
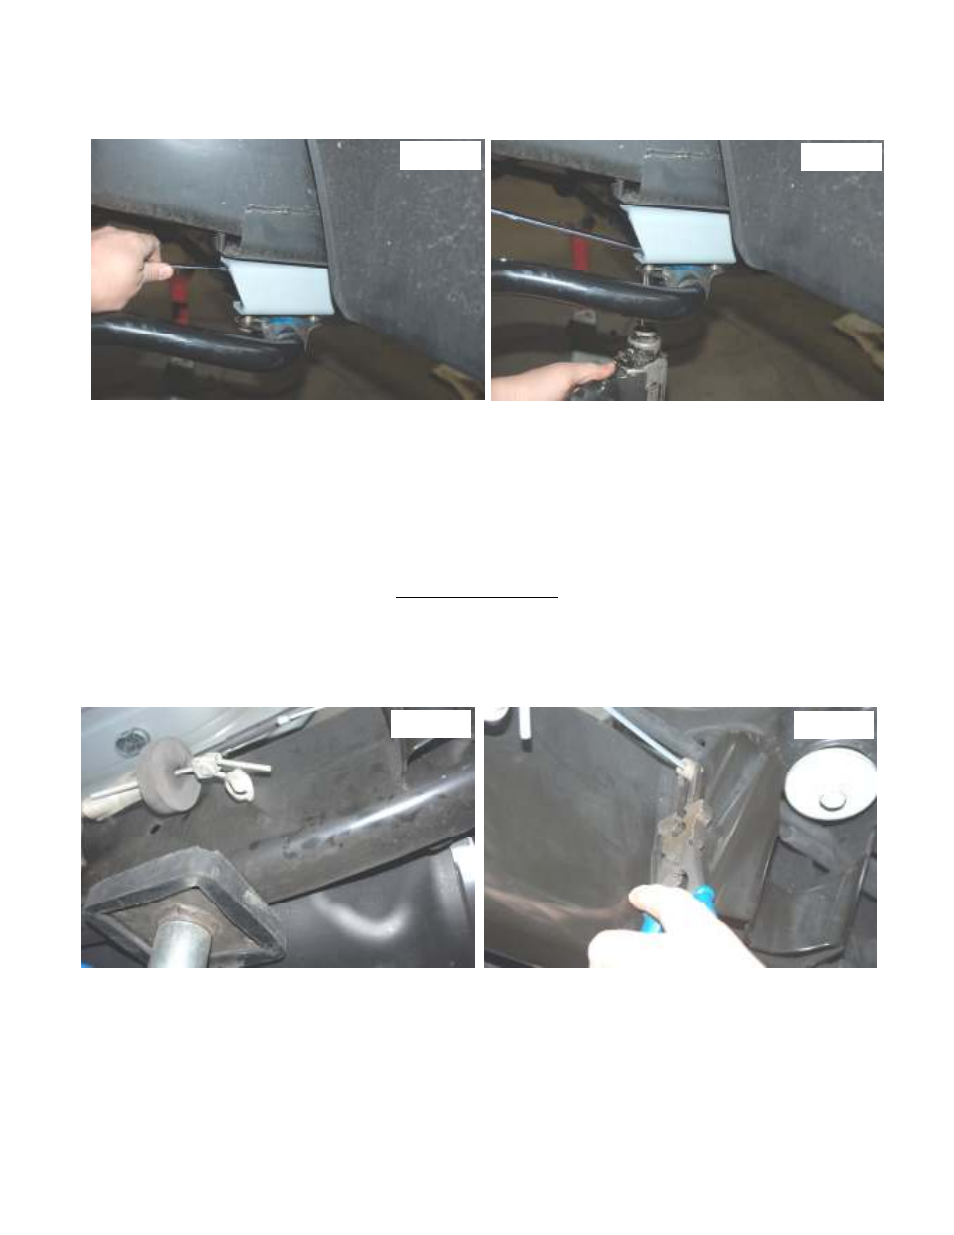
24. Install the sway bar drop bracket as shown in Photo 14 and secure to the frame using the factory hardware. Tighten
with a 18mm wrench.
25. Install the sway bar to the new bracket with the supplied 7/16” x 1 1/4” bolts, flat washers and nuts. See Photo 15.
Tighten using a 9/16” socket and wrench. Tighten the stock upper sway bar link hardware.
26. Install the tires / wheels. Lower vehicle to the ground.
27. Install the track rod in the new bracket using the supplied 16mm 80mm Bolt and lock nut.
28. Using a 13mm socket install brake line bracket to axle on driver and passenger side
29. Torque the fasteners to the following specifications:
Lower suspension arm cam nut……………110 ft/lbs
Lower suspension arm rear nut…………….88 ft/lbs
Upper suspension arm axle nut…………….89 ft/lbs
Upper suspension arm frame nut…………..62 ft/lbs
Track Rod Bolt………………………………..110 ft/lb
REAR INSTALLATION
1. Secure and block the front tires of the vehicle on a level concrete or asphalt surface.
2. Raise the rear of the vehicle and support the frame with jack stands. Remove the rear wheels and tires and set
aside.
3. Un-couple the e-brake cable on the drivers side of the vehicle. See Photo 1.
4. Remove the cable from the body mount using pliers to release the cable clips as shown in Photo 2
Photo 14
Photo 15
Photo 1
Photo 2