Rough Country 872 User Manual
Page 2
FRONT INSTALLATION
1. Park the vehicle on a level surface and chock the rear wheels.
2. Measure the front / rear to determine how much lift will be needed to level the vehicle. FR__________RR_________
3. Jack up the front of the vehicle using a floor jack. Place jack stands under the frame rails directly behind the lower
control arms and lower the vehicle onto the jack stands.
4. Remove the tires and wheels.
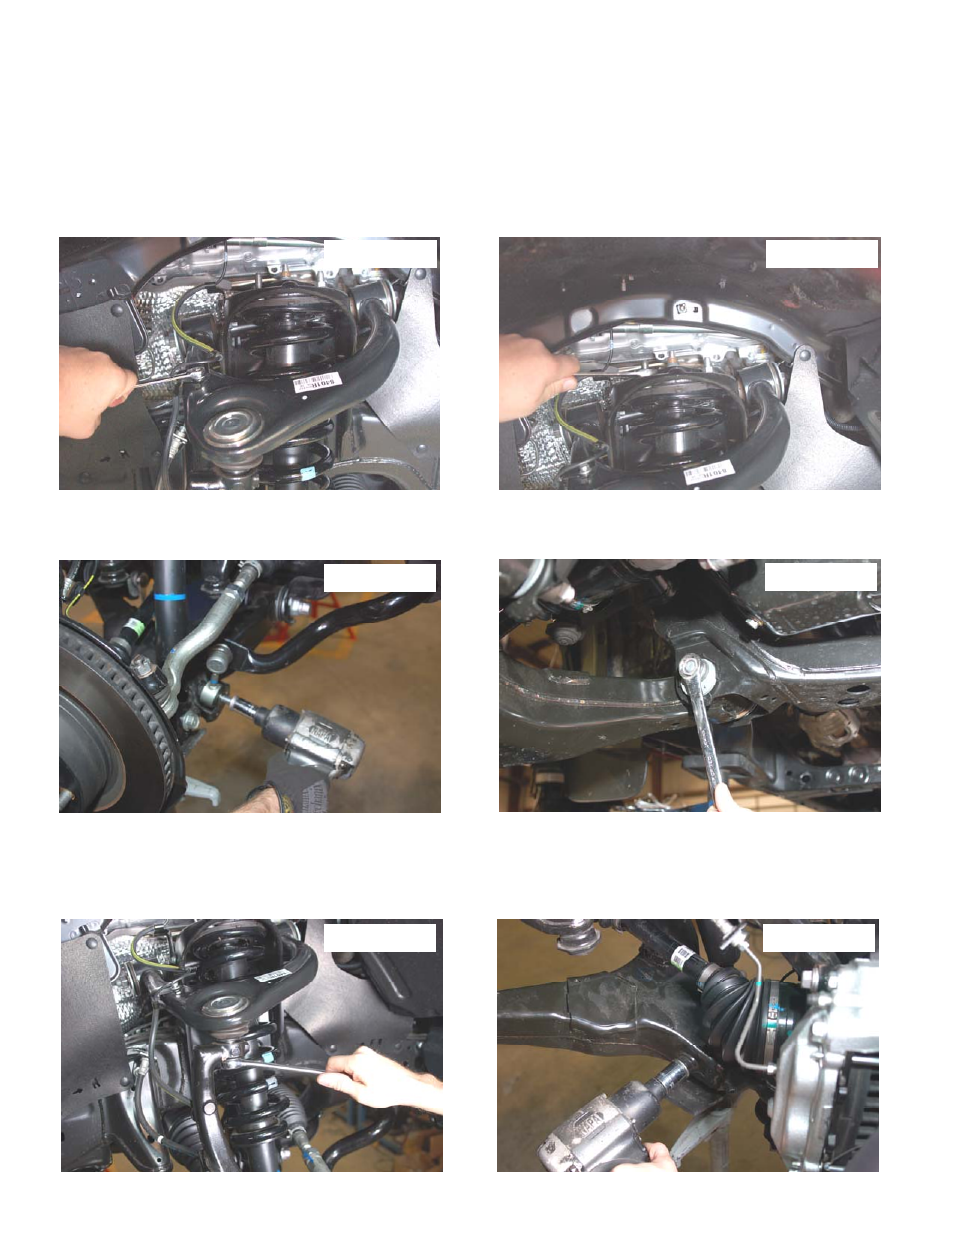
5. Remove the sensor wire bracket as shown in Photo 1 using a 10MM wrench. Take care not to overextend or
damage this wire. Retain the hardware for reuse.
6. Remove the upper strut nuts as shown in Photo 2 using a 14MM wrench. Retain hardware.
7. Remove the sway bar link from the lower control arms using a 19MM wrench. See Photo 3. Retain hardware.
8. Loosen , but do not remove the lower control arm bolts to allow the lower control arm to swing down using a 24MM
wrench. See Photo 4.
9. Remove the brake line bracket from the knuckle using a 12MM wrench.
10. Remove the upper ball joint nut using a 19MM wrench as shown in Photo 5. It may be necessary to hit side of the
knuckle to brake the taper lock loose.
11. Remove the lower strut bolts as shown in Photo 6 using a 22MM socket and wrench. Remove the strut from the
vehicle.
Photo 1
Photo 2
Photo 3
Photo 4
Photo 5
Photo 6