Rough Country 920 User Manual
Page 2
POST INSTALLATION INSTRUCTIONS
1. Check all fasteners for proper torque. Check to ensure for adequate clearance between all components.
2. Check and retighten wheels at 50 miles and again at 500 miles. Periodically check all hardware for tightness.
3. Install “Warning to Driver” decal on sun visor.
FRONT INSTALLATION INSTRUCTIONS
1. Chock the rear tires and jack up the front.
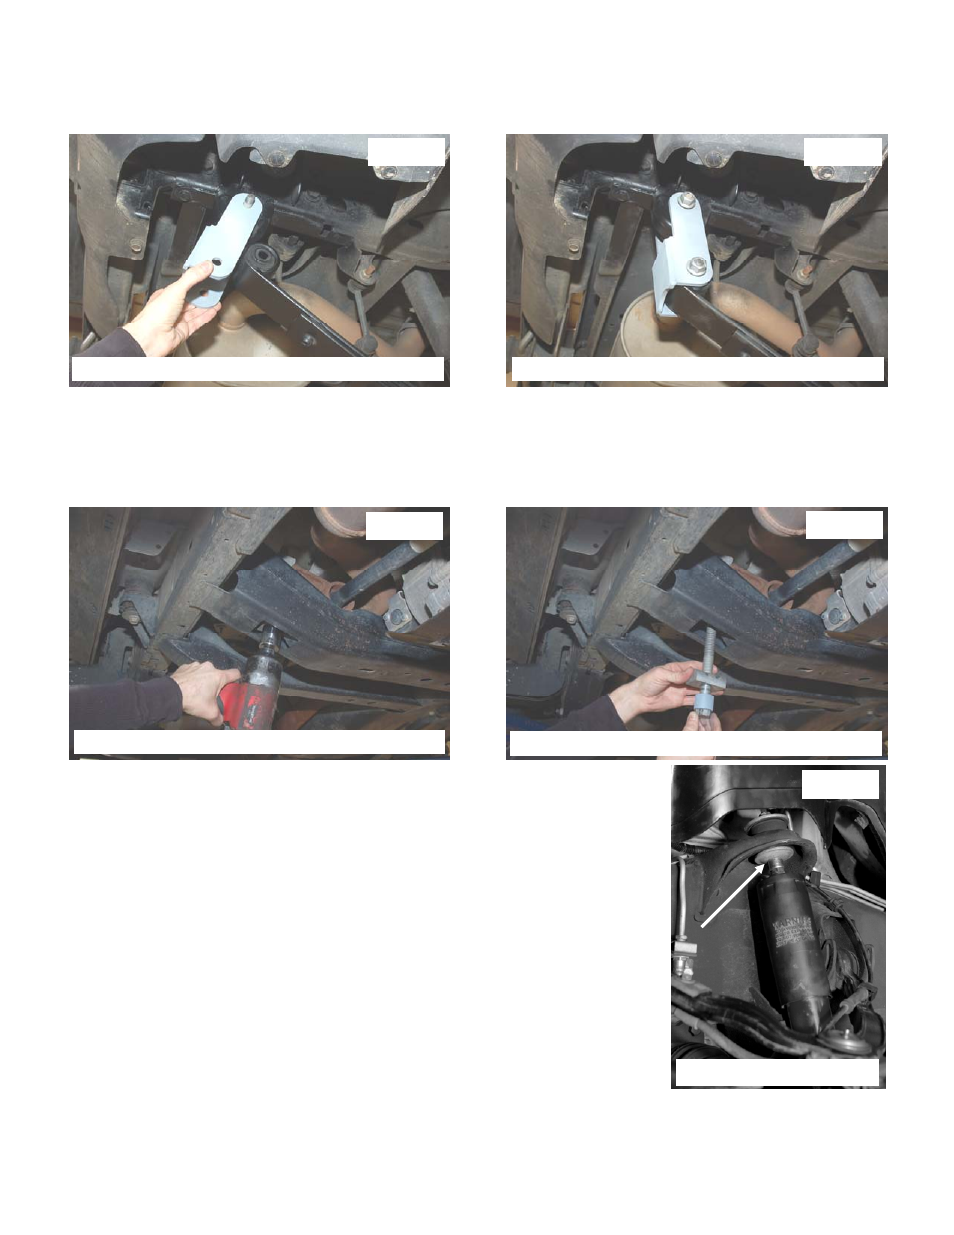
2. Remove the torsion bar adjuster bolt using 1 1/16” socket. See Photo 1.
3. Install the supplied spacer on the bolt and reinstall the bolt. See Photo 2.
4. Snug the bolt using a 1 1/16 to level the vehicle. Note: The weight of the vehicle will
need to be taken off the vehicle while adjusting the torsion bar bolts. Adjust bolt and
lower the vehicle to the ground. If adjustment is necessary jack up the vehicle and
re-adjust as needed.
5. Remove the upper shock from the mount and install the supplied stud spacer. See
Photo 3.
6. Reinstall the shock on the vehicle with the factory hardware.
6. Install the new shackles with the stock hardware. See Photo 3 & 4. Do not tighten at this time.
7. Jack up the vehicle and remove the jack stands.
8. Lower the vehicle to the ground.
9. Tighten the shackle hardware using a 21mm socket / wench.
Photo 3
Photo 4
Photo 1
Photo 2
Photo 3
Install the shackle on the frame
Install the shackle on the spring
Remove the torsion bar adjuster bolt
Install the sleeve on the torsion bar bolt
Install the sleeve