Rough Country 1040 User Manual
Page 2
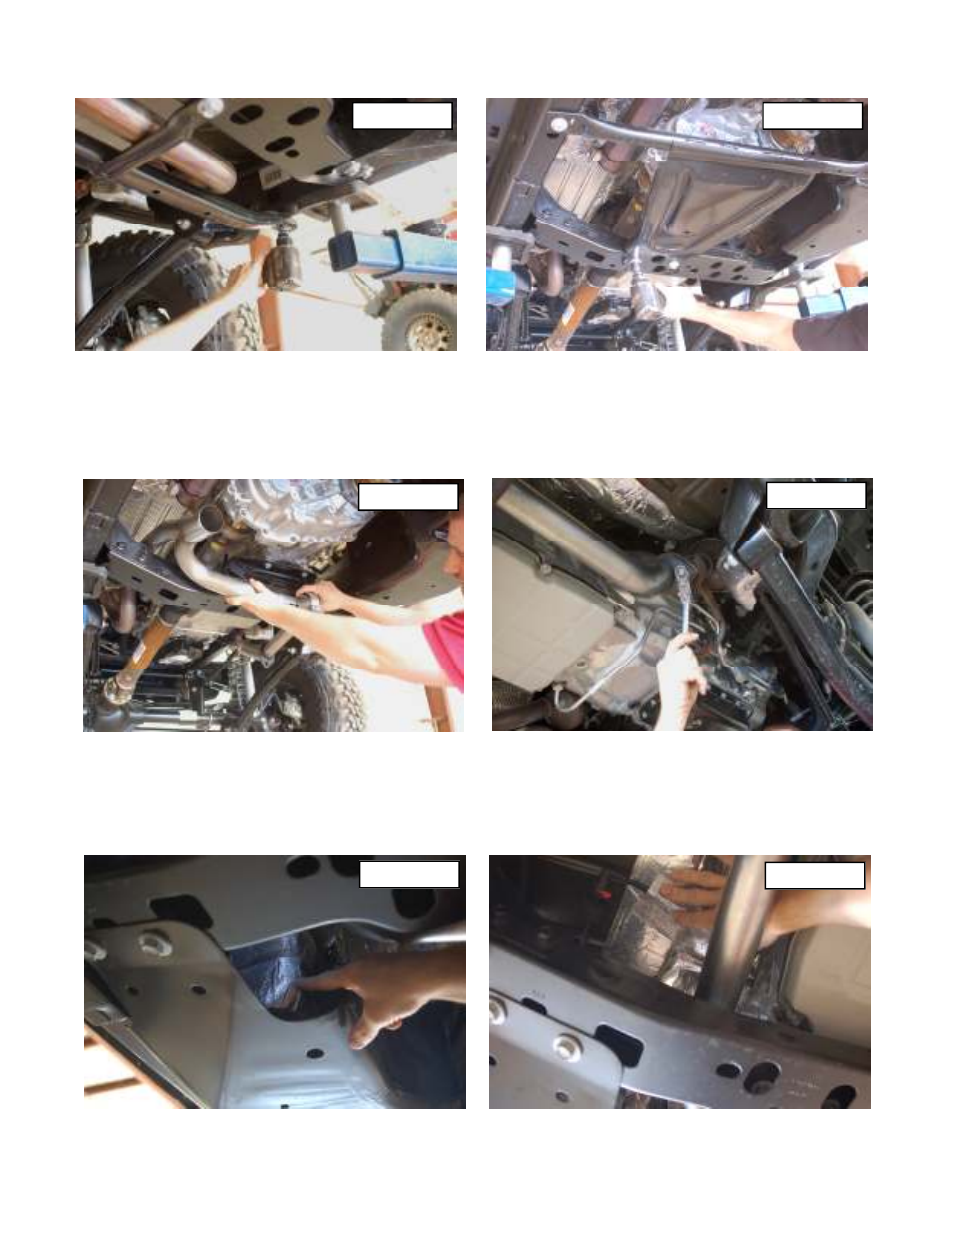
3. Remove the three bolts holding the crossmember brace with a 18mm socket. See Photo 3.
4. Next remove the four bolts holding on the skid plate with s 18mm socket. See Photo 4.
5. Slide the y-pipe forward until the pipe comes out of the rear clamp and remove from vehicle.
6. Next slide driver and passenger side y-pipe over the crossmember, assemble the connection between the two sides
before the pipe goes over the crossmember. Make sure the clamp is not tighten at this time. See Photo 5.
7. Slide the back of the y-pipe into the factory exhaust clamp do not tighten at this time.
8. Assemble driver and passenger exhaust flanges with factory bolts, tighten using a 13mm socket / wrench. See
Photo 6.
9. Tighten the clamp connecting the driver and passenger y-pipe and factory rear exhaust clamp with a 13mm socket/
wrench.
10. Next re-install the crossmember brace and factory skid plate using a 18mm socket.
11. Check to make sure the exhaust does not come in contact with the frame or any other components after it has been
relocated. Next using the supplied heat shield tape place one piece on the corner of the gas tank and another cover-
ing the fuel lines above the y-pipe. Cut tape as needed with scissors. See Photo 7 & 8.
POST INSTALLATION INSTRUCTIONS
•
All hardware must be tightened at 500 miles after installed and then checked periodically to ensure all fasteners are
tight.
PHOTO 3
PHOTO 4
PHOTO 5
PHOTO 6
PHOTO 7
PHOTO 8