Rough Country 1054 User Manual
Page 3
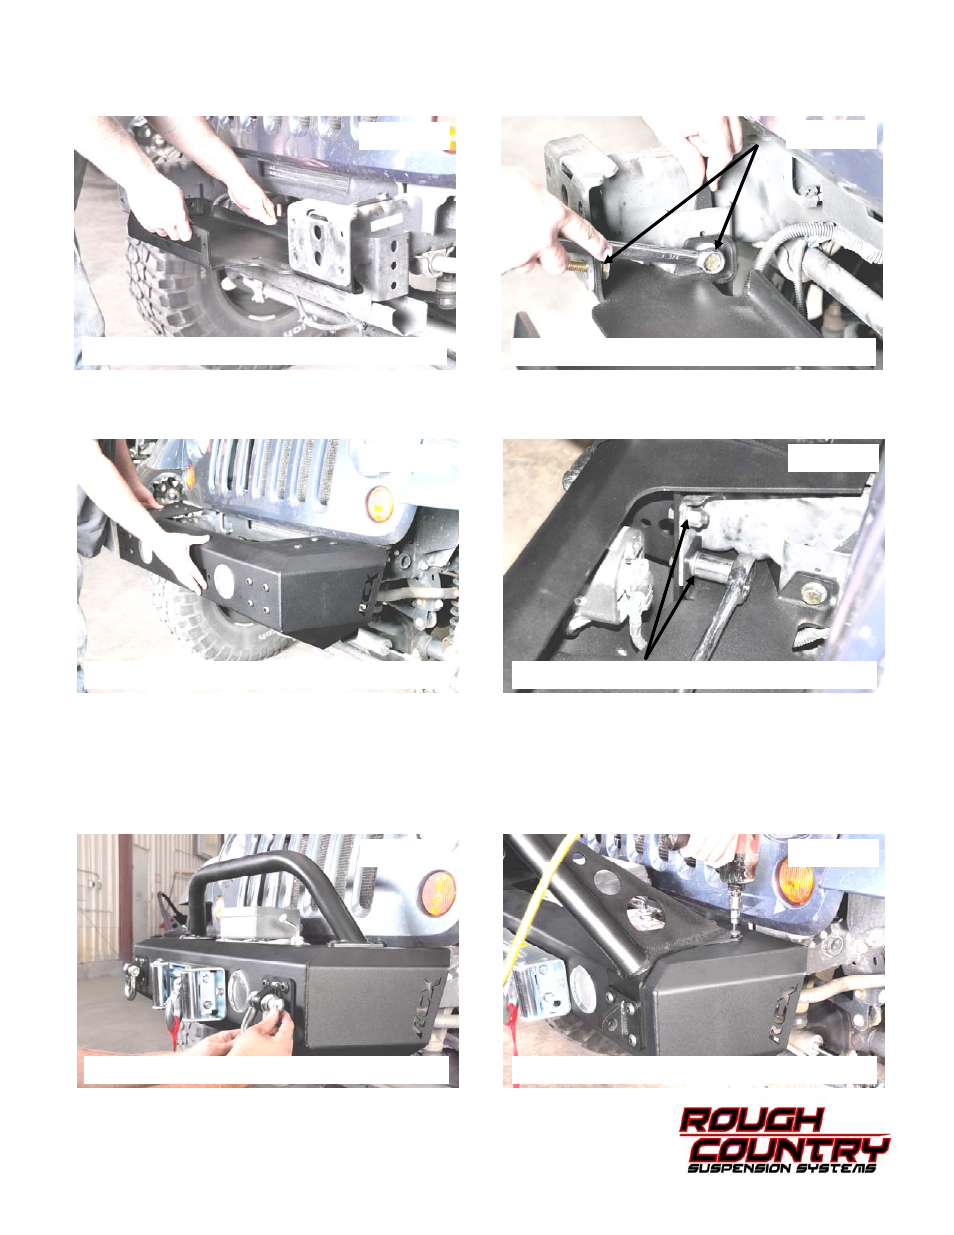
10. Place the winch plate into position on the frame. See Photo 7.
11. Install the winch plate on the frame with the supplied 1/2” x 1” Bolts, washer and nuts. Do not install the nut on the
front bolt. See Photo 8.
12. Position bumper in place on the bumper mounts. See Photo 9.
13. Secure bumper to the stock bumper mounts using the supplied 1/2” lock nuts and washers. Tighten using a 3/4”
wrench. See Photo 10.
14. Mounting hardware is included for the optional accessories that are available for this bumper. If no accessories are
used the allen head bolts will be used to plug the threaded holes.
15. For installing the optional D-ring mounts, install using the supplied 1/2” x 1 1/2” allen head bolts. See Photo 11.
Thread locker is recommended to ensure the hardware stays tight.
16. For installing the optional Light bar or Stinger, install using the supplied 1/2” x 1” allen head bolts. See Photo 12.
17. Due to the thickness of the winch plate / bumper. Most roller fairlead retaining bolts included in the winch will be too
short. Longer 3/8” x 1 1/4” bolts are included with this kit to install the roller fairlead/ hawse fairlead to the bumper.
Photo 7
Photo 8
Photo 9
Photo 10
Photo 11
Photo 12
POSITION WINCH PLATE
SECURE PLATE TO FRAME
POSTITION WINCH BUMPER
SECURE WINCH BUMPER
D-RINGS AND LIGHT BAR SHOWN
INSTALLING STINGER SHOWN