Rough Country 288.20 User Manual
Page 4
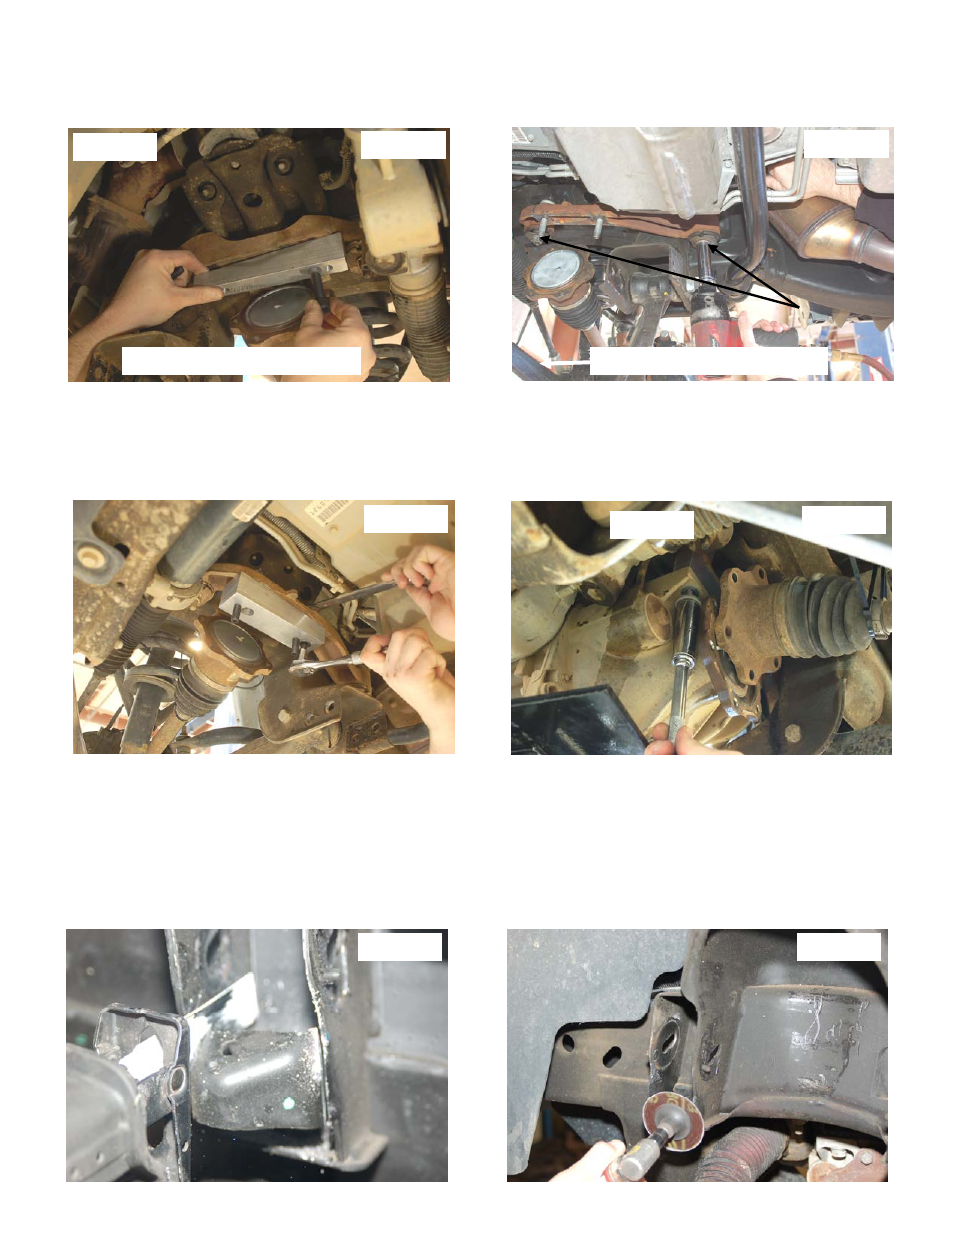
16. On the Drivers side, locate and secure the new diff mount drop bracket to the stock location using the supplied 12mm x
45mm socket head bolts. Tighten using a 10mm Allen head.
Note that the narrower diff drop bracket will install on
the driver side of the vehicle with the taller part to the front. See Photo 13.
17. Remove the stock differential bracket on the passenger side using a 18mm & 15mm socket / wrench.
See Photo 14.
18. Remove the factory studs using a hammer and then reinstall the factory mount. Tighten using a 18mm & 15mm wrench
19. Install the supplied differential bracket to the stock mount as shown in
Photo 15 with the supplied 12mm x 70mm socket
head bolts and 12mm lock nuts. Make sure the taller end of the bracket is to the front. Tighten using a 18mm wrench
and 10mm allen wrench.
20. Reinstall the differential on the Rough Country diff drop brackets with factory bolts on the driver side and factory nuts on
the passenger side. Tighten with a 18mm socket.
See Photo 16.
21. Reconnect the connector plug on the differential & pull the vent hose down slightly and reinstall on the differential. The
differential vent hose may be tapped to the electrical loom. If so separate and slightly pull for slack.
22. Reinstall the axle shafts to the differential with the factory hardware using a 15mm socket as removed in Step 15.
23. Cut the bump stop from the upper control arm mount on the passenger and driver side as shown in
Photo 17 using a
reciprocating saw.
Passenger side shown.
24. After the bump stop has been cut from the control arm mount, grind and apply paint to the cut surface to prevent rust-
ing.
See Photo 18.
Photo 17
Photo 18
Photo 14
Passenger Side Shown
Front
Photo 13
Driver Side Shown
Photo 15
Front
Photo 16