Rough Country 87496 User Manual
Page 3
7. Using the thick wall sleeve 3/8” I.D x 1.400 long in the poly bag, insert this sleeve into the rod end of one of the stabi-
lizer cylinders. This cylinder will be used on the passenger side.
8. Install the 3 shock remaining sleeves 1/2” I.D. x 1 1/2” into the stabilizer bushings.
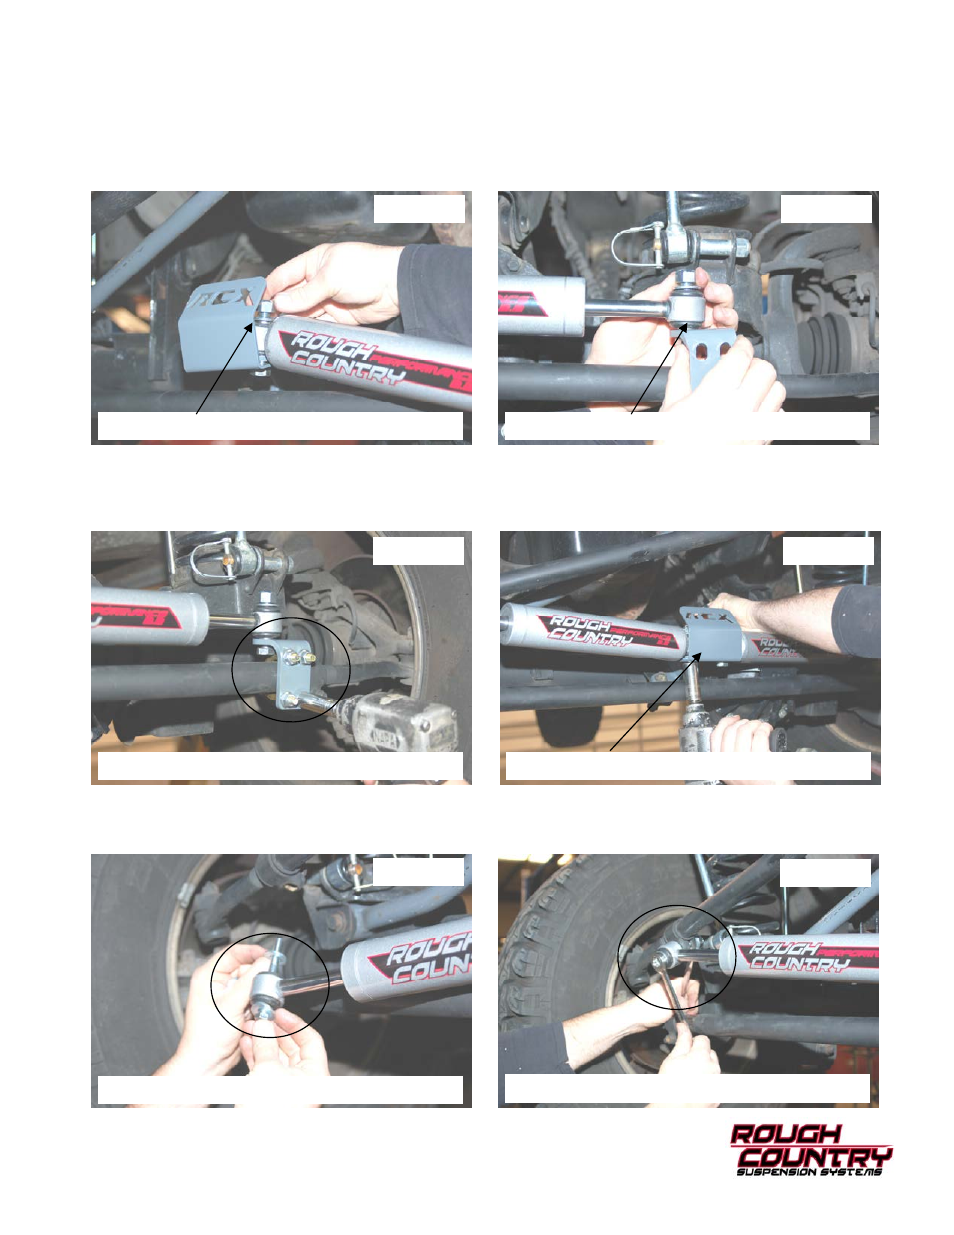
9. Turn the wheels all the way to the driver side. Insert one of the 1/2” x 2 1/2” long bolts through the RCX cover plate
and the center axle bracket. Next slide the stabilizer with sleeve over the bolt and hand tighten the nut. See Photo 7.
10. Install the 1/2” x 2 1/2” long bolt from the poly bag through the tie rod bracket and then install the stabilizer rod end
with the 1/2” washer and nut. Tighten with a 3/4” socket and wrench. See Photo 8.
11. Next using the 2- 3/8” x 1 1/2” u-bolts and 3/8” flange nuts, install the tie rod bracket to the drag link. Extend the sta-
bilizer 1/4” from fully extended and tighten the 3/8” flange nuts with a 9/16” socket. See Photo 9.
12. Using the 1/2” x 2 1/2” bolt, washer and nut, install the passenger side stabilizer to the center axle bracket. Tighten
the passenger and driver stabilizer with a 3/4” socket and wrench. See Photo 10.
13. Install the 3/8” x 3 1/2” bolt and washer from the poly bag through the stabilizer rod end with the thick sleeve. Next
slide a 3/8” washer on the bolt and insert the bolt into the factory steering link clamp. Secure with a washer and 3/8”
nut. Tighten with a 9/16” socket and wrench. See Photo 11 & 12.
PHOTO 12
PHOTO 10
PHOTO 8
PHOTO 11
PHOTO 9
PHOTO 7
Install the new 2.2 stabilizer cylinder
Install the tie rod bracket
Secure bracket to the tie rod
Install stabilizer cylinder to the center bracket
Install stabilizer to the steering link
Tighten hardware