Rough Country 1109 User Manual
Page 2
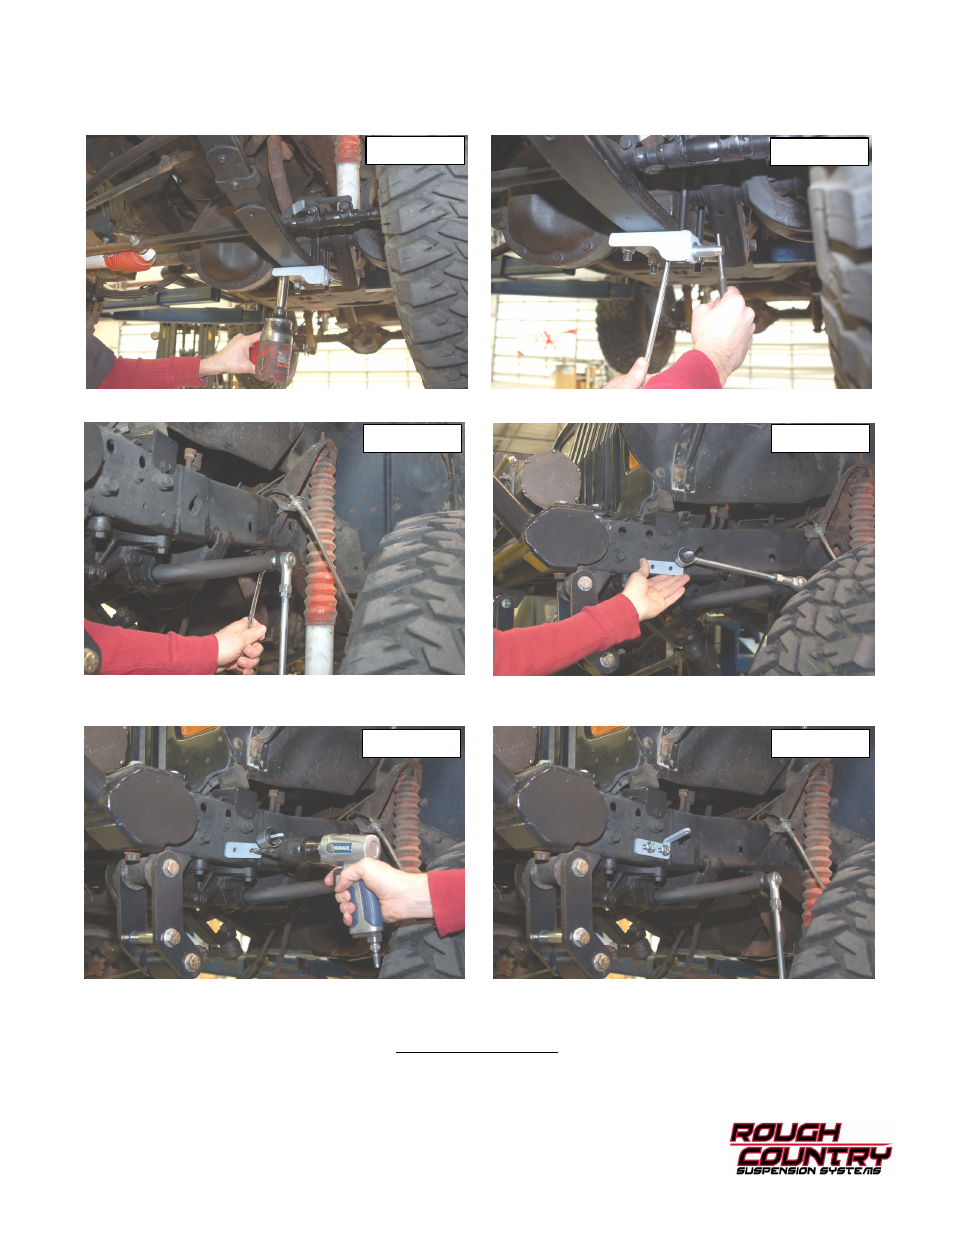
3. Install the spring plate with the pin holes facing forward and to the outside on the stock u-bolts. Tighten using a 3/4”
wrench. See Photo 3.
4. Install the supplied disconnect pin on the new spring plate with the 1/2” lock nuts. Hold pin by sliding a punch
through the hole, and tighten with a 3/4” wrench. See Photo 4.
5. Adjust the sway bar link to a length of 10 1/2” from end to end and tighten the jam nut using a 5/8” & 3/4” wrench.
6. Install the disconnect link on the sway bar with supplied hardware and tighten using a 19mm wrench. See Photo 5.
7. Swing up the sway bar link to determine the location of the frame bracket. See Photo 6.
8. Hold the bracket in place and drill the frame with a 9/32” drill bit using the bracket as a template. See Photo 7.
9. Install the supplied 5/16” self tapping bolts as shown in Photo 8 and tighten using a 1/2” wrench.
Thank you for choosing Rough Country for your suspension needs.
PHOTO 3
PHOTO 4
PHOTO 5
PHOTO 6
PHOTO 7
PHOTO 8
POST INSTALLATION
1. Check all fasteners for proper torque. Check to ensure there is adequate clearance between all rotating, mobile,
fixed and heated members. Check steering for interference and proper working order.
2. Re torque all fasteners after 500 miles. Visually inspect components and re torque fasteners during routine vehicle
service.