Installations/connections, Installation of the camera – Panasonic WV-NF284 User Manual
Page 16
16
Installations/Connections
Cautions:
ONLY CONNECT THIS TO 12 V DC or 24 V AC CLASS 2 POWER SUPPLY.
Be sure to connect the grounding lead to the GND terminal.
Installation of the camera
Before starting the installation/connection, prepare the required devices and cables. Refer to
the corresponding pages for further information.
z Make a hole in the ceiling and fix the camera mount bracket over it. (☞ page 17)
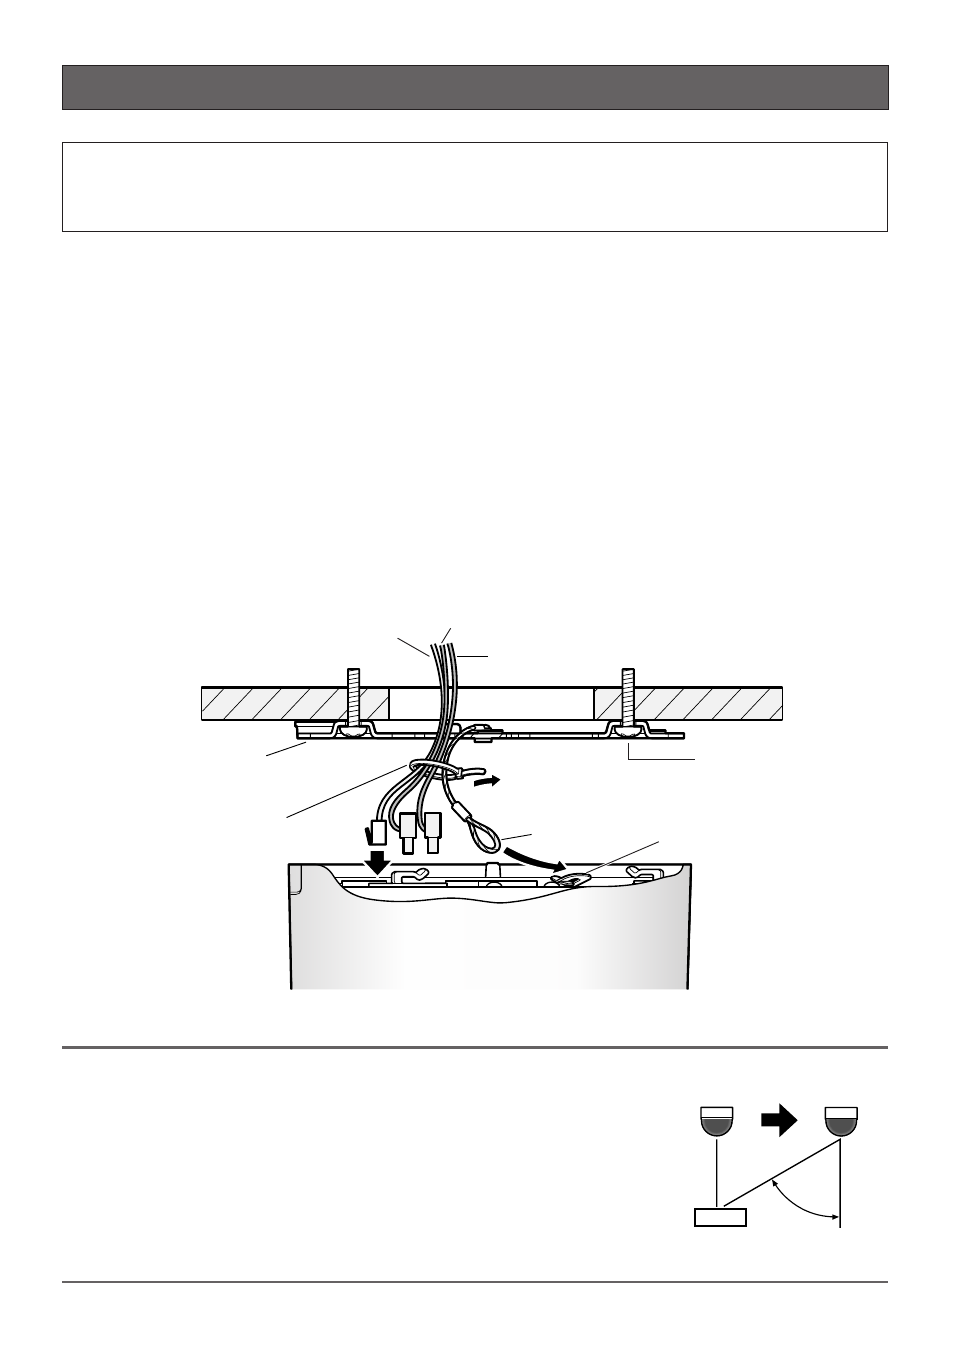
x Line up the ends of the cables (power cord, LAN cable and cable from an external device)
and the safety wire, and then bundle them using the provided cable tie. (
☞ page 18)
c Attach the safety wire to the safety wire holder of the camera. (☞ page 18)
v Connect the power cord (from a DC 12 V or an AC 24 V power supply), a LAN cable (cate-
gory 5 or better) and an external device. (
☞ pages 21 - 23)
b Mount the camera onto the camera mount bracket. (☞ page 18)
n Adjust angle of the camera, angular field of view and focus. (☞ pages 26 and 27)
Note:
When the camera is installed just above the photogenic subject
as q in the illustration, it may be difficult to adjust angular field
of view focusing around the subject.
To easily adjust angular field of view focusing around the sub-
ject, increase an angle (A) as w.
(A)
q
w
Subject
Safety wire
Ceiling
Safety wire holder
LAN cable
Power cord
Camera mount bracket
(provided as a standard
accessory)
Cable tie (provided as a
standard accessory)
Anchor bolt x4
(not provided)
Cable from an
external device
Bundle the cables and
the safety wire together