Uncle Milton Solar System In My Room User Manual
Page 2
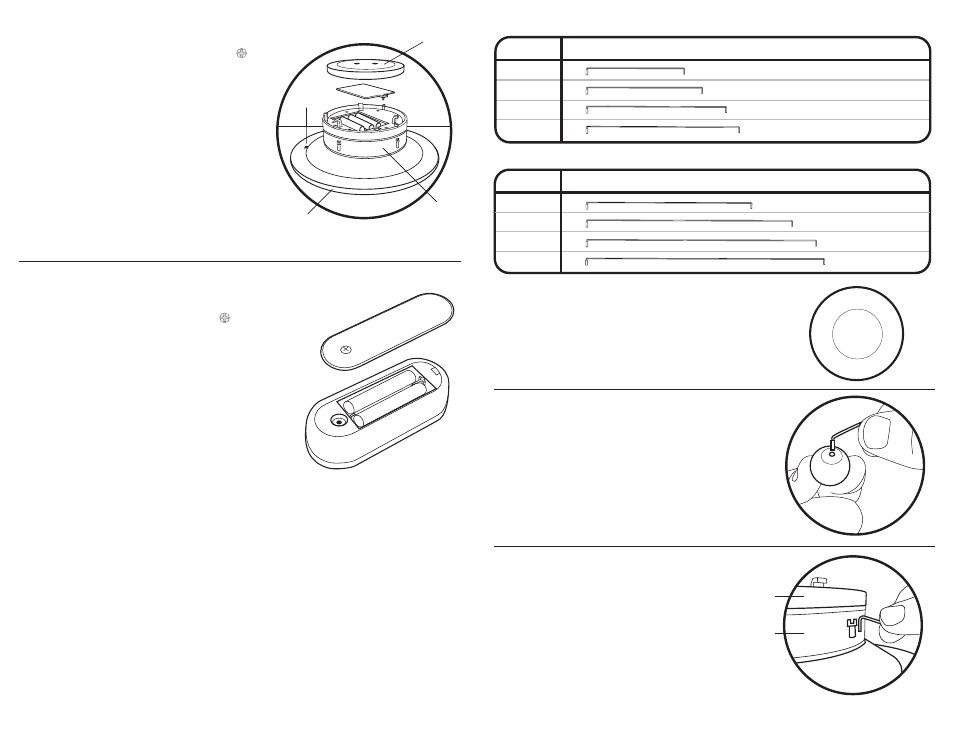
Assembling Solar System In My Room
NOTE: FOR EASE OF ASSEMBLY, PLANET NAMES ARE SHOWN
ON THE BOTTOM OF EACH PLANET.
1. Starting with the shortest wire, attach the planet
Mercury by inserting the wire into the insertion hole.
NOTE: THERE ARE TWO ROTATION RINGS ON THE
HUB. THE LOWER RING HAS SLOTS FOR
CONNECTING THE FOUR INNER PLANETS.
THE UPPER RING HAS SLOTS FOR CONNECTING
THE FOUR OUTER PLANETS.
I
nstalling Batteries
Tool required - Small Phillips-head screwdriver
1. Use a Phillips-head screwdriver to remove the
battery door.
2. Insert 3 “AA” batteries. Make sure the “+” and “-”
ends are inserted correctly, as indicated in the
battery compartment.
3. Replace cover.
4. IMPORTANT! Switch the Solar System In My Room
hub “ON.” PLEASE NOTE: The unit will not activate
at this point. Your Solar System In My Room is only
activated by using the Remote Control.
On/Off
Ceiling
Mounting Plate
Sun
Hub
Mercury
Upper
Rotation
Ring
Lower
Rotation
Ring
Mercury
Venus
Earth
Mars
Jupiter
PLANET
WIRE LENGTH
LOWER ROTATION RING
MOBILE ASSEMBLY
UPPER ROTATION RING
MOBILE ASSEMBLY
Saturn
Uranus
Neptune
PLANET
WIRE LENGTH
Installing batteries into the remote control
Tool required - Small Phillips head screwdriver
1. Use a Phillips head screwdriver to remove the battery door.
2. Insert 2 “AAA“ batteries. Make sure the “+” and “-” ends are
inserted correctly, as indicated in the battery compartment.
3. Replace cover.
MER
CUR
Y