Run the edu10 startup demo, Running other demos – Velleman projects EDU10 Assembly instructions User Manual
Page 6
- UK -
p. 6
USB PIC PROGRAMMER AND TUTOR BOARD
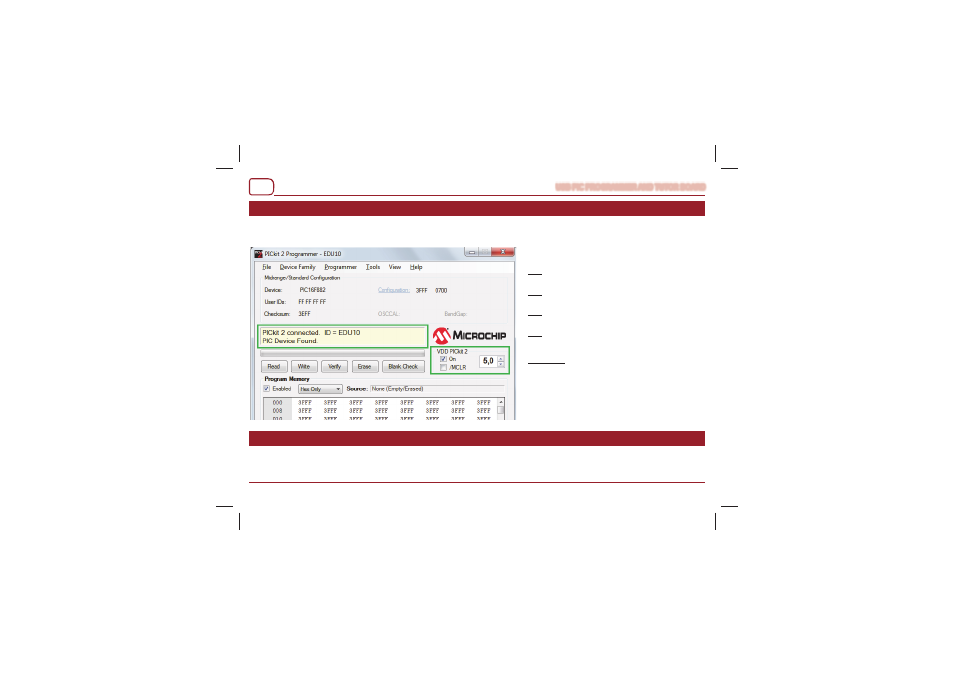
Run the EDU10 Startup Demo
Run the EDU10 Startup Demo
• Click on “On” check box in the panel “VDD PICkit 2” to turn the EDU10 power on.
• Use the “Up” arrow to adjust the voltage to 5V.
• Now the PIC16F882 on EDU10 should be running its default “Startup” program.
You can test the board by pressing buttons SW1..SW4
and RESET (SW5). There should be following response:
SW1:
- Turn on LD7
- Show ‘7’ on the 7-segment display.
SW2:
- Turn on LD6
- Show ‘6’ on the 7-segment display.
SW3:
- Turn on LD5
- Show ‘5’ on the 7-segment display.
SW4:
- Turn on LD4
- Sound is generated.
- Display all segments+dot on the 7-segment display.
RESET mode:
- LDR is programmed as light detector.
- LDR turns LED LD8 on/off depending on light.
- Potentiometer RV1 changes the display brightness.
- If NTC voltage <1V or >4V then “E” (Error) is displayed on the
7-segment display.
Running other demos
Running other demos
In the software package for the EDU10 there are several demos written in assembly and C.
You can use the PICkit 2 Programmer software to reprogram the PIC16F882 on the EDU10 board with the downloaded demo code.