Inicie edu10 startup demo, Ejecutar otras demostraciones – Velleman projects EDU10 Assembly instructions User Manual
Page 22
- ES -
p. 22
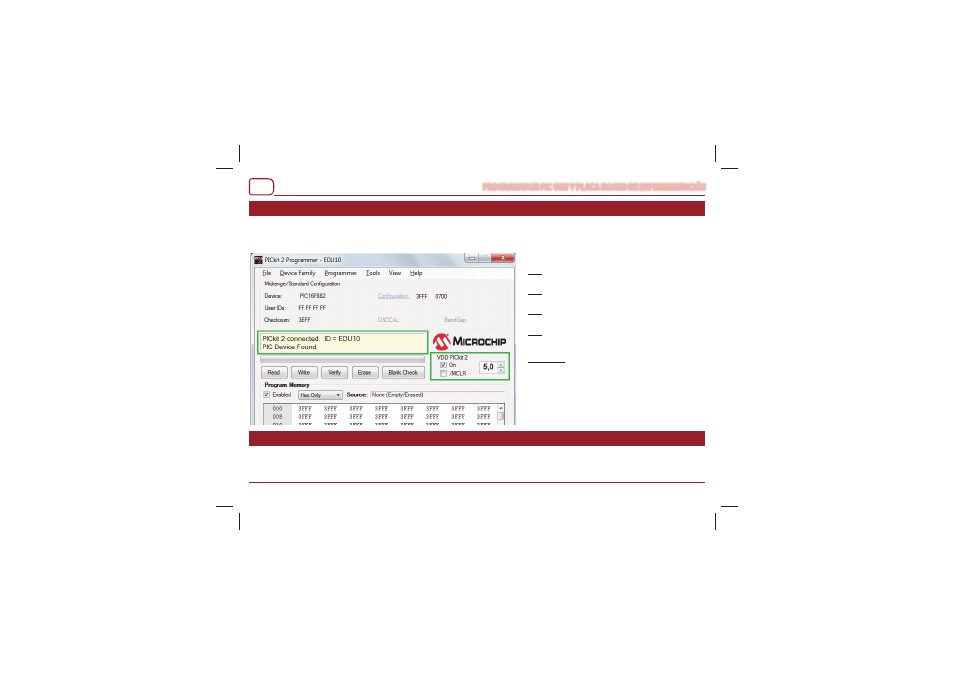
PROGRAMADOR PIC USB Y PLACA BOARD DE EXPERIMENTACIÓN
Inicie EDU10 Startup demo
Inicie EDU10 Startup demo
• Haga clic en “On” del panel “VDD PICkit 2” para activar el EDU10.
• Utilice la fl echa hacia arriba para ajustar la tensión en 5V.
• Ahora PIC16F882 en EDU10 inicia el programa “Startup” estándar.
Someta la placa a pruebas al pulsar los botones SW1..
SW4 y RESET (SW5). Aparece lo siguiente:
SW1:
- Turn on LD7
- Show ‘7’ on the 7-segment display.
SW2:
- Turn on LD6
- Show ‘6’ on the 7-segment display.
SW3:
- Turn on LD5
- Show ‘5’ on the 7-segment display.
SW4:
- Turn on LD4
- Sound is generated.
- Display all segments+dot on the 7-segment display.
RESET mode:
- LDR is programmed as light detector.
- LDR turns LED LD8 on/off depending on light.
- Potentiometer RV1 changes the display brightness.
- If NTC voltage <1V or >4V then “E” (Error) is displayed on the
7-segment display.
Ejecutar otras demostraciones
Ejecutar otras demostraciones
El paquete de software del EDU10 incluye varias demostraciones escritas en assembly y C.
Utilice el software de programación PICkit 2 para reprogramar el PIC16F882 en la placa EDU10 utilizando el código de demostración descargado.