Spicer Wheel Ends Service Manual, Steer & Drive Wheel Ends User Manual
Page 43
41
Standa
rd
S
tee
r A
ssemb
ly
Standard Steer Assembly
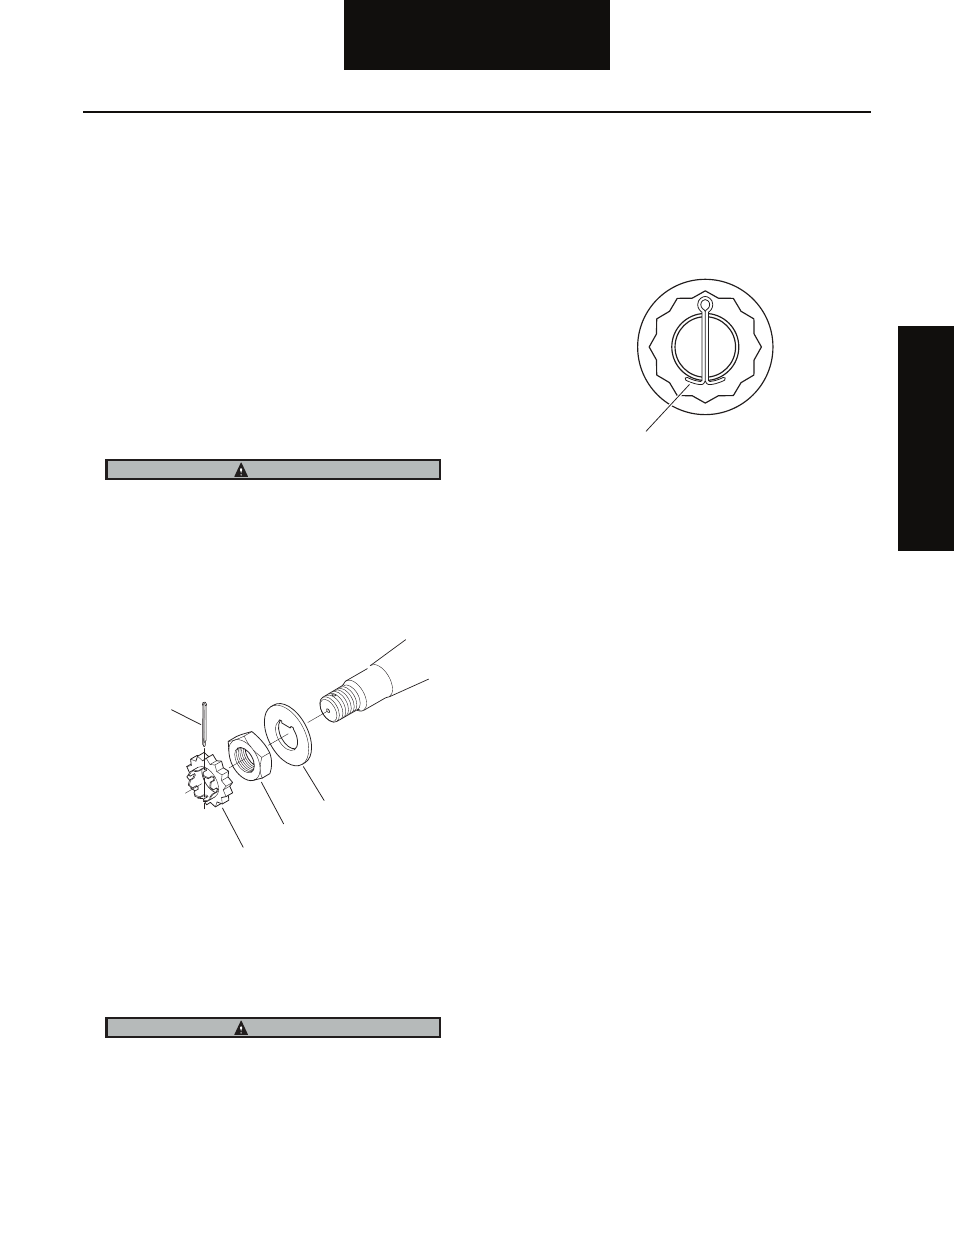
Stamped Locking Nut System
Proper wheel bearing adjustment maximizes wheel bearing
and seal life. Proper adjustement can also extend brake lining
life by preventing lining contamination caused by seal leaks.
1. Inspect the spindle threads and spindle nut for cor-
rosion and clean thoroughly or replace as required.
2. Pre-lubricate all bearings.
3. Install the inner bearing into the hub and install the
wheel seal.
4. If grease lubricant is used, fill the hub cavity with the
appropriate lubricant.
5. Install the hub on the spindle with care, to prevent
damage or distortion to the wheel seal.
Never mix grease and oil lubricants.
6. Install the outer bearing on the spindle.
7. Install the retaining washer and adjusting nut.
8. Seat the bearing by tightening the adjusting nut to
200 lbs. ft (271 N•m) while rotating the hub.
9. Loosen the adjusting nut one full turn.
10. Re-tighten the adjusting nut to 50 lbs. ft (68 N•m)
while rotating the hub.
11. Back off the adjusting nut 1/8 turn.
12. Install the stamped locking nut and cotter pin.
Never tighten the adjusting nut to align the cotter pin slot.
This can pre-load the bearings and cause a premature bear -
ing failure.
13. Verify that the wheel endplay is between 0.001" and
0.005" (0.025 and 0.127 mm) using a dial indicator.
If reading does not fall within the range, repeat this
procedure. See “Verify Wheel End-play” section.
14. Bend cotter pin legs around the stamped locking nut.
15. Attach the hub cap.
16. If oil lubricant is used, fill the hub cap cavity with the
appropriate lube. Install oil fill plus and tighten to
specified torque.
CAUTION
D-flat retaining washer
Jam nut or Adjusting nut
Stamped locking nut
Cotter pin
CAUTION
Bend cotter pin legs