Installation, Wireless remote indicator, Description of your product – Blue Ox BX88193 User Manual
Page 18
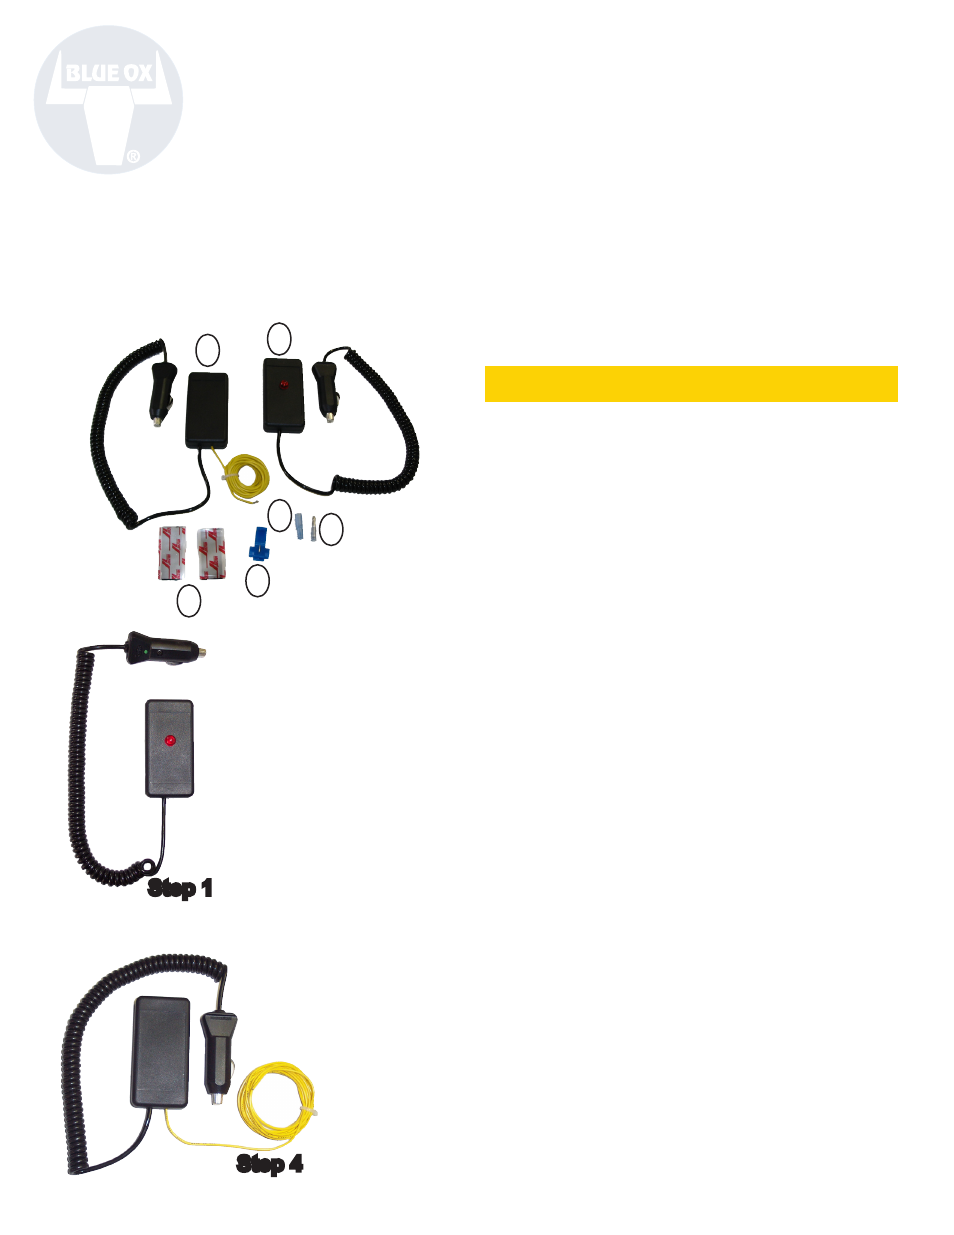
1. Remove the receiver from the package
(step 1).
2. Plug the receiver’s power cord into
the towing vehicle’s 12-volt accessory
receptacle.
3. Mount the receiver so that its LED faces the
towed vehicle and is also visible from the
RVs driver’s seat.
4. Remove the transmitter from the package
and ensure its serial number matches the
receiver’s serial number (step 4).
5. Use an electrical tester to determine the
cold side of the brake light wire. Attach the
transmitter wire to the cold brake light wire
in the towed vehicle using the ScotchLock
connector included.
Step 1
Step 4
Ref Qty.
Part#
Description
No.
Wireless Remote Indicator (included with Luxor)
1
1
62-3503
Transmitter
2
1
62-3504
Receiver
3
2
192-0028
3/4” Velcro Strips
4
1
293-1419
ScotchLock Connector
5
1
294-0854
Terminal Bullet (Male)
6
1
294-0853
Terminal Bullet (Female)
Installation
This section explains how to install the Wireless Remote Indicator (included with the Luxor™).
Wireless Remote Indicator
Description of your product.
With wireless technology, dangling and loose wires are a thing of the past. The wireless remote indicator transmits a
digital signal back to the towing vehicle and illuminates the receiver’s LED as soon as the towed vehicle’s brakes are
engaged - alerting you that the Apollo® braking system is activated.
15 of 18
292-2658
Date 09/06
2
3
4
5
6
1