The apollo® illustrated – Blue Ox BX88193 User Manual
Page 15
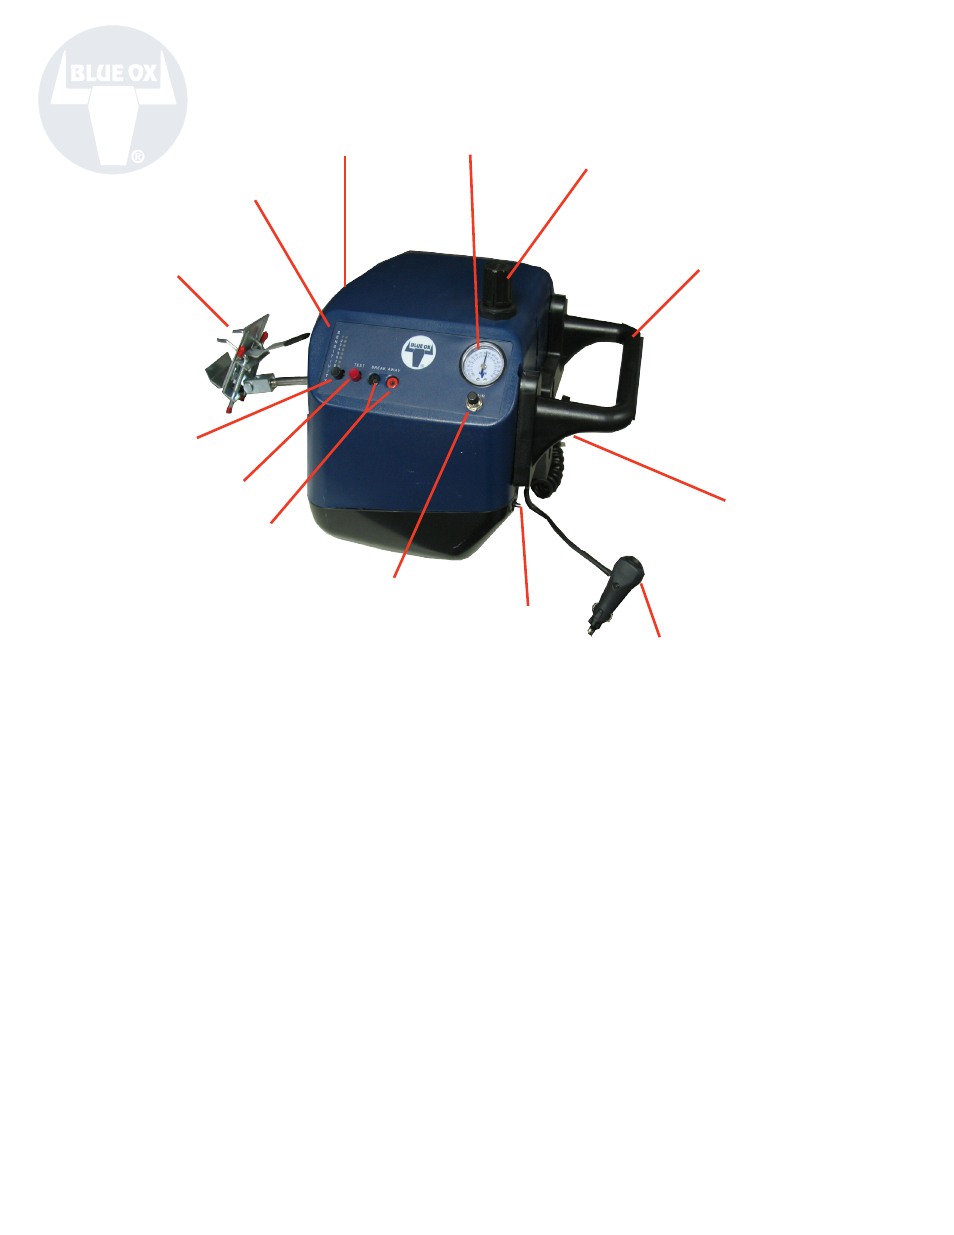
Drain Button
Pressing the DRAIN button releases air pressure
from the Apollo when not in use.
Breakaway Receptacles
The clips of the Breakaway system connect to these
receptacles.
Test Button
The TEST button activates the Apollo manually
to ensure it is working properly. Can also assist in
determining the appropriate Sensitivity setting.
Sensitivity Button
Adjusts the sensitivity. The higher the setting, the
less braking force required to activate the Apollo.
Sensitivity Setting LEDs
Displays the Sensitivity setting.
Brake Bracket
The brake bracket attaches to the towed vehicle’s
brake pedal.
Actuator Arm
When activated, extends to press the brake bracket
against the towed vehicle’s brake pedal.
Clockwise from Air Pressure Gauge:
Air Pressure Gauge
Displays the amount of air pressure in the system.
Air Pressure Regulator
Increases or decreases the amount of air pressure
in the cylinder. The amount of pressure (PSI) is
displayed on the air pressure gauge.
Back Support Brace
Enables you to carry your Apollo® unit. It also rests
against the bottom of the driver’s seat when the
Apollo® is installed.
12-Volt Power Cord
Plugs into the vehicle’s 12-volt power receptacle.
Provides power to the Apollo® from the towed
vehicle’s battery.
Adjustment Knob
Allows you to adjust the height of the back support
brace so that it sits correctly against the bottom of
the seat.
Drain Exhaust
Air exits the Apollo from this location when the
DRAIN button is used to release air pressure.
Brake Bracket
Actuator Arm
Drain Exhaust
Sensitivity
Setting LEDs
Air Pressure
Regulator
Air Pressure Gauge
Drain Button
Test
Button
Sensitivity
Button
Back Support Brace
12-Volt
Power Cord
Adjustment
Knob
Breakaway
Receptacles
The Apollo® Illustrated
Date 09/06
292-2658