Installation (con’t.) – Blue Ox BX88193 User Manual
Page 11
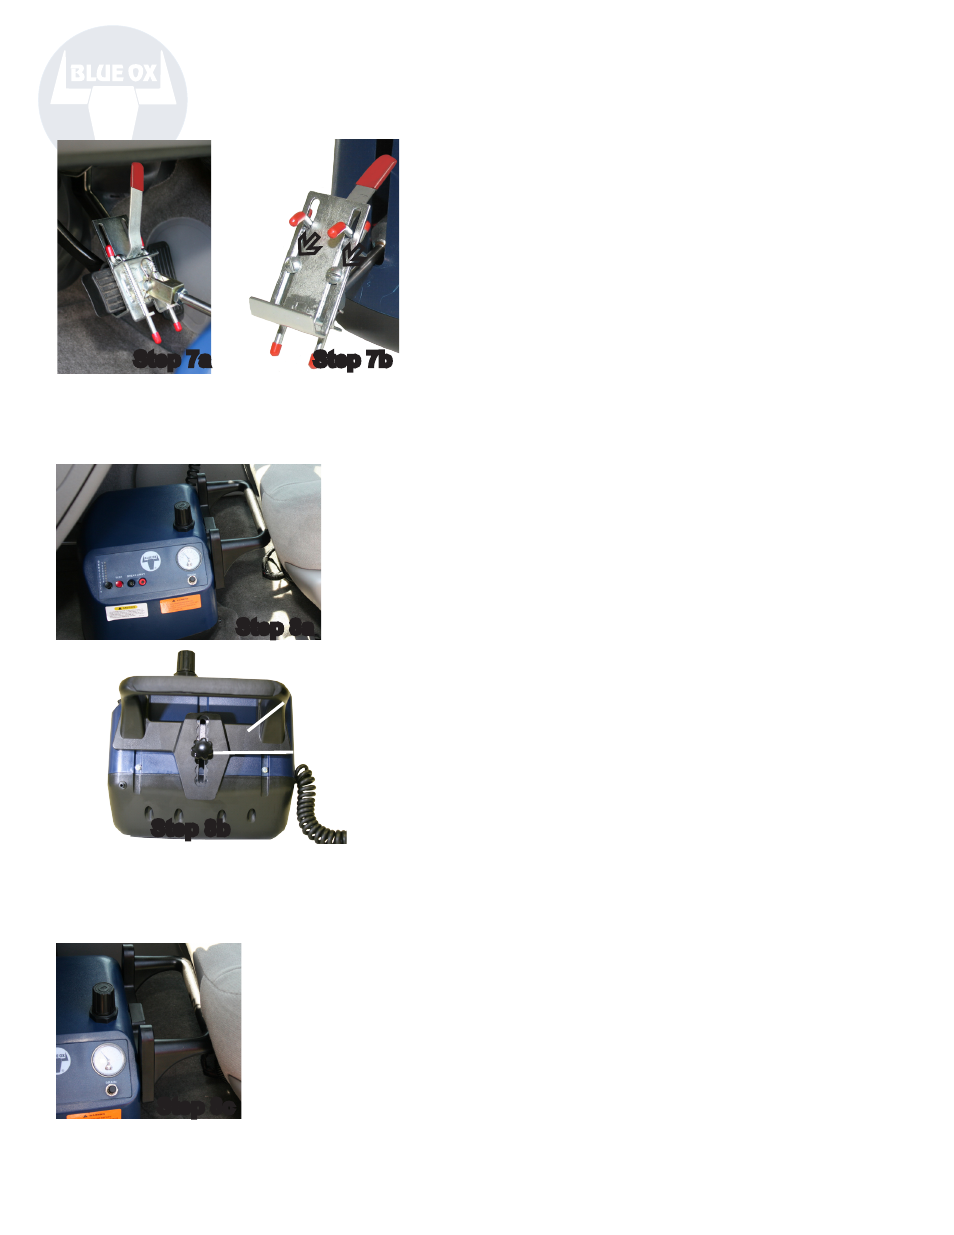
7. Attach the brake bracket to the towed
vehicle’s brake pedal with the release handle
facing up. Position the brake bracket so that
its “feet” grab the top of the towed vehicle’s
brake pedal (step 7a). Note: You may need
to loosen the Phillips screws to adjust the
brake bracket to fit the brake pedal (step 7b).
8. Move the Apollo forward until the
actuator arm is fully retracted. Move the
seat forward until it contacts the Apollo.
Ensure the brake pedal is NOT depressed.
Note: If the seat does not reach the Apollo,
an extender may be needed. These may be
obtained by contacting Blue Ox. The back
support brace should be 1/4 of the distance
up from the bottom of the seat (step 8a). If
it is not, slide the seat back so that you are
able to loosen the adjustment knob (step
8b). Adjust the back support brace up or
down accordingly (NOTE: The brace may
be flipped vertically if needed). The brace
should not slide under the seat or hit the
seat adjustor. If the vehicle is equipped with
an electric seat adjustor, use it to move the
seat height to the lowest position. When
the necessary adjustments have been made,
tighten the adjustment knob to secure the
back support brace. Slide the seat forward
until it contacts the Apollo (step 8c).
9. If the vehicle has a drive-line disconnect,
be certain it is out of the way to ensure the
Apollo does NOT engage it while towing.
10. Plug the Apollo into a 12-volt accessory
outlet and turn the power cord on. The
compressor fills the air tank. The power
light on the power cord should remain
illuminated with a solid green light.
Adjustment
Knob
Step 7b
Step 7a
Step 8c
Step 8b
Step 8a
Installation (con’t.)
Back Support
Brace
Date 09/06
292-2658
8 of 18