Acroprint timeQplus Biometric (V2) Installation User Manual
Page 9
timeQplus BIOMETRIC™ Installation Guide
8
15
timeQplus BIOMETRIC™ Installation Guide
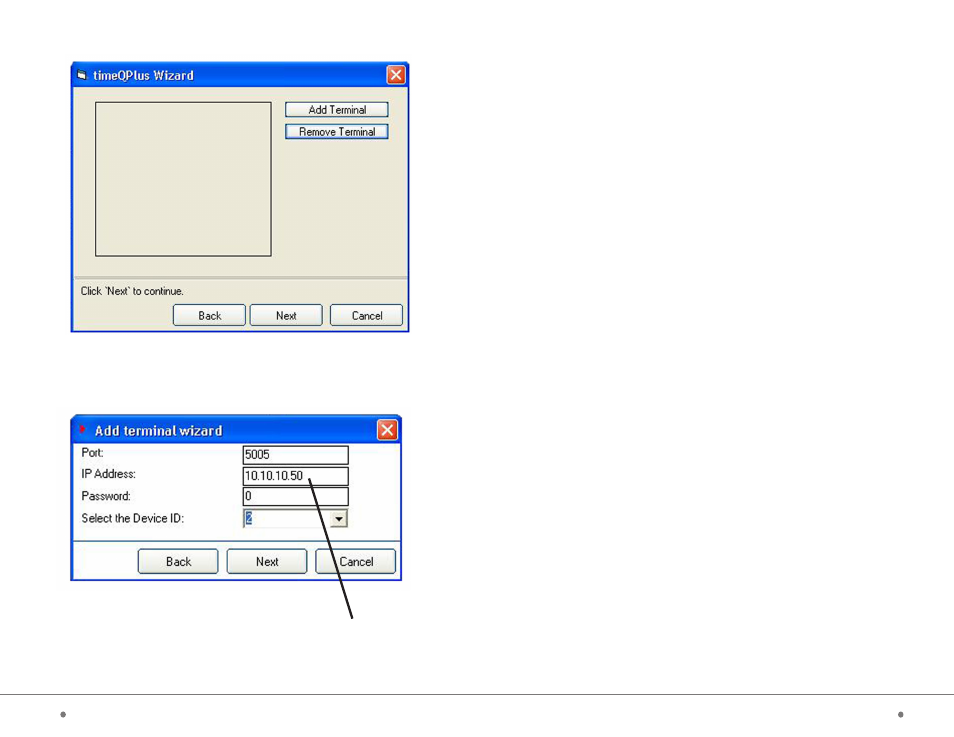
When you are done click “Next” and select the option to “Add terminal”.
See picture below:
Enter the appropriate data to match the settings entered into the TQ100 terminal
during step 1 above.
Installation Overview
Step One:
TQ100 Terminal Installation
Installing the TQ100 Biometric terminal(s) includes: configuring the terminal
through its built in keypad, mounting the terminal securely, connecting the
terminal to the computer system.
Step Two:
Software Installation and Terminal Connection
Installing the software is as simple as inserting the timeQplus Biometric CD in
your computer and answering some questions. The same timeQplus Biometric
CD will be used to install either the Server or Client configuration. The Server
computer will host the database and the Clients will access the Server data
over your Ethernet network. If you plan to install the software on multiple
computers you must install the timeQplus Biometric server first, after
which the client software can be installed on any number of client computers
on the network. After the install is complete you will be prompted to restart
the computer. Then the Setup Wizard will prompt you to enter the rules your
Time and Attendance system will use to accurately track your employees’
time. The Setup Wizard will also assist connecting the terminal(s) to the
software application.
Step Three: Employee Enrollment
Enrolling the employees is a flexible process and can be adapted to your
environment and your setup preferences. Each employee will be entered
into the Attendance Rx application and assigned a Personal Identification
Number (PIN). The PIN is used for enrolling that employee on a TQ100
terminal. When you add additional terminals the Administrator can simply
add enrolled employees to the new terminal.
NOTE: The leading zeroes
can be left off.