Connecting the xadc and panel together – Xantrex Technology Xantrex AC to DC Converter XADC User Manual
Page 17
Installation Instructions
975-0301-01-01
17
4. Take one of the side mounting flanges that you removed in step 2 above, and
screw it to the bottom of the XADC.
The mounting flange screw holes will align with the two pilot holes in the
XADC.
5. Take the two small mounting tabs (with pilot pin attached) from the mounting
hardware bag in the panel shipping box and screw them to the top of the
XADC, behind the AC and DC wiring compartment holes, see Figure 11.
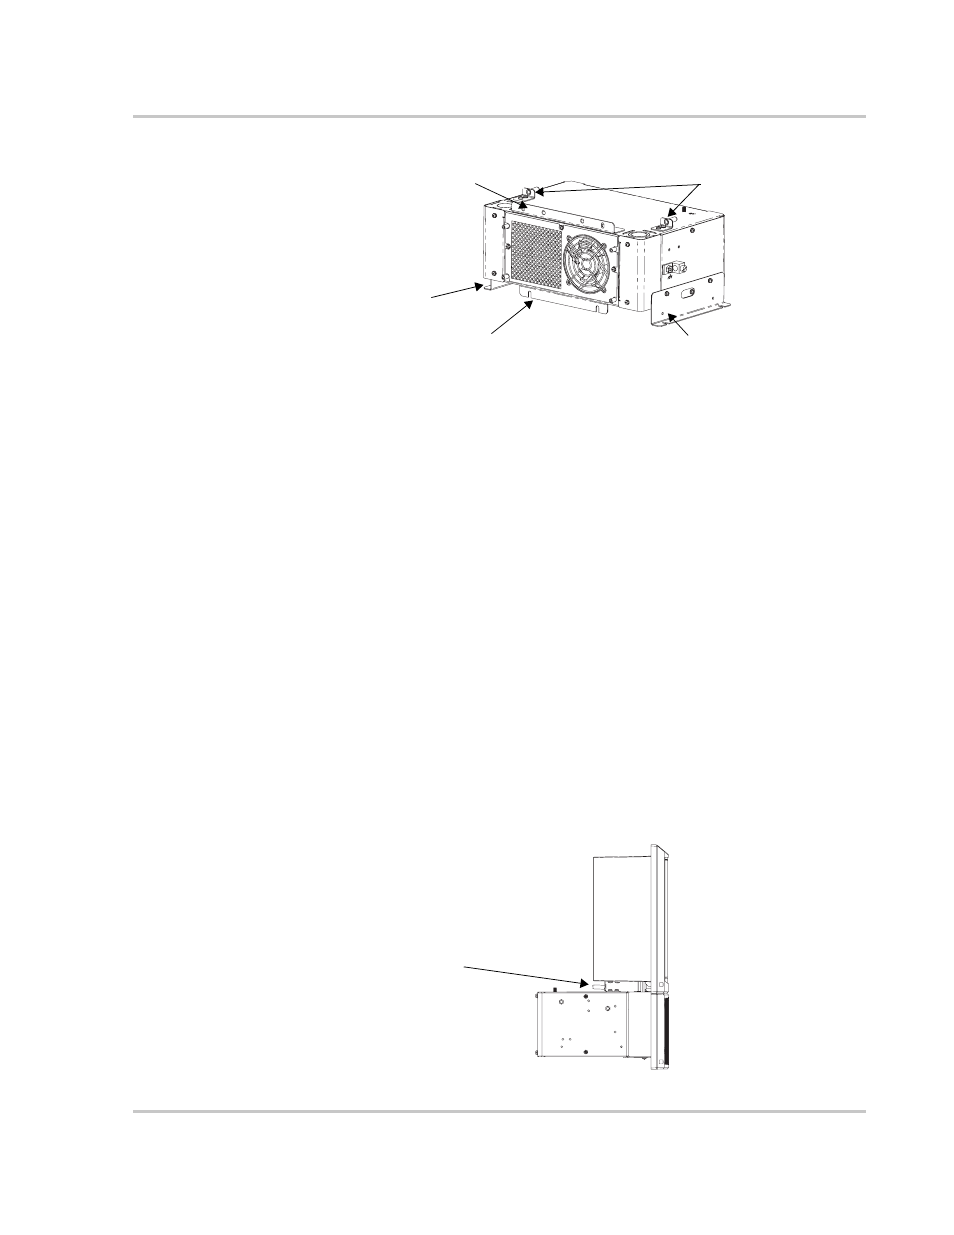
Connecting the XADC and Panel Together
To connect the XADC and panel together:
1. Slide the XADC under the panel until the pilot pins on the mounting tabs on
the top of the XADC slide in to the corresponding holes on the mounting clips
on the bottom of the panel, see Figure 12.
2. Using the hardware provided in the panel hardware bag, screw the panel to the
XADC using the holes on the panel that have lined up with the holes on the
top of the XADC mounting flange.
Figure 11 Mounting Flanges for Installation
Remove this side
mounting flange (keep the
left or right flange and
mounting hardware for
the bottom flange)
Remove this side
mounting flange
Add this mounting flange
(using one of the removed
side mounting flanges and
the associated hardware)
Add this mounting flange
(from the panel hardware
bag)
Add these two mounting tabs
(from the panel hardware bag)
Figure 12 Connecting the XADC and Panel
XADC mounting tabs
with pilot pins and panel
mounting clips