Vivotek IP7133 (WIRED) User Manual
Page 21
VIVOTEK - A Leading Provider of Multimedia Communication Solutions
User's Manual - 21
Time zone: According to your local time zone, select one from the drop-down list�
Keep current date and time: Select this option to reserve the current date and time of the Network
Camera� The Network Camera’s internal real-time clock maintains the date and time even when the
power of the system is turned off�
Sync with computer time: Select this option to synchronize the date and time of the Network Camera with
the local computer� The read-only date and time of the PC is displayed as updated�
Manual: The administrator can enter the date and time manually� Note that the date and time format are
[yyyy/mm/dd] and [hh:mm:ss]�
Automatic: The Network Time Protocol is a protocol serves synchronize computer clocks by periodically
querying an NTP Server�
NTP server: Assign the IP address or domain name of the time-server� Leaving the text box blank
connects the Network Camera to the default time-servers�
Update interval: Select to update the time with the NTP server on hourly, daily, weekly, or monthly basis�
Enable Daylight Saving Time: Select this option to enable daylight saving time (DST)� During DST, the
system clock moves one hour ahead�
Please follow the steps below to enable daylight saving time:
1. Select the time zone for your Network Camera first.
2� Select Enable Daylight Saving Time�
3� The starting time and ending time of the DST will be displayed in this option�
4. To manually configure the daylight saving time rules, please refer to Upload / Export Daylight Saving
Time Configuration File on page 53 for details�
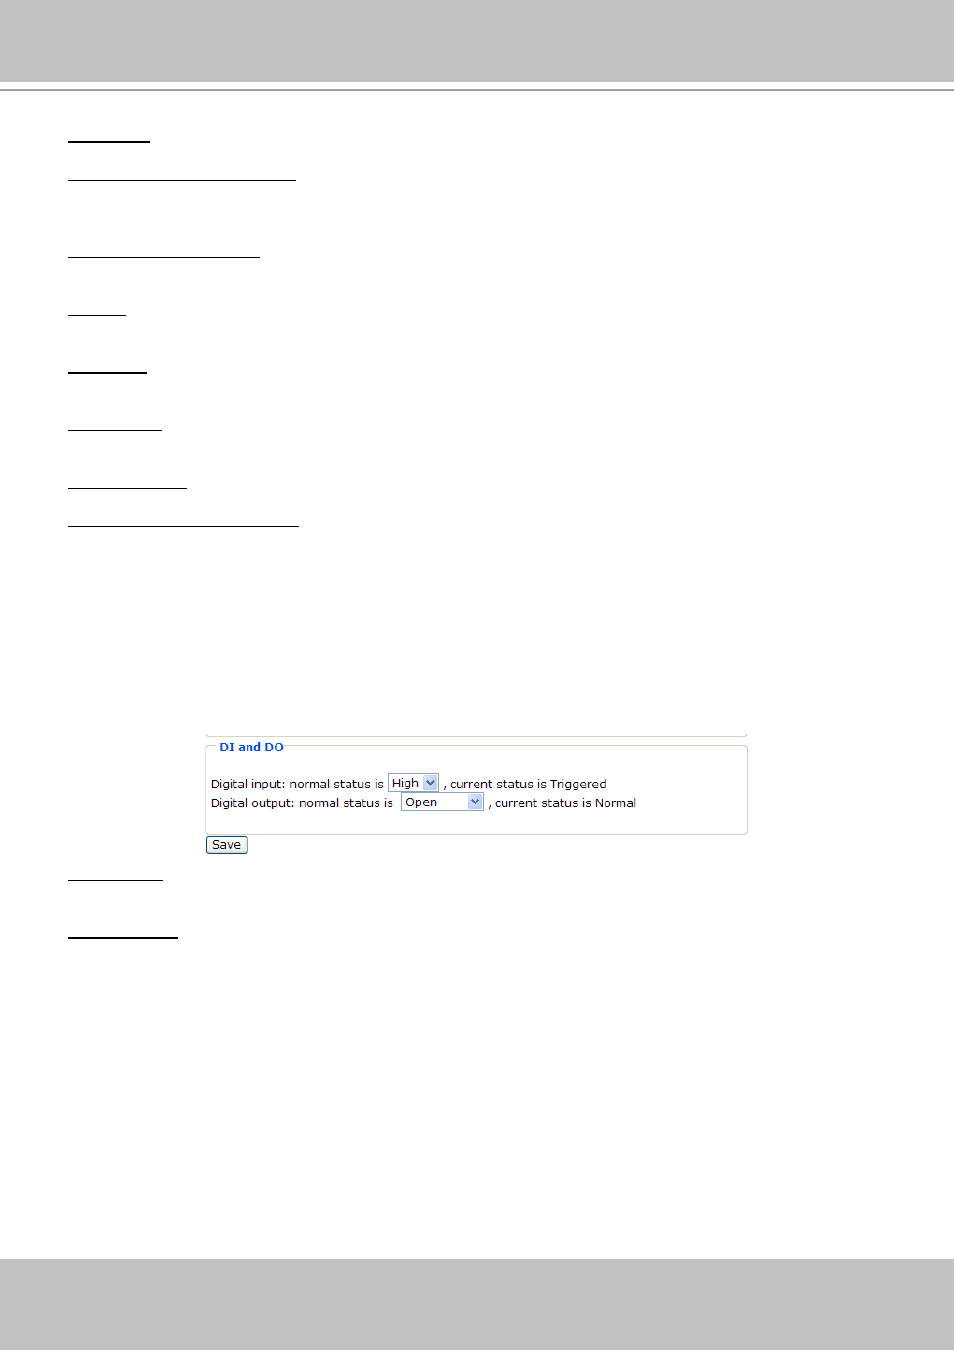
DI and DO
Digital input: Select High or Low to define normal status of the digital input. The Network Camera will
report the current status�
Digital output: Select Grounded or Open to define normal status of the digital output� The Network
Camera will show whether the trigger is activated or not�