Switching camera angles, Switching virtual surround system, During playback, press [av select – Toshiba RD-XV47KE User Manual
Page 76: Select “angle” using [cursor, Then press [enter, Press [av select, Select “virtual surround” using [cursor, Select “off”, “type 1” or “type 2” using [cursor
76
EN
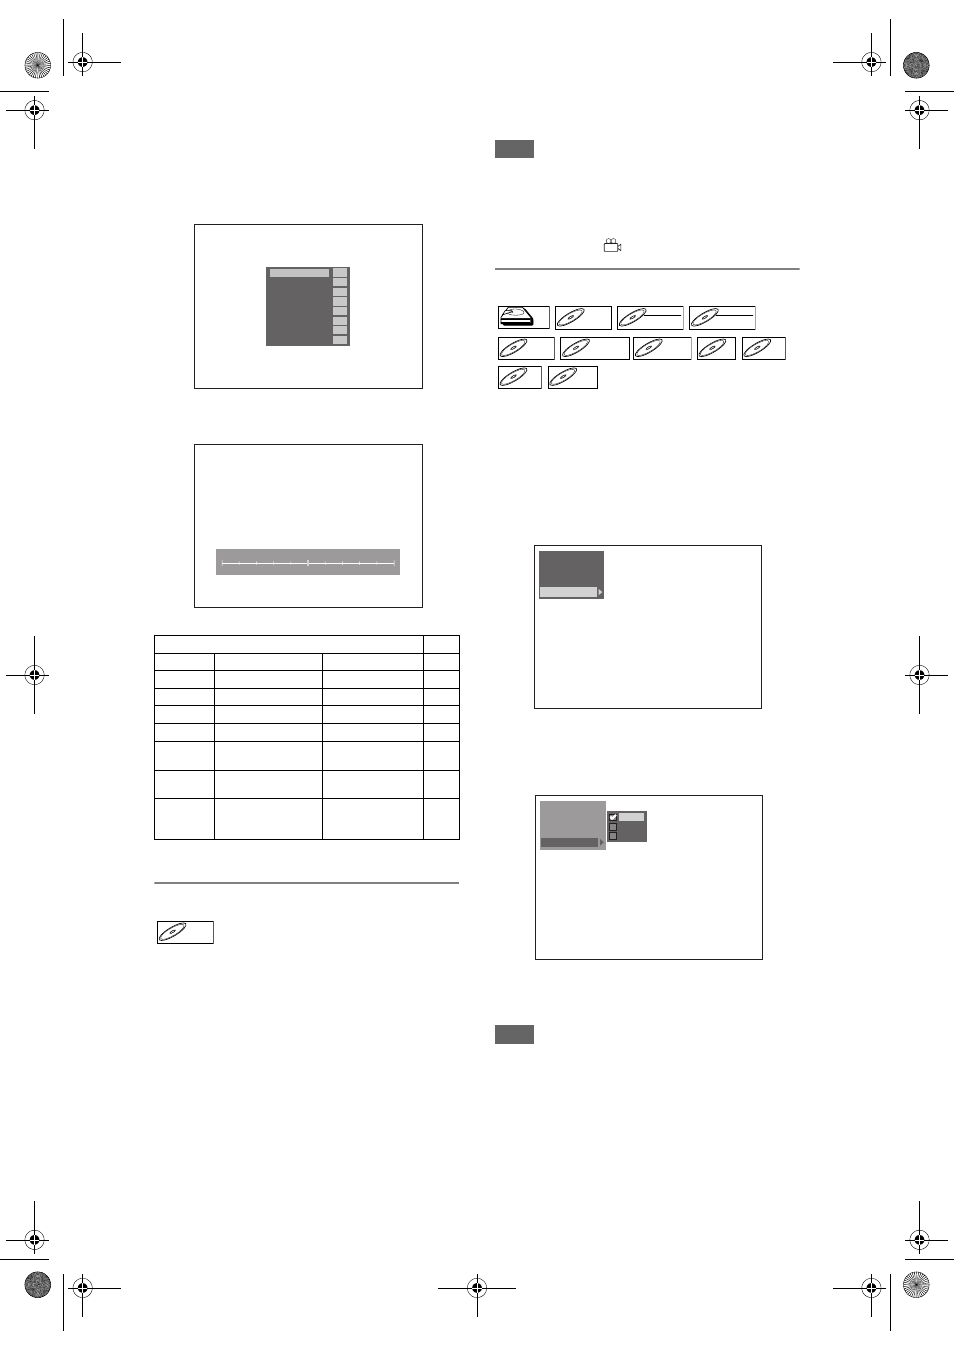
For manual picture settings:
1 Select “User 1”, “User 2” or “User 3” using
[Cursor
U
/
D
], then press [MODE].
2 Select setup option you want to adjust using
[Cursor
U
/
D
], then press [ENTER].
3 Make an adjustment using [Cursor
L
/
P
], then
press [ENTER].
4 Press [AV SELECT] to exit.
Switching Camera Angles
Some DVD-Videos feature scenes shot from two or
more angles. The disc case is usually marked with an
angle icon if the disc has multi-angle scenes.
Press [DVD] first.
1
During playback, press
[AV SELECT].
AV Select menu will appear.
2
Select “Angle” using
[Cursor
U
/
D
], then press [ENTER].
The angle will switch each time you press
[Cursor
D
].
Note
• If the “Angle” is not selectable, that means the scene
does not contain the sequences shot from the
multiple angles.
• When “Angle Icon” is set to “On” (see page 97), and
the scene contains the sequences shot from the
multiple angles, “
” will appear on the TV screen.
Switching Virtual Surround System
You can enjoy stereophonic virtual space through
your existing 2 channel stereo system.
1
Press [AV SELECT].
AV Select Menu will appear.
2
Select “Virtual Surround” using
[Cursor
U
/
D
], then press [ENTER].
3
Select “Off”, “Type 1” or “Type 2”
using [Cursor
U
/
D
], then press
[ENTER].
• Off
: no effect
• Type 1 : Natural effect
• Type 2 : Emphasised effect
Note
• Select “Virtual Surround” to “Off” if the sound is
distorted.
• The setting will be kept even when the unit is turned
off.
User Setup options
default
Brightness
to adjust brightness
0(dark) - 10(bright)
0
Contrast
to adjust contrast
-5(weak) - +5(strong)
0
Colour
to adjust colour
-5(pale) - +5(brilliant)
0
Sharpness
to adjust sharpness
-5(soft) - +5(clear)
0
Gamma
to adjust darkness
-1(weak) - +1(strong)
0
3D NR
to reduce noise in the
playback picture
Off, Weak, Middle,
Strong
Off
MPEG NR
to reduce noise
in the MPEG picture
Off, On
Off
Progressive
Mode*
to select suitable signal
conversion for
progressive output
Auto, Film
(for live-action picture),
Video(for an animation)
Auto
*Available only when “Video Out” is set to “Component (Progressive)” in
the “Initial Setting”. (See page 92.)
Contrast
Colour
Sharpness
Gamma
3D NR
MPEG NR
Progressive Mode
Brightness
0
0
0
0
0
Off
On
Auto
Brightness
0
10
DVD-V
DVD-V
HDD
HDD
DVD-V
DVD-V
DVD-RW
DVD-RW
VR
DVD-RW
DVD-RW
Video
DVD-R
DVD-R
D
DVD+R
VD+RW
W
DVD+RW
D
DVD+R
VD+R
DVD+R
CD
CD
CD
VCD
VCD
VCD
MP3
MP3
MP3
DivX
DivX
®
DivX
®
Subtitle
Angle
Zoom
Virtual Surround
Picture Quality
Setup
Picture Quality
Subtitle
Angle
Zoom
Virtual Surround
OFF
Type 1
Type 2
Off
E3B90ED_EN.book Page 76 Friday, February 23, 2007 12:38 PM